
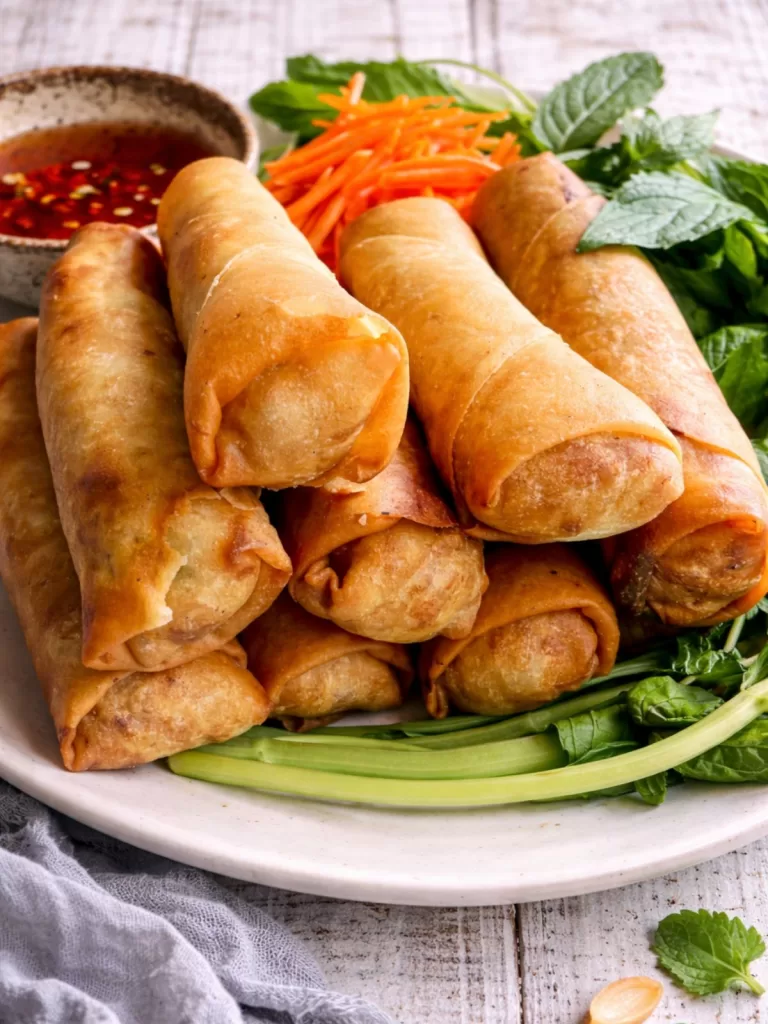
Vietnamese Fried Spring Rolls, also known as Cha Gio, are crispy golden rolls filled with juicy pork, glass noodles and vegetables. Wrapped in thin pastry and fried until perfectly crunchy, they deliver rich savoury flavour in every bite. Serve them with fresh herbs, crisp lettuce and a punchy nuoc cham dipping sauce for a classic Vietnamese appetiser or light meal.

I’ve made plenty of spring rolls over the years, but these ones always hit the spot. They’re crisp, flavour-packed and surprisingly easy once you get into the rolling rhythm. Whenever I make a batch, they disappear faster than I can fry them, there’s just something about a hot, crunchy Cha Gio dunked in dipping sauce that no one can resist.
Why You’ll Love these Spring Rolls
- Classic Vietnamese flavour with simple, supermarket-friendly ingredients
- Wheat wrappers fry up beautifully crisp and golden
- Juicy pork filling with noodles for authentic texture
- Step-by-step method for easy rolling and frying
- Make-ahead and freezer-friendly
- Perfect for entertaining — everyone LOVES these
Wheat Wrappers vs Rice Paper
Traditional Cha Gio can be made with rice paper, but for fried spring rolls, wheat wrappers are far more reliable.
Why wheat wrappers work better:
- Fry evenly and turn beautifully golden
- Stay crisp longer after frying
- Easier to roll and seal
- Less oil absorption
If you do want to use rice paper, let the rolled spring rolls dry uncovered in the fridge for 30–60 minutes before frying and cook in smaller batches.
Optional Add-In
Some traditional recipes include wood ear mushrooms for texture. If you like them, soak ¼ cup dried wood ear mushrooms (or shiitake if you cannot find wood ears) in boiling water for 15 minutes, squeeze dry, finely chop and mix through the filling.
Not a fan? Leave them out like I have – these spring rolls are still outstanding.
Spring Roll Wrapper Tips
For the best results, choose frozen wheat spring roll wrappers. The brand from Coles separates easily and fries beautifully. Woolworths wrappers work, but they tend to tear and stick together more. Asian supermarkets also stock excellent wrappers.
Thawing tip: Place the frozen packet in the fridge for about an hour before rolling. Slow thawing reduces condensation, which helps prevent tearing.
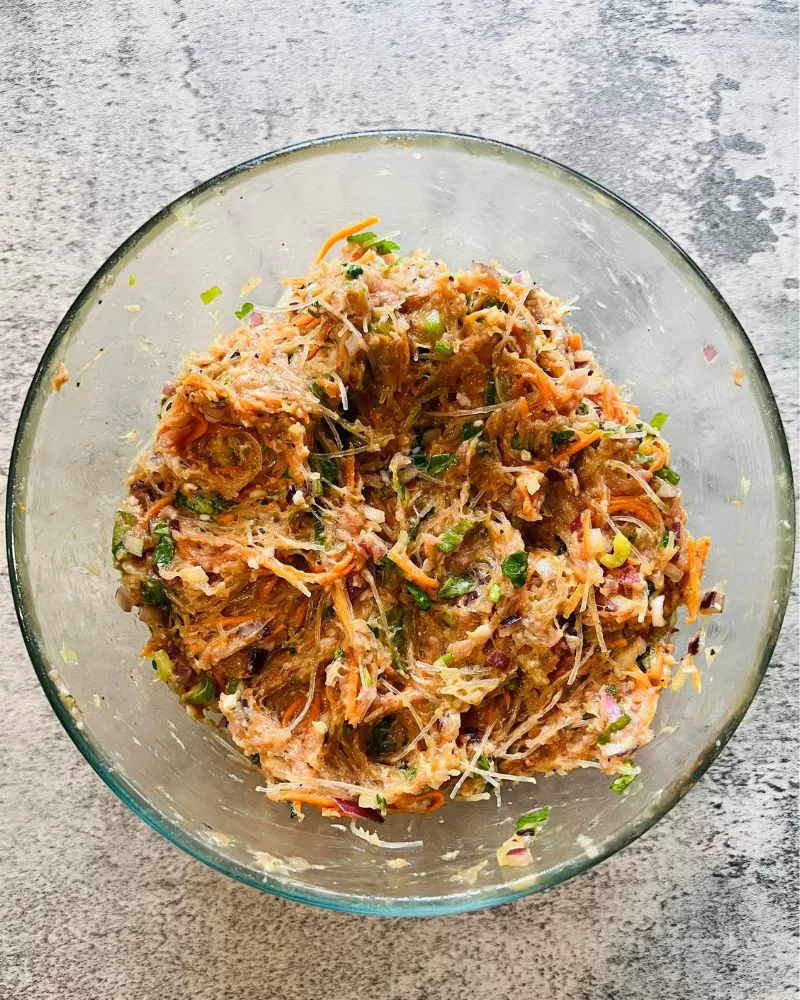
How to Make the Filling
The filling is simple: soak the noodles until soft, pat dry, snip into shorter lengths, then mix everything together in one bowl. That’s it. The rolling will take the most time, but once you get into a rhythm, it’s surprisingly quick.
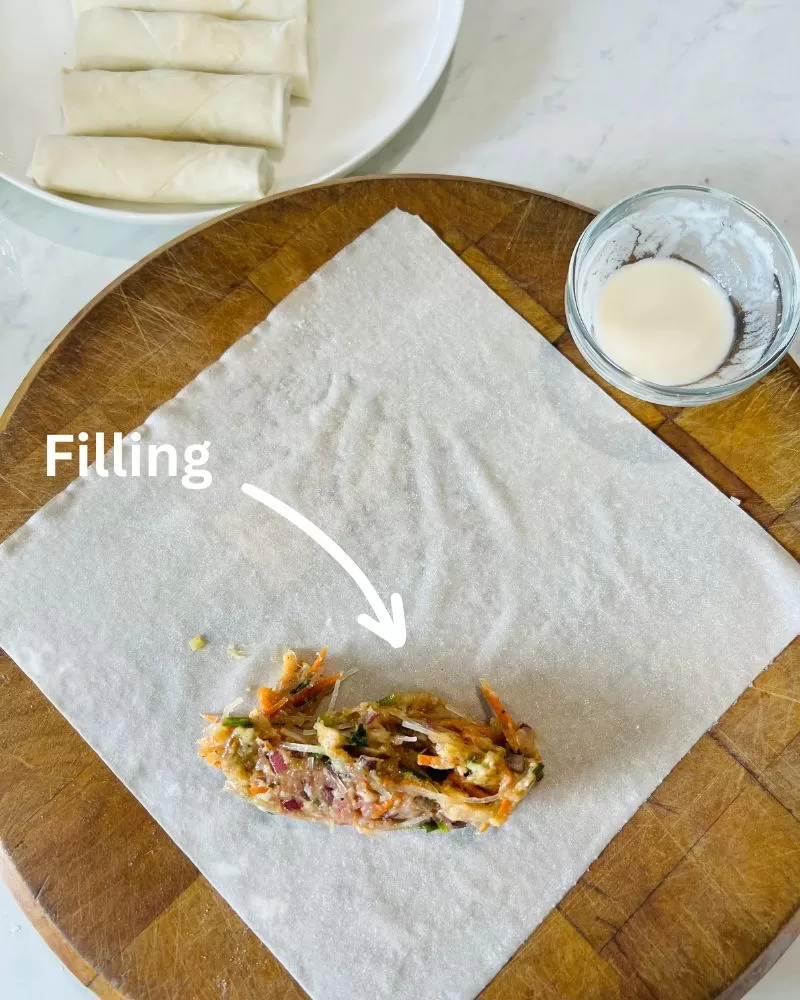
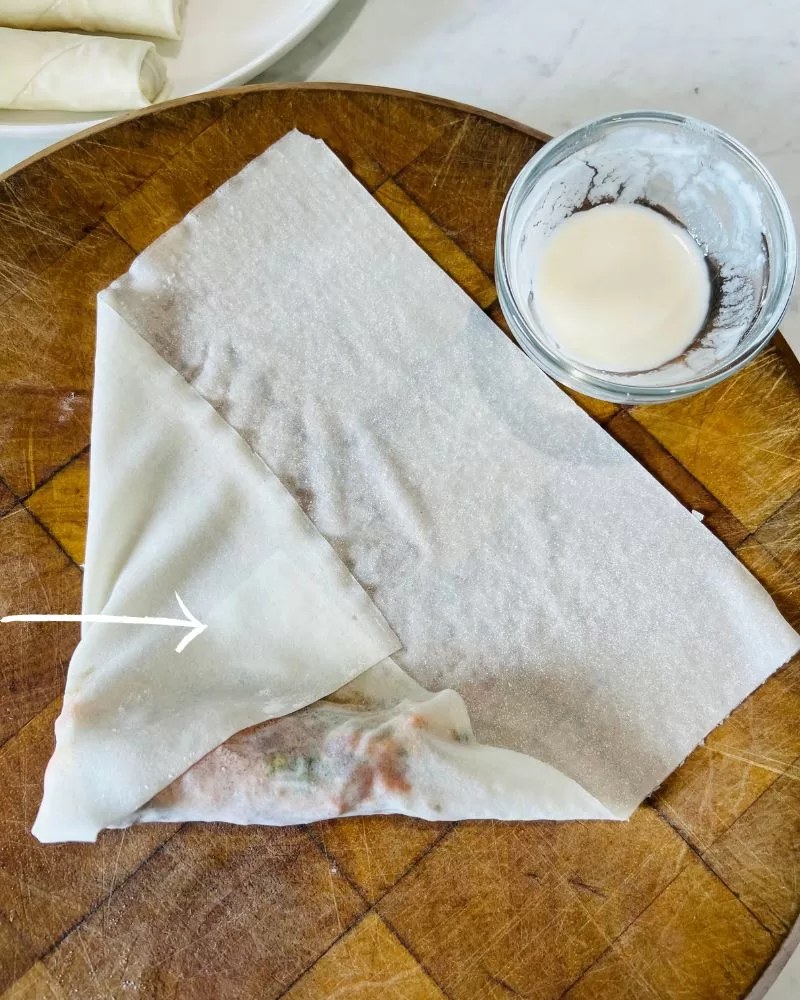
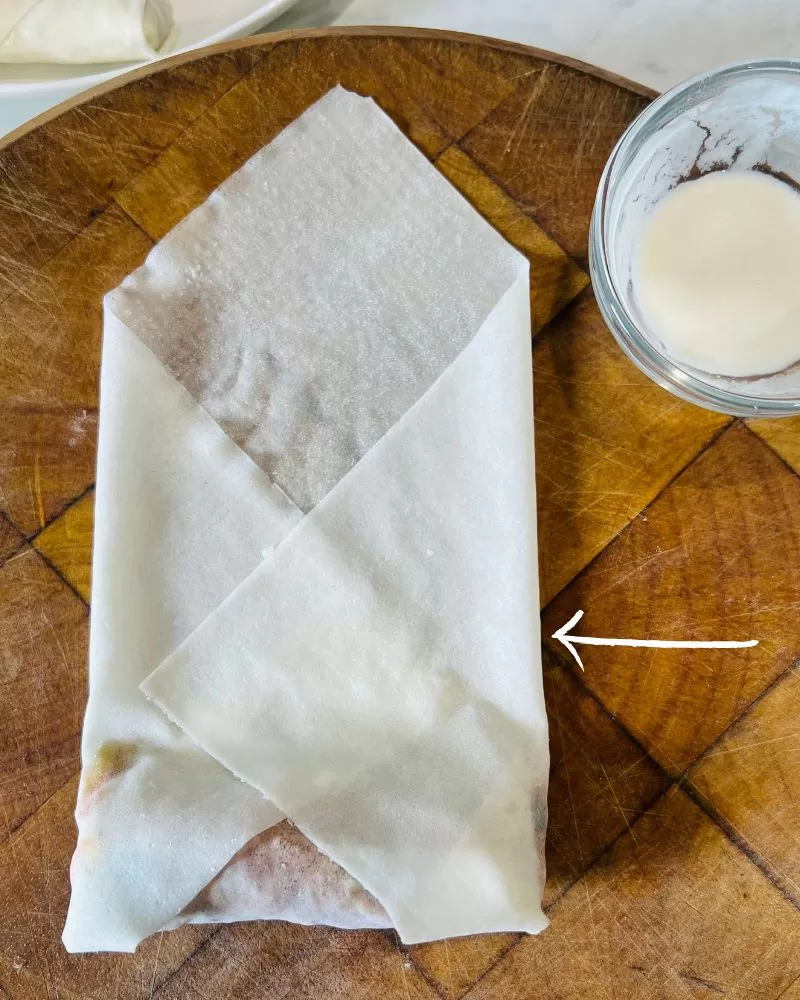
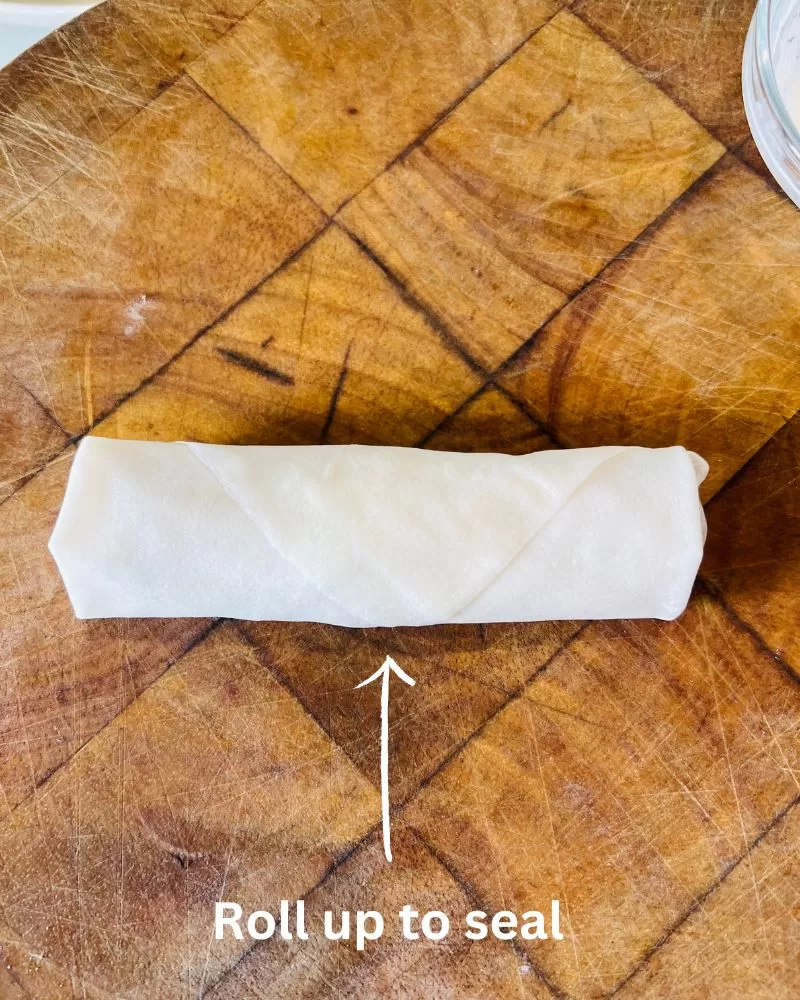
How to Roll Spring Rolls
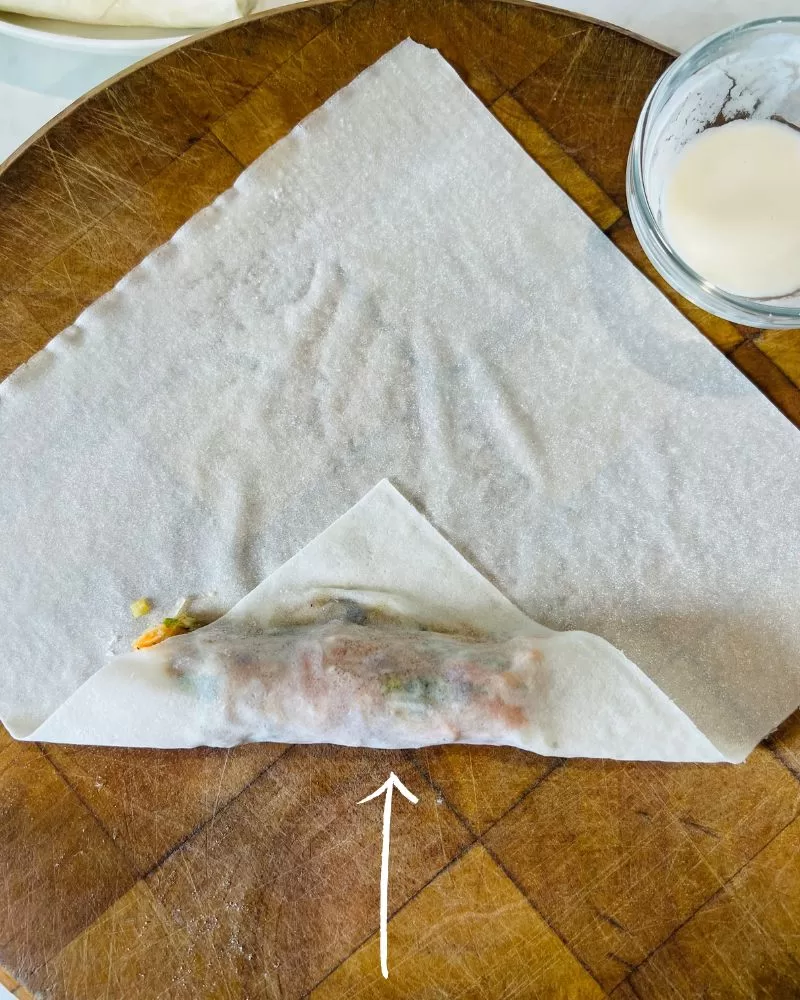
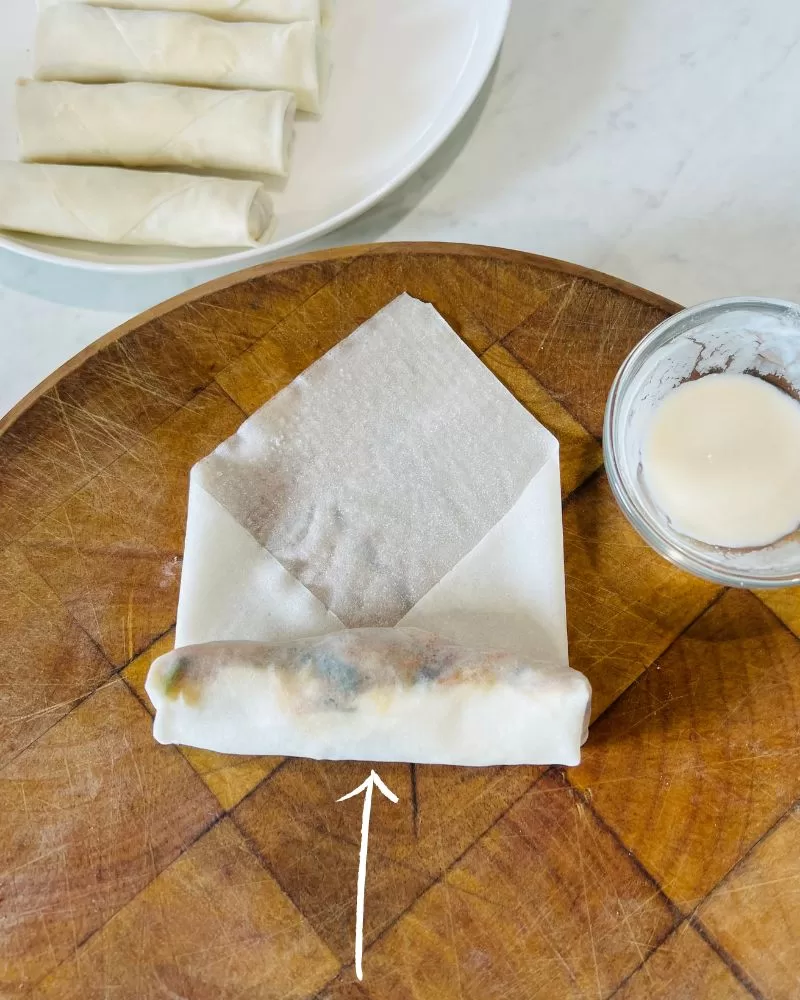
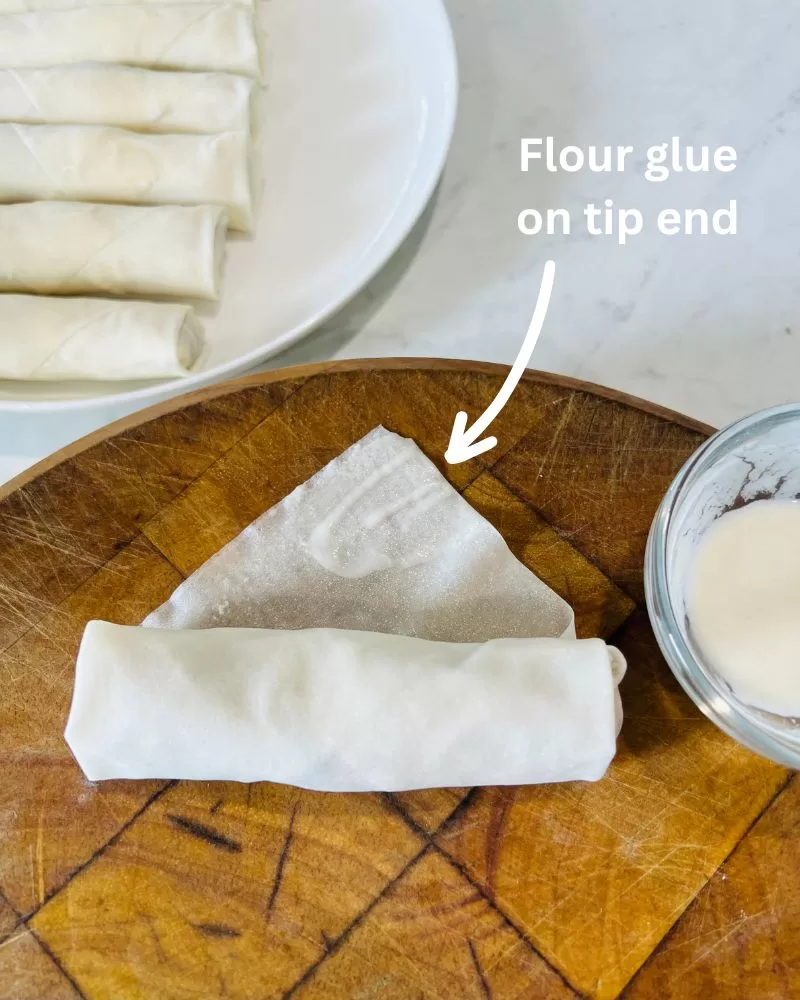
Work with one wrapper at a time. Place a spoonful of filling near the bottom corner, roll it over, fold in the sides, then roll up firmly. Brush the final corner with a dab of “flour glue” to seal. Keep rolled spring rolls covered until you’re ready to fry.
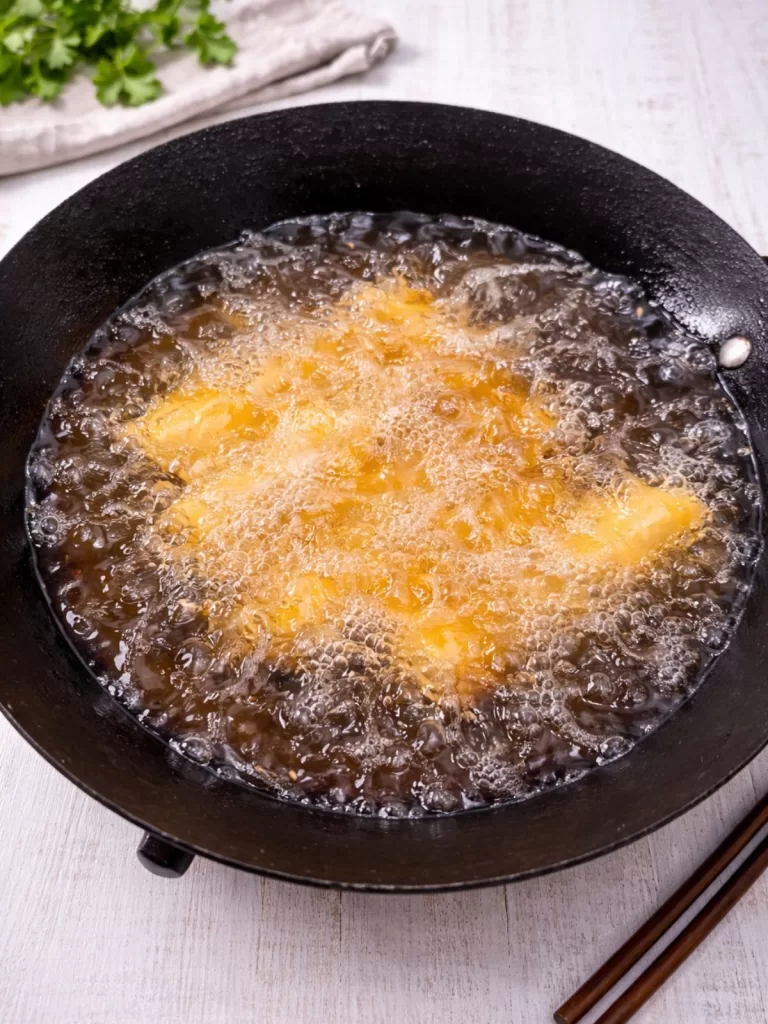
How to Fry Vietnamese Spring Rolls
Heat vegetable oil in a wok or deep saucepan to 160°C (a cube of bread should turn golden in about 20 seconds). Fry the spring rolls in small batches for 4–6 minutes, turning occasionally, until lightly golden and crisp. Remove and drain briefly on paper towel, then transfer straight to a wire rack to keep them crisp.
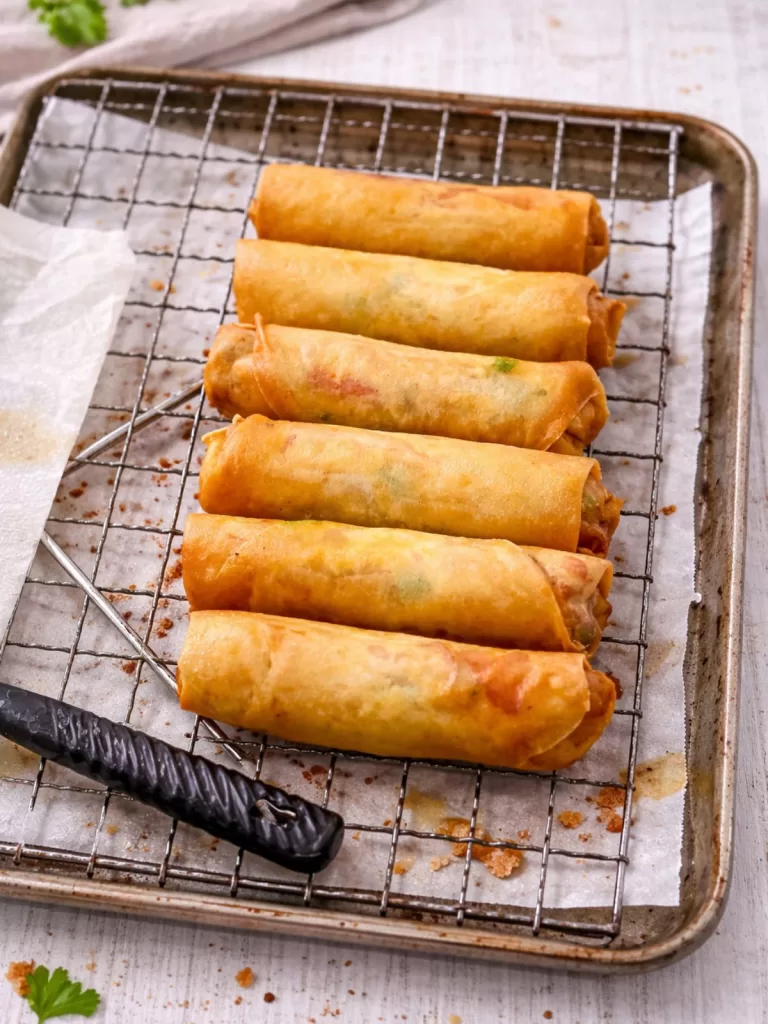
Increase the oil temperature to 180°C, then fry the spring rolls again for 1–2 minutes until deep golden, shatteringly crisp and cooked all the way through. Always cut one open before serving to check the pork is fully cooked.
Double frying is the key to spring rolls that stay crunchy, the first fry cooks and sets the wrapper, while the second removes excess moisture and delivers that classic golden finish.
Why a Double Fry?
Double frying is the secret to spring rolls that stay crisp and guarantee the filling cooks through.
- Crispier texture: The first fry cooks and sets the wrapper. The second fry removes extra moisture and builds that shattering crunch.
- Better colour: The higher temperature in the second fry gives you that deep golden finish.
- Food safety: Because the filling contains raw pork, the two-step fry ensures even cooking all the way to the centre. Always cut into one to check.
Serving Suggestions
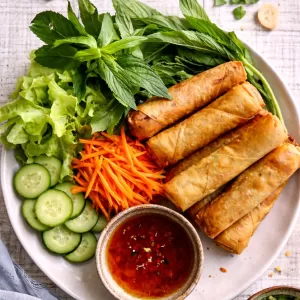
These spring rolls are best served hot and fresh from the fryer, or kept warm in a low oven until ready to eat.
Pair them with lettuce leaves, cucumber, mint and pickled carrot for the full Vietnamese experience. Wrap everything together, then dip into the homemade Nuoc Cham for that classic sweet, salty and tangy finish.
If you prefer something thicker and richer, skip the Nuoc Cham and serve with a spoonful of sweet and sticky chilli jam instead. It adds a glossy heat that works beautifully with the crisp, golden rolls.
They’re perfect as an appetiser, snack platter, part of a shared dinner or added to a vermicelli noodle bowl for a complete meal.


How to Store
Cooked spring rolls will keep in the fridge for up to 3 to 4 days. Reheat in the oven or air fryer until hot and crisp again.
For best results, freeze them uncooked. Arrange in a single layer on a tray and freeze until firm, then transfer to a zip lock bag or airtight container for up to 3 months. Cook straight from frozen, adding a few extra minutes to the cooking time. Do not defrost first.
Golden, crunchy on the outside and packed with flavourful, herby filling on the inside, these Vietnamese spring rolls are the kind of platter that disappears fast – if you make them, I’d love to hear how they turned out, so leave a comment below and let me know!
More Recipes to Try:
- Crispy Thai Prawn and Pork Spring Rolls
- Crispy Prawn Balls
- Chinese Ham and Chicken Rolls (Cheats Version!)
- Prawn Toast (Shrimp Toast)
- Thai Pork Cakes with Cucumber Dipping Sauce
Vietnamese Fried Spring Rolls
Ingredients
- 80g bean thread vermicelli noodles (2 bundles)
- 500g pork mince (at least 15% fat – i.e not lean)
- 1 large carrot, finely grated
- 2 spring/green onions, thinly sliced
- 2-3 eschalots, finely diced
- 2 cloves garlic, finely chopped or grated
- ¼ cup coriander leaves & stems, finely chopped
- 1 egg
- 1 tablespoon fish sauce
- 2 teaspoons oyster sauce
- 1 teaspoon each chicken stock powder, caster sugar, cracked black pepper and salt
- 250g packet (20 sheets) frozen spring roll pastry, thawed (See notes)
- Vegetable oil, for deep frying
FLOUR GLUE (TO SEAL)
- 1 tablespoon plain flour (AP flour)
- 3 teaspoons water
NOUC CHAM DIPPING SAUCE
- 2 tablespoons each warm water and caster sugar
- 2 tablespoons fish sauce
- Juice of 1 lime
- 1 clove garlic, finely chopped
- 1 small birds eye chilli, diced
Instructions
PREPARE THE NOODLES
- Place noodles in a bowl and cover with warm water.
- Soak for 15 minutes until softened, then drain and pat dry.
- Using scissors, cut into roughly 4 cm lengths and transfer to a mixing bowl.
MAKE THE FILLING
- Add pork mince, carrot, spring/green onions, eschalots, garlic, coriander, egg, fish sauce, oyster sauce, stock powder, sugar, pepper and salt to the noodles.
- Use your hands to mix until well combined.
ROLL THE SPRING ROLLS
- Whisk flour and water together to form a thick paste.
- Working with one wrapper at a time, place a heaped spoonful of filling near the bottom corner.
- Fold over, then fold in the sides. Roll up firmly, brushing the final corner with flour glue to seal.
- Repeat with remaining wrappers. Cover and chill until ready to fry (or freeze—see notes).
FRY THE SPRING ROLLS – FIRST FRY
- Heat oil in a wok or deep saucepan to 170°C (bread cube should crisp in ~20 seconds).
- Fry 4–5 rolls at a time for 4–6 minutes until light golden. Drain on paper towel briefly, then transfer to a wire rack.
FRY THE SPRING ROLLS – SECOND FRY
- Increase oil to 190°C.
- Fry rolls again for 1–2 minutes until deep golden and crisp. Always cut one open to ensure the pork is fully cooked.
SERVE
- Serve hot with Nuoc Cham dipping sauce, lettuce, herbs and pickled carrot or cucumber.
NOUC CHAM
- Place warm water and caster sugar into a jar. Shake to dissolve the sugar.
- Add remaining ingredients and shake until combined. Chill until required. Keeps for 1 week.
Notes
- COOKS NOTES:
Oven Temps: Oven temperatures are for conventional, if using fan-forced (convection), reduce the temperature by 20˚C.
Measurements: We use Australian tablespoons and cups: 1 teaspoon = 5 ml, 1 tablespoon = 20 ml & 1 cup = 250 ml.
Herbs: All herbs are fresh (unless specified) and cups are lightly packed.
Vegetables: All vegetables are medium size and peeled, unless specified.
Eggs: We use extra-large size and eggs are 55-60 g each, unless specified. - SPRING ROLL WRAPPERS
Use frozen wheat wrappers for best results. Coles brand separates easily and fries evenly. Thaw in the fridge for about 1 hour before rolling. - FREEZING THE ROLLS
Freeze uncooked spring rolls in a single layer, then transfer to a zip-lock bag. Fry straight from frozen (never thaw), adding a few extra minutes. -
REHEATING COOKED SPRING ROLLS
Reheat in a 180°C oven or air fryer until hot and crisp.

Leave a Reply