
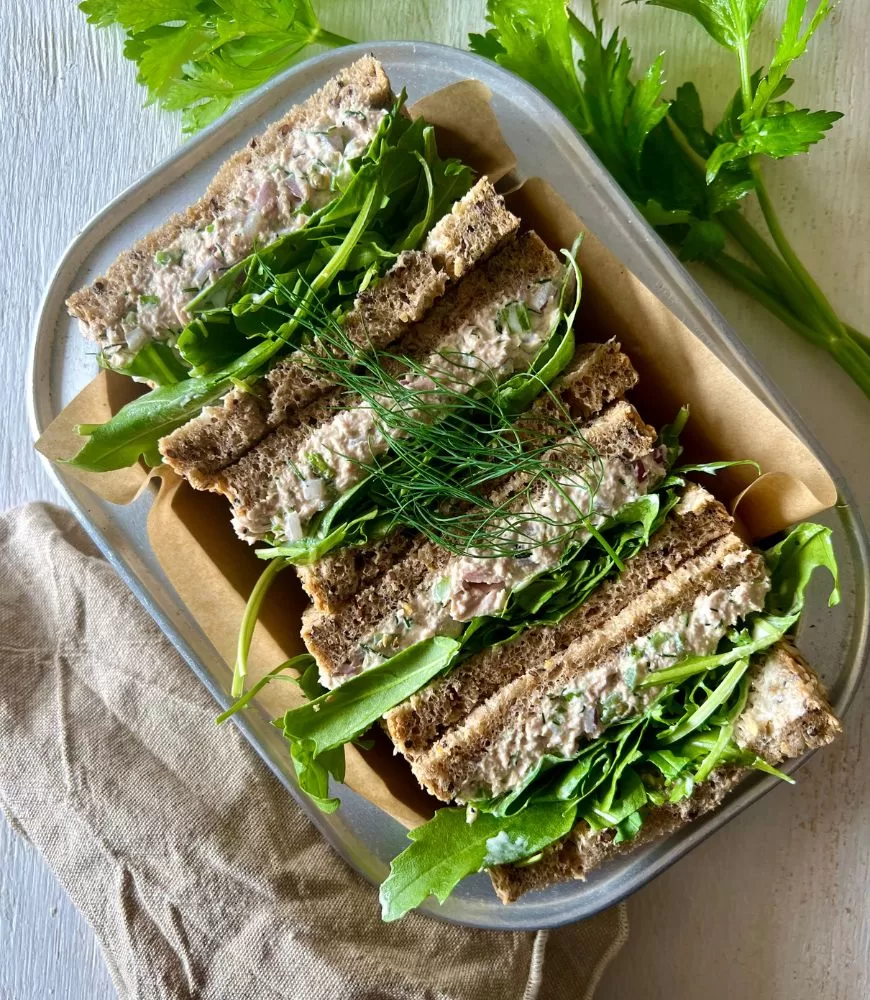
Who doesn’t love a classic done right? My Best Tuna Sandwich is a game-changer! Creamy, flavourful tuna filling meets buttery bread and fresh greens for a sandwich that’s simple yet irresistibly good. Whether you’re after a quick lunch or a picnic favourite, this recipe is easy to whip up and packed with flavour.
This tuna sandwich is seriously the best 🙌🏻
Welcome to my Best Tuna Sandwich recipe. It’s a simple yet tasty combo of canned tuna in oil (way better than water, trust me), mixed with good ol’ whole egg mayo, some dill, crunchy celery, capers, and red onion.
Throw it on your favourite bread – whether it’s wholemeal, wholegrain, white or whatever you’ve got – and if you’re feeling fancy, add some rocket or your go-to salad leaves for that extra fresh kick.
Other ways you can use the tuna filling
- Wrap or Tortilla: Roll up the tuna filling in a soft tortilla or wrap for a convenient and portable option. Add some extra greens for freshness.
- Crackers or Rice Cakes: Spoon the tuna mixture onto crackers, rice cakes, or any crunchy base for a delightful appetiser or snack.
- Baguette or Sub Roll: Pile the tuna filling into a baguette or sub roll for a heartier sandwich experience.
- Stuffed Pita Pocket: Stuff a pita pocket with the tuna mixture, along with your favourite salad ingredients. for a pocket-sized, handy option.
- Salad Topper: Serve the tuna on a bed of fresh salad greens for a light and low-carb alternative. Drizzle with a light vinaigrette for added flavour.
- Melted Tuna Melt: Create a classic tuna melt by placing the tuna filling between slices of bread, adding cheese, and toasting until the cheese is melted and bubbly.
- Sushi Roll: Get creative by rolling the tuna filling inside a sushi roll with avocado & cucumber, for a unique twist.
- Open-Faced Sandwich: Present the tuna filling on a single slice of bread, topped with fresh herbs or microgreens, for an elegant open-faced sandwich.
- Slider Bites: Make mini tuna sandwiches using slider buns for a fun appetiser at parties or gatherings.
Best Tuna Sandwich
Who doesn’t love a classic done right? My Best Tuna Sandwich is a game-changer! Creamy, flavourful tuna filling meets buttery bread and fresh greens for a sandwich that’s simple yet irresistibly good. Whether you’re after a quick lunch or a picnic favourite, this recipe is easy to whip up and packed with flavour.
Ingredients
TUNA SANDWICH FILLING
- 185g can tuna in olive oil, well drained
- ¼ cup whole egg mayonnaise (or Kewpie)
- ½ small red onion, finely diced
- 2 tablespoons finely diced celery
- 2 teaspoons capers, drained well and finely chopped (optional but highly recommended)
- 1 tablespoon roughly chopped dill (optional or replace with chives or parsley)
- Sea salt & pepper, to taste
FOR THE SANDWICH
- 4 slices of your favourite bread
- Butter, to spread
- Rocket or salad leaves
Instructions
Tuna Sandwich Filling
- Combine all ingredients in a bowl and mix until well combined. Cover and chill for 1 hour or until required. (Chilling is optional, but I prefer a nice chilled filling)
To Make Sandwiches
- Lay bread out flat on a clean work surface then spread with butter (make sure to go right to the edges!)
- Divide tuna filling between 2 of the slices of bread and spread to the edges, then top with rocket (or salad) leaves. Sandwich together with remaining bread slices and cut each in half or quarters to serve. Enjoy!
Notes
- COOKS NOTES:
Oven Temps: Oven temperatures are for conventional, if using fan-forced (convection), reduce the temperature by 20˚C.
Measurements: We use Australian tablespoons and cups: 1 teaspoon = 5 ml, 1 tablespoon = 20 ml & 1 cup = 250 ml.
Herbs: All herbs are fresh (unless specified) and cups are lightly packed.
Vegetables: All vegetables are medium size and peeled, unless specified.
Eggs: We use extra-large size and eggs are 55-60 g each, unless specified. - TUNA
I personally lean towards using tuna in oil as it imparts a richer flavour, in my opinion. However, feel free to use any type of tuna you have available; the sandwich still turns out delicious even with tuna in springwater. It’s worth noting that not all tuna is of the same quality, and usually, the higher the price, the better the quality. I opt for a premium brand like Safcol, but you can use whatever you have or what fits into your budget. - MAYONNAISE
I have a preference for the rich flavour, distinct taste, and smooth texture of whole egg mayonnaise. I find that it enhances the overall creamy profile, particularly in this sandwich. An alternative option is to use Japanese Kewpie mayonnaise. When opting for whole egg mayo, I typically choose Best Foods or S & W brands, readily available at most supermarkets and similar stores. - BREAD
I personally prefer using wholemeal or wholegrain-style bread for this tuna sandwich, but feel free to use ANY type of bread. You can get creative and use crackers like Vita Veet’s, Ryvita’s, or Salada’s as a base. Alternatively, you can opt for wraps, rolls, or even stuff the filling inside sushi rolls for a unique twist. The choice is yours! - STORAGE
I prefer preparing this in advance to allow the flavours to blend, and I particularly enjoy the result of a well-chilled filling. However, the choice is yours; you can also use it immediately after preparation. This recipe yields two substantial sandwiches, but feel free to double or triple it based on your requirements. Once prepared, store the filling in an airtight container in the refrigerator for up to three days.
You may also enjoy
![]()


Leave a Reply