
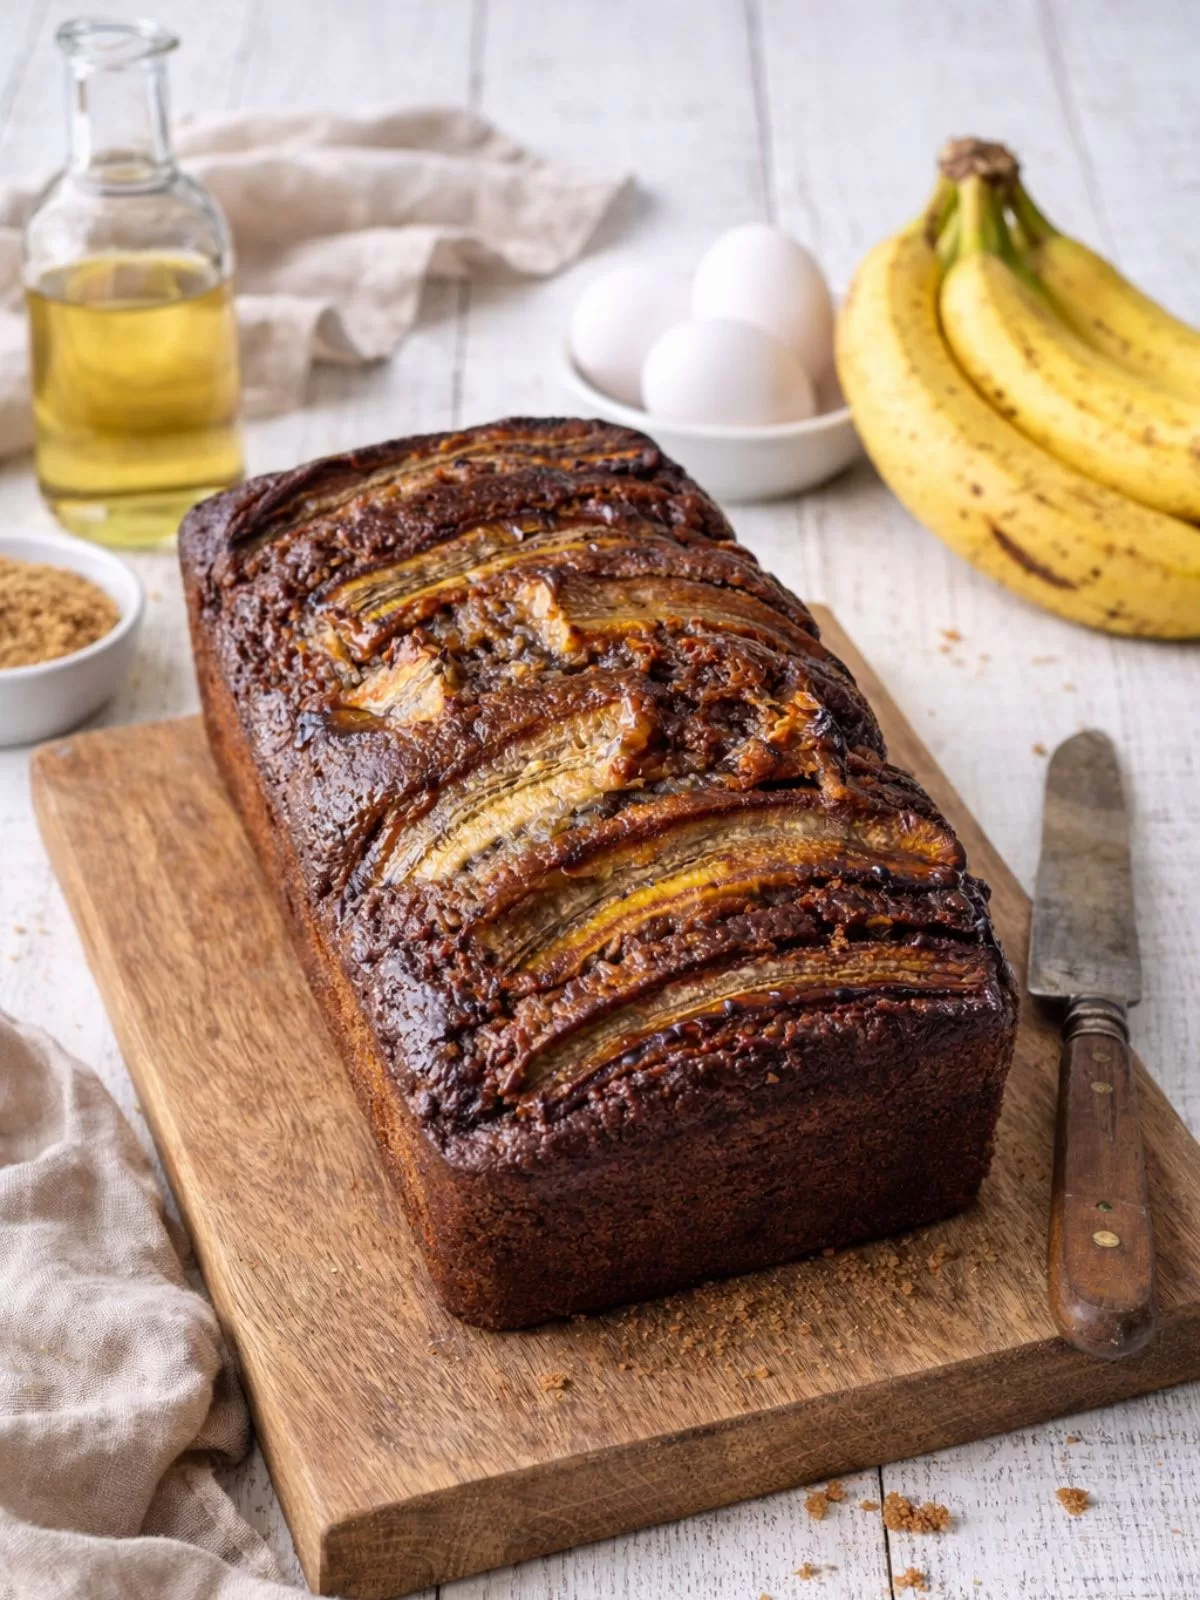
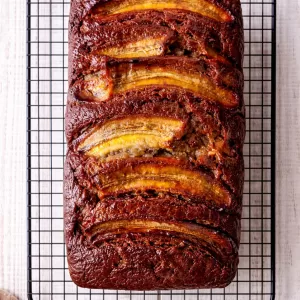
Banana Bread with Oil comes out moist, tender, and full of banana flavour. This easy one bowl recipe uses simple pantry ingredients and works well for overripe bananas sitting on your bench. Vegetable oil keeps the crumb moist and gives the loaf a light texture. Mash the bananas, mix the batter in one bowl, pour into a loaf tin, and bake until golden. A reliable banana bread with vegetable oil for lunchboxes, afternoon tea, or a quick slice with coffee.
This Banana Bread with Oil has sat in my baking rotation for years. I tested and adjusted the recipe until the loaf delivered strong banana flavour and a moist crumb every time. Four overripe bananas give the loaf deep banana flavour while vegetable oil keeps the texture tender. Mix the batter in one bowl, pour into a loaf tin, and bake until golden. This easy banana bread with oil turns out reliable every time.
Why This Banana Bread with Oil Works
- One bowl banana bread with oil, no mixer required
- Uses four overripe bananas for strong banana flavour
- Vegetable oil keeps the crumb moist and tender
- Easy banana bread recipe with simple pantry ingredients
- Works with choc chips, nuts, berries, or coconut
- Freezes well whole or sliced
Best Bananas for Banana Bread
Overripe bananas give banana bread strong flavour and natural sweetness. Look for bananas with dark spots or fully brown skins. The softer the banana, the easier it mashes into the batter and the stronger the banana flavour in the finished loaf. Four large overripe bananas give this banana bread with oil deep banana flavour and a moist crumb.
If bananas in the fruit bowl start turning dark, place them straight into the freezer. Once you have enough, take them out and let them thaw at room temperature, then mash and use in the batter. A simple way to use bananas without throwing them away.
Ingredients for Banana Bread with Oil
This banana bread with oil uses simple pantry ingredients. Four overripe bananas give the loaf strong banana flavour while vegetable oil keeps the crumb moist. Buttermilk adds richness and helps the loaf stay light. You likely have most of these ingredients ready in your kitchen.
- Very ripe bananas: The riper the bananas, the stronger the banana flavour and the sweeter the loaf. Soft bananas mash easily into the batter.
- Eggs: Help bind the batter and give the banana bread structure.
- Buttermilk: Adds richness and helps create a tender crumb.
- Neutral oil: Vegetable, canola, or rice bran oil work well. Oil keeps the banana bread moist.
- Caster sugar: Sweetens the loaf and helps the top brown during baking.
- Brown sugar: Adds moisture and deeper flavour.
- Vanilla extract: Lifts the flavour and rounds out the banana taste.
- Plain flour: Forms the base of the batter and gives the loaf structure.
- Bi carb soda: Helps the loaf rise and keeps the crumb light.
- Salt: Balances the sweetness and strengthens the overall flavour.
- Extra banana: Placed on top before baking for the classic banana bread look. Optional.
- Honey or golden syrup: Brushed over the warm loaf for a glossy finish and extra flavour.
How to Make Banana Bread with Oil
This banana bread with oil comes together in one bowl with simple steps. Mash the overripe bananas until smooth, then whisk in the eggs, buttermilk, oil, and vanilla. Add the sugars and mix until combined. Sift in the dry ingredients and fold through gently so the batter stays light. Pour into a lined loaf tin and place a banana on top if using. Bake until the centre cooks through and the loaf turns golden. While the loaf sits warm, brush the top with honey or golden syrup for a glossy finish, then cool before slicing.
Tips for the Best Banana Bread with Oil
- Use overripe bananas: Dark, spotty bananas give the strongest banana flavour and natural sweetness. The softer the banana, the easier it mashes into the batter.
- Frozen bananas work well: Place ripe bananas in the freezer instead of throwing them away. Thaw at room temperature, drain excess liquid, then mash and use in the batter.
- Use oil for a moist crumb: Oil keeps banana bread moist and tender and helps the loaf stay fresh longer.
- Use buttermilk: Buttermilk improves texture and helps the loaf bake with a golden crust.
- Add extra flavour if you like: Choc chips, nuts, coconut, or berries fold through well.
- Do not overmix the batter: Once the flour goes in, fold gently until combined so the crumb stays light.
- Check the centre before removing from the oven: Insert a skewer into the middle. It should come out clean or with a few moist crumbs.
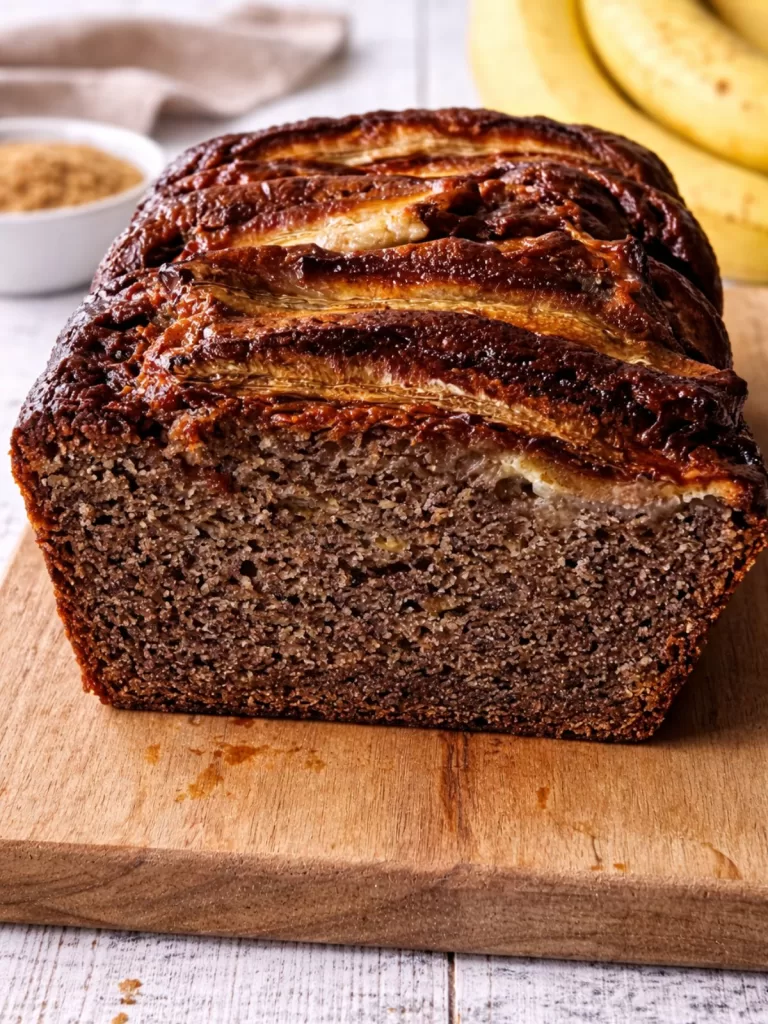
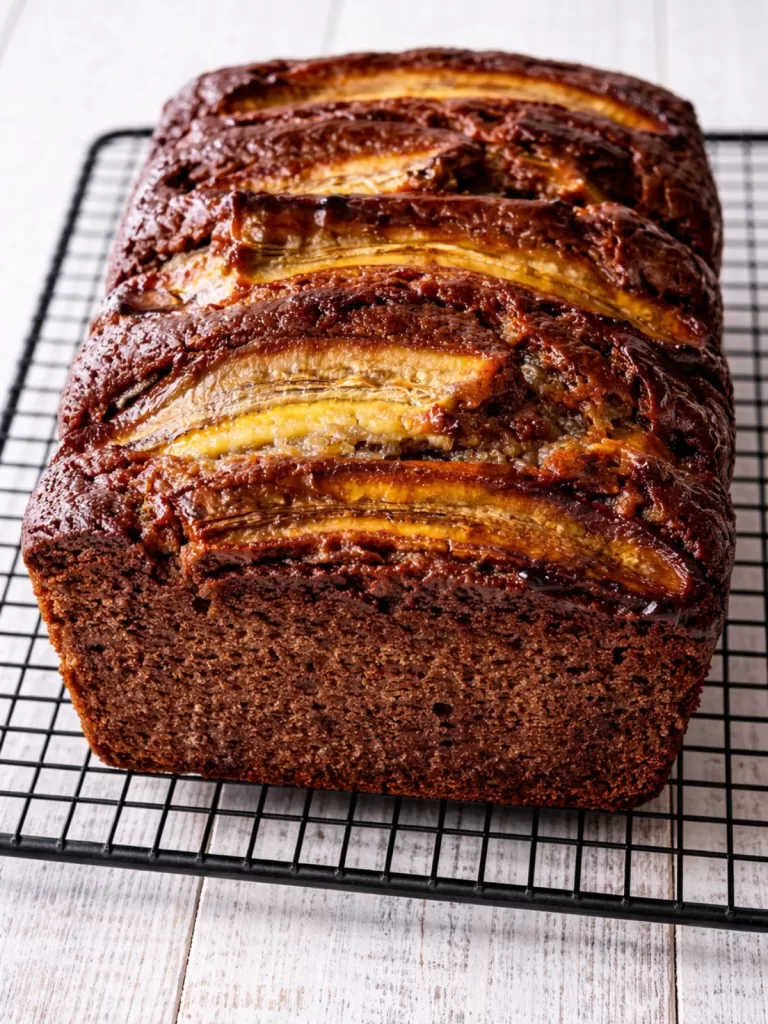
- Cool the loaf before slicing: Let the loaf sit in the tin briefly, then move to a rack to cool fully.
Serving Suggestions
Banana bread works well warm or at room temperature. Toast slices lightly and spread with butter for a simple breakfast or afternoon snack. For a sweeter option, drizzle with honey or maple syrup and serve with fresh berries and thick yogurt. Banana bread also pairs well with coffee for morning tea or afternoon tea.
How to Store Banana Bread
Banana bread keeps well at room temperature for several days when stored in an airtight container. The oil in this banana bread helps the loaf stay moist. Keep the loaf whole or slice it once cooled.
- Room temperature: Store banana bread in an airtight container for up to three days.
- Refrigerator: Keeps fresh for up to five days, though the crumb tightens slightly when cold.
- Freezer: Banana bread freezes well. Wrap slices or the whole loaf tightly and freeze for up to three months.
- To serve: Thaw at room temperature or warm slices briefly in the toaster.
Frequently Asked Questions
Can I use frozen bananas for banana bread?
Yes. Thaw frozen bananas at room temperature, drain excess liquid, then mash and use as normal.
What oil works best for banana bread?
Use a neutral oil such as vegetable, canola, or rice bran oil so the banana flavour stays the focus.
How do I know when banana bread is cooked?
Insert a skewer into the centre of the loaf. If it comes out clean or with a few moist crumbs, the bread is ready.
Can I freeze banana bread?
Yes. Wrap slices or the whole loaf well and freeze for up to three months.
Can I add extras to banana bread?
Yes. Fold add-ins through the batter before baking. Add about ½ cup choc chips, nuts, or coconut. Add about 1 cup fresh or frozen berries. For spices such as cinnamon add 1 teaspoon or for nutmeg, add about 1/4 teaspoon to the dry ingredients.
If you make this Banana Bread with Oil, leave a comment below and share how it turned out. Your feedback helps other readers and I enjoy hearing how you served it.
More Baking Recipes:
- Coconut & Lemon Syrup Cake
- Self-Saucing Sticky Date Pudding
- Easy Hazelnut Biscotti
- Self-Saucing Sticky Date Pudding (So Easy!)
- 5 Ingredient Choc Chip Cookies
- Mini Jam Drop Biscuits
Banana Bread with Oil
Ingredients
- 4 very ripe bananas, about 350g once peeled
- 2 eggs
- ⅓ cup buttermilk, see Note 2
- ½ cup neutral oil such as vegetable, canola or rice bran oil
- 1 cup caster sugar
- ½ cup brown sugar
- 1 teaspoon vanilla extract
- 1 ¾ cups plain flour
- 1 teaspoon bi-carb soda, baking soda
- ½ teaspoon salt
- 1 extra banana, peeled and halved lengthways, optional
- 1-2 tablespoons honey or golden syrup, maple syrup also works
Instructions
- Preheat oven to 180°C, 160°C fan forced. Line the base and sides of a 12 cm x 22 cm loaf pan with baking paper.
- Place the bananas in a large bowl and mash with a fork until mostly smooth. Add the eggs, buttermilk, and oil and whisk to combine. Add the caster sugar, brown sugar, and vanilla extract and mix well.
- Sift in the flour, bi carb soda, and salt. Fold gently with a spatula until combined. If using add ins such as choc chips, coconut, or nuts, fold them through now.
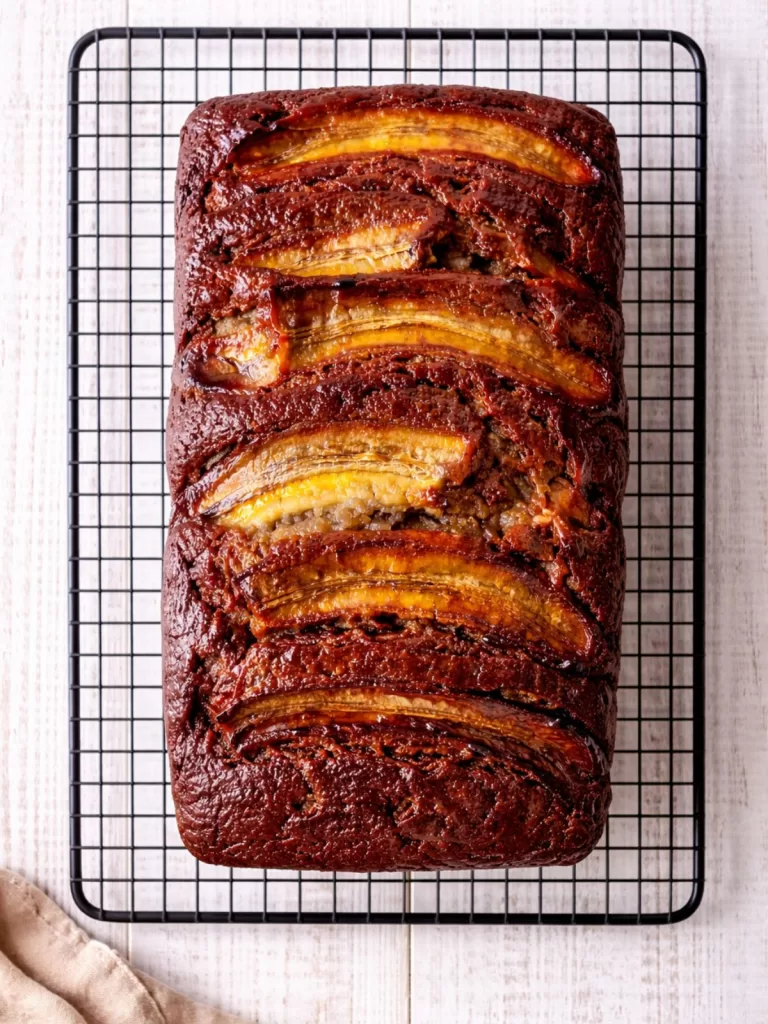
- Pour the batter into the prepared loaf pan. If using the extra banana, place it on top. Bake for 1 hour 10 minutes to 1 hour 15 minutes, or until a skewer inserted into the centre comes out clean. Start checking at the 1 hour 5 minute mark.
- Remove from the oven and drizzle the honey or golden syrup over the top. Use a pastry brush to coat the surface. Cool in the pan for 10 minutes, then transfer to a wire rack to cool completely before slicing.
Notes
-
MEASUREMENTS
All measurements use Australian cups and spoons. 1 teaspoon equals 5 ml. 1 tablespoon equals 20 ml. 1 cup equals 250 ml. -
BUTTERMILK
To make quick buttermilk, add 1 teaspoon lemon juice or white vinegar to a measuring jug. Top with milk to reach ⅓ cup. Stir and let sit for 5 minutes until lightly curdled. It works well in this recipe. -
ADD INS
You can fold extra ingredients into the batter. Good options include choc chips, nuts, shredded coconut, oats, or dried fruit. Add about ½ cup. For fresh or frozen berries, add about 1 cup. For spices such as cinnamon or nutmeg, add about 1/4 teaspoon for nutmeg and 1 teaspoon for cinnamon. -
BANANA TOPPER
The photos show small lady finger bananas placed on top of the loaf. If using regular bananas, one banana halved lengthways works well.

Love this Banana Bread. So easy to make. I made one then a couple of days later I made another and froze the slices. It freezes very well. Thank you for the great recipe