person drinking wine
Hello! I'm Kate.
  • About
  • Contact
  • Image Policy
  • Privacy Policy
  • HOME
  • ABOUT
  • ALL RECIPES
  • Categories
    • Breakfast & Brunch
    • Appetisers & Dips
    • Condiments & Sauces
    • Meat & Poultry
    • Seafood
    • Pasta
    • Salads & Sides
    • Chinese
    • Curries
    • Soups
    • Sweets
    • Vegetables
  • CONTACT

Feed Me Kate

A collection of delicious recipes from my table to yours

Home » Categories » Chinese » Sweet and Sour Pork (Just like a Restaurant)

Chinese, Meat & Poultry · December 19, 2023

Sweet and Sour Pork (Just like a Restaurant)

Jump to Recipe Print Recipe

Welcome to my delicious homemade Sweet and Sour Pork recipe that brings the authentic flavours of Chinese to your kitchen. This classic dish features crispy pork bites coated in a sweet and tangy sauce, creating a delightful combination of flavours that’s easy to prepare and perfect for a satisfying meal. This is truly a tasty and comforting Chinese favourite that tastes exactly like you get in your local Chinese restaurant, but better!

sweet and sour pork on Chinese plate with bowl of rice in white bowl

Sweet and Sour Pork is a popular Chinese dish that features bite-sized pieces of pork, typically battered and deep-fried until crispy. The dish is then coated in a flavourful sweet and sour sauce made from a combination of sugar, vinegar, ketchup, and the secret ingredient – a dash of Worcestershire sauce.

Additional ingredients such as capsicum, carrot, onions, and pineapple are included for added texture and taste. The result is a deliciously balanced combination of sweetness, tanginess, and savoury flavours, making it a favourite in Chinese cuisine both in restaurants and homemade kitchens.

This dish works equally well with chicken too! If using chicken, choose from thigh or breast. Due to the velveting of the meat, if using breast, it will be still be tender and juicy.

2 raw pork steaks
Pork Scotch Fillet
bottle of ketchup, white background
Ketchup
red and green capsicum, white background
Capsicums
can of pineapple chunks
Pineapple

How to make

  • Marinate Pork: Dice pork and mix with marinade ingredients. Refrigerate until needed.
  • Make Batter for Pork: Create batter by whisking together flour and cornflour. Adjust with tap water for thickened cream consistency. Chill for a maximum of 1 hour.
  • Prepare Sweet & Sour Sauce: Combine sauce ingredients in a bowl. Set aside.
  • Chop Vegetables: Ensure veggies are uniformly chopped for even cooking.
  • Deep Fry Pork in Batter: Heat oil to 180C. Coat pork in batter, then drop into hot oil in batches. Fry for 3 minutes or until golden. Drain on a wire rack. Repeat with remaining pork.
  • Deep Fry Pork for Second Time: Reheat oil to 200C. Do a second fry on pork batches for 1 minute until golden brown and really crisp. Drain and set aside.
  • Stir-fry Vegetable in Wok: Heat 1 tbsp veggie oil in a wok over medium-high heat. Stir-fry veggies (excluding pineapple) for 1-2 mins. Pour in sauce, bring to a boil, then turn off heat.
  • Add Pork & Pineapple and Serve: Add fried pork and pineapple. Toss well to coat in sauce. Serve immediately and enjoy!
marinated raw pork in white bowl on marble background
white bowl with flour in it. Whisk next to it
sweet and sour sauce in bowl bowl, marble background
white plate with chopped red onion, red capsicum, green capsicum, carrot and pineapple pieces on it. Marble background

Why do a double fry?

Double deep frying is a cooking technique commonly used for certain meats, including items like chicken wings, french fries, and, in this case, sweet and sour pork. The process involves frying the food twice at different temperatures, and it serves several purposes:

  1. Crispiness: The primary reason for double frying is to achieve a crispier texture. The initial fry cooks the food through and begins the process of developing a crispy exterior. The second fry at a higher temperature helps to further dehydrate the surface, resulting in a more substantial and crunchy crust.
  2. Moisture Control: Double frying is effective in controlling the moisture content of the food. The first fry allows the interior to cook while retaining moisture. The second fry at a higher temperature then removes excess moisture from the surface, preventing the food from becoming soggy.
  3. Colour Development: The double frying process gives an appealing golden-brown colour on the exterior of the food.
  4. Oil Absorption: Frying at a lower temperature initially allows the food to absorb less oil, as the moisture inside creates a barrier. The second, higher-temperature fry then quickly seals the surface, minimising further oil absorption and resulting in a less greasy end product.

In the case of this sweet and sour pork, the double frying method is used to create a contrast between the crispy exterior and tender inside of the pork, allowing it to hold up well against the sweet and tangy sauce without becoming soggy.

close up of sweet and sour pork
plate of Chinese sweet and sour pork

Serving suggestions

Sweet and Sour Pork pairs well with a variety of side dishes. Below are some serving suggestions for you:

  1. Steamed Rice: Serve the sweet and sour pork over a bed of steamed white or brown rice.
  2. Fried Rice: The pork pairs well with fried rice. The combination of textures and flavours adds an extra dimension to the meal.
  3. Noodles: Choose your favourite noodles, such as chow mein or hokkien, and toss them with the sweet and sour pork.
  4. Vegetables: Include a side of stir-fried or steamed vegetables like broccoli, sugar snap peas or Chinese greens. .
  5. Sesame Seeds or Spring Onions: Garnish with a sprinkle of sesame seeds or spring onion curls.
fried rice on white plate, white background
cooked rice in white bowl, white background
noodles in a white bowl, white background

❄️ Storage

FRIDGE:
Allow to cool to room temperature before refrigerating. Cover with plastic wrap or transfer leftovers to an airtight container. Consume within 2-3 days.

FREEZE:
I do not recommend freezing.

TO REHEAT:
When ready to eat, reheat gently in the microwave (MEDIUM 50% power) until it piping hot and evenly heated.

Sweet and Sour Pork (just like a restaurant)

This classic dish features crispy pork bites coated in a sweet and tangy sauce, creating a delightful combination of flavours that’s easy to prepare and perfect for a satisfying meal. This is truly a tasty and comforting Chinese favourite that tastes exactly like you get in your local Chinese restaurant, but even better!
Print Recipe Pin Recipe
Prep Time:20 minutes mins
Cook Time:20 minutes mins
Total Time:40 minutes mins
Course: Dinner
Cuisine: Chinese
Keyword: Chinese Pork, Deep Fry Pork, Sweet & Sour
Servings: 4 people
Author: Kate

Equipment

  • Wok or large frying pan
  • Electric deep fryer or large saucepan

Ingredients

MARINATED PORK

  • 500g pork scotch fillet or pork belly, cut into small bite size pieces (See Notes)
  • 1 teaspoon chicken stock powder (See Notes)
  • ½ teaspoon Chinese 5 spice powder
  • ¾ teaspoon bicarbonate soda
  • ½ teapsoon ground white pepper
  • pinch of salt
  • ½ teaspoon MSG (optional – See Notes)
  • ½ teaspoon sesame oil
  • 2 teaspoons Shoaxing wine (Chinese cooking wine)

BATTER

  • 1 cup self-raising flour
  • ½ cup cornflour or potato starch
  • Water

SWEET AND SOUR SAUCE

  • ⅓ cup ketchup or tomato sauce
  • ⅓ cup caster sugar (can use white or brown sugar)
  • ¼ cup white vinegar
  • 2 tablespoons pineapple juice (reserved from the can for the stir fry)
  • 2 tablespoons water
  • 2 teaspoons Worcestershire sauce
  • 2 ½ teaspoons cornflour
  • 1 teaspoon MSG (optional – See Notes)
  • Few drops of red food colouring (optional)

STIR FRY

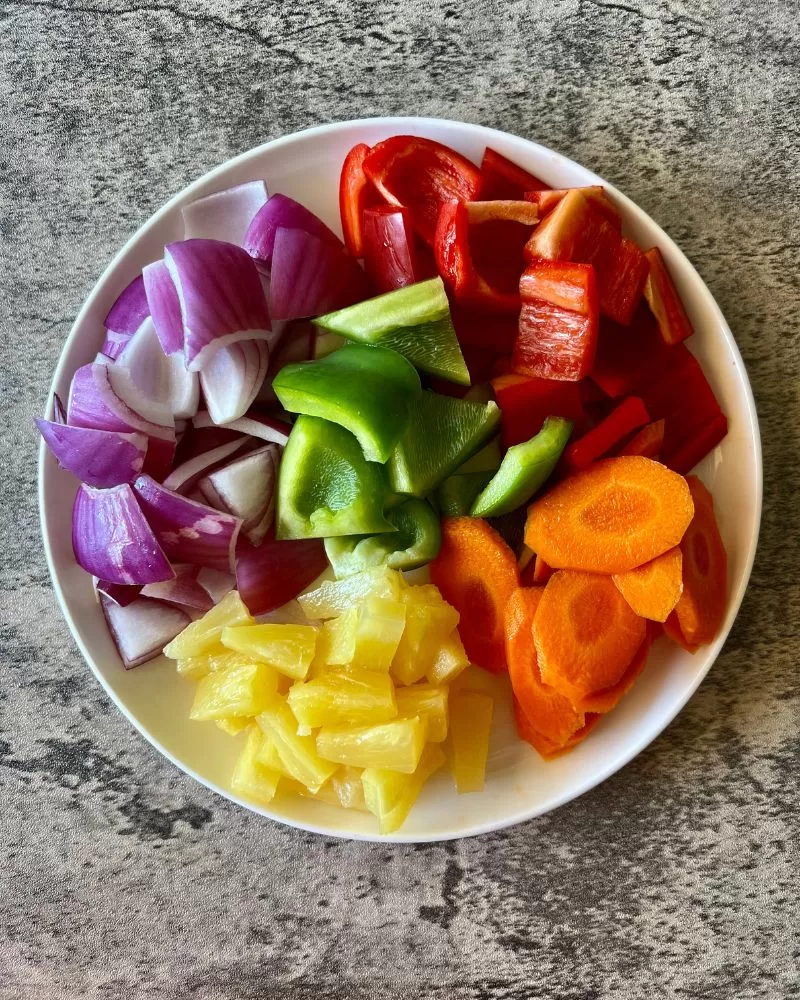
  • ½ large red onion, cut into large chunks
  • ½ small red capsicum, cut into chunks
  • ½ small green capsicum, cut into chunks
  • 1 small carrot, cut into 2-3mm thick slices
  • 227g can pineapple chunks in juice, drained (reserve the juice for the Sweet & Sour Sauce)

Instructions

MARINATE PORK

  • Combine pork with all marinade ingredients in a bowl. Cover and chill until required, or up to 24 hours ahead of time. If you only have 10 minutes thats fine too, while you get the rest of the dish prepped.

BATTER

  • Create batter by whisking together flour and cornflour. Add enough cold tap water until you get the consistency of thickened cream. You can use immediately or chill for a maximum of 1 hour.

SWEET & SOUR SAUCE

  • Whisk all ingredients in a bowl until throughly combined. Set aside until ready to use.

DEEP FRY (1ST)

  • Heat enough oil in a wok or saucepan to come one-third up the side over medium high heat until it reaches 180C. (alternately use an electric deep fryer according to manufactures instructions) Coat pork in batter, then drop one-by-one into hot oil in batches. Fry for 3 minutes or until golden. Drain on a wire rack. Repeat with remaining pork. (TIP: I use food safe gloves here to help reduce with messy hands. I use a new glove for every batch)

DEEP FRY (2ND)

  • Reheat oil to 200C. Do a second fry on pork, in batches, for 1 minute 30 seconds or until golden brown and really crisp. Drain and set aside.

STIR FRY

  • Heat 1 tablespoon oil in a wok over high heat. Add the onion, capsicums and carrot and stir-fry for 1-2 minutes or until slightly softened. Pour in the prepared sweet and sour sauce and bring to boil. Once boiling, turn heat off and add all the fried pork and the pineapple pieces. Toss well to coat. Transfer to a serving platter or plates and serve immediately. Enjoy 🙂

Notes

  • COOKS NOTES:
    Oven Temps: 
    Oven temperatures are for conventional, if using fan-forced (convection), reduce the temperature by 20˚C.
    Measurements: We use Australian tablespoons and cups: 1 teaspoon = 5 ml, 1 tablespoon = 20 ml & 1 cup =  250 ml.
    Herbs: All herbs are fresh (unless specified) and cups are lightly packed.
    Vegetables: All vegetables are medium size and peeled, unless specified.
    Eggs: We use extra-large size and eggs are 55-60 g each, unless specified.
  • PORK
    The best cut of pork for making this dish is either pork scotch fillet (aka – pork neck) or pork belly, with the skin and any bones removed, for the best flavour and juiciest pork bites. The use of bicarb soda in the marinade is a Chinese tenderising secret also known as velveting which means the pork will remain juicy and the outside can get extra crisp.
    Other pork cuts can be used such as tenderloin, pork loin steaks etc but because they are leaner, they will be more prone to drying out. The marinade will help counteract this though and if this is all you have, don’t not cook this dish. Use it, it will still be delicious..
  • CHICKEN STOCK POWDER
    I use a Chinese style chicken stock powder called Knorr Chicken Powder which can be found in Asian grocers and even some large Coles supermarkets. It is the best for Chinese cookinig but your regular chicken stock powder with brands such as Continental or Massel is perfectly fine to use as well.
  • MSG
    MSG, or monosodium glutamate, is a flavour enhancer that is commonly used in Chinese cooking, as well as in various cuisines around the world. It is the sodium salt of glutamic acid, an amino acid that occurs naturally in many foods. Here are some reasons why MSG is used in Chinese cooking:
    1. Enhanced Umami Flavour: MSG is known for its ability to enhance the savoury or umami taste in foods. Umami is one of the five basic tastes (along with sweet, salty, bitter, and sour), and it contributes to the overall depth and richness of a dish. MSG intensifies the natural flavours of ingredients, making the food more delicious and satisfying.
    2. Balancing Flavours: MSG can help balance and round out the flavours in a dish. It is often used in small quantities to enhance the taste of other ingredients without imparting a specific flavour of its own.
    3. Culinary Tradition: MSG has been used in Chinese cooking for decades and is considered a traditional seasoning in many Asian cuisines. It is often used in conjunction with other umami-rich ingredients like soy sauce and oyster sauce.
    It’s important to note that MSG has been the subject of some controversy, with concerns raised about potential adverse effects. However, scientific studies have generally found MSG to be safe for most people when consumed in moderate amounts as part of a balanced diet. If you have concerns about MSG, you can just omit from the recipe.
  • PINEAPPLE
    I like to use the canned pineapple chunks in juice (not in syrup). If desired, you can also use fresh pineapple. If using fresh, omit the pineapple juice from the sweet and sour sauce so you don’t need to source it. It will still taste great. 
    If using fresh though, add it to the wok at the same time as adding the vegetables rather than after to give it time to soften.

You may also enjoy

  • Crispy Lemon Honey Chicken
  • Chicken & Ham Spring Rolls
  • Crispy Prawn Balls
  • Pork & Prawn Wontons with Snow Peas
  • Satay Chicken Curry
  • Chinese Sweet & Sour Dipping Sauce (Just Like a Restaurant)

Loading

Posted In: Chinese, Meat & Poultry

Get on the List

You’ll Also Love

Peruvian Chicken with Green Sauce in a bowl with avocado salsa, brown rice and lime. Napkin underneath the platePeruvian Roast Chicken with Green Sauce
creamy tortellinin pastaCreamy French Onion Tortellini with Bacon & Mushrooms
white plate with deep fried prawn balls and bowl of sweet chilli sauceCrispy Prawn Balls

Leave a Reply Cancel reply

Your email address will not be published. Required fields are marked *

Recipe Rating


Next Post >

Amazing Zucchini & Bacon Slice

About Photo
Hi there! I'm Kate, an avid food lover and cooking enthusiast. Join me on a global culinary adventure as I whip up a storm with my favourite dishes from around the world. From my kitchen to yours, discover easy, delicious, and sometimes unique recipes that might just become your new favourites!

Stay Updated

Search

EXPLORE CATEGORIES

  • Appetisers & Dips
  • Breakfast & Brunch
  • Chinese
  • Condiments & Sauces
  • Curries
  • Meat & Poultry
  • Pasta
  • Salads & Sides
  • Seafood
  • Soups
  • Sweets
  • Vegetables

Trending Now

hey there!

I'm eager to hear about your culinary creations! If you've tried a recipe from Feed Me Kate, please share your thoughts and suggestions in the comments section below each recipe. Your feedback is greatly appreciated. Thanks for visiting! Cheers, Kate x

BROWSE BY COURSE

  • Breakfast & Brunch
  • Appetisers & Dips
  • Condiments & Sauces
  • Meat & Poultry
  • Seafood
  • Salads & Sides
  • Vegetables
  • Pasta
  • Soups
  • Sweets

Latest on Instagram

Penang Chicken Curry!! Been a bit cold and windy Penang Chicken Curry!!

Been a bit cold and windy here the last 2 days so a curry was definitely on the table!! 

So easy and delicious to whip up. I love all Thai curries but Penang is my partners absolute fave so this was for him!! I of course add heaps of chilli to mine as I like a good kick 🌶️ 

Have a fab Friday and an awesome weekend!! 😎💜😊

#penang #chickenpenang #chickencurry #thaicurry #thaipenang #kaffirlimeleaves #chilli #chickendinner #easycurry #currypaste #coconutcream #feedmekate
Asian Pork & Broccolini Bowls ✨RECIPE✨ These Asian Pork & Broccolini Bowls ✨RECIPE✨

These pork bowls are SOOOO quick and easy to make and everyone, including the kids will enjoy it!

Not a fan of pork? Simply swap the pork mince out for extra lean beef, chicken or turkey!  You could also swap the broccolini out for snow peas, more green beans, Asian greens, zucchini or regular broccoli. 🥦 Simply use what’s you have or what your family enjoys! It’s very versatile - leave the chilli 🌶️ out or add more depending on your heat tolerance. 😎

Have a Happy day 🌺🌈

RECIPE ⬇️

Asian Pork & Broccolini Bowls
 
INGREDIENTS: - Serves 4

1 tablespoon oil
3 cloves garlic, finely chopped 
1/2 long red chilli, deseeded and finely chopped (Optional)
500g Extra Lean pork mince (or your choice of mince)
2 bunches broccolini, cut into 3cm lengths
1 cup chopped green beans
2 spring onions, cut into 3cm lengths

STIR-FRY SAUCE:
1/4 cup oyster sauce
1/4 cup water
1 tablespoon kecap manis
1 tablespoon soy sauce
2 teaspoons sesame oil
2 teaspoons brown sugar or honey
2 teaspoons cornflour

TO SERVE:
Cooked rice of choice 
Finely shredded carrot
Spring onions, sliced, extra to garnish
Herb to garnish if desired (I used some Thai basil as that’s what I had)

1 Combine Stir-Fry Sauce ingredients in a jug or bowl until throughly combined. Set aside.
2 Heat oil in a large frying pan over medium high heat. Add the garlic and chilli (if using) and cook for 30 seconds. Crumble in the pork mince then cook, breaking up with a spoon for 5 minutes or until cooked through. 
3 Add the broccolini and green beans. Cook, stirring for 2 minutes or until just starting to soften. Add the prepared Stir-Fry Sauce and the spring onions and cook for a further 1-2 minutes or until vegetables are just soft (but still a little crunchy) and the sauce has thickened.
4 Serve with rice and garnish with shredded carrot, extra spring onions, sliced red chilli (if using) and a sprig of herbs. Enjoy 😊 

#asianbowl #healthypork #highprotein #quickdinner #mincerecipe #oystersauce #porkstirfry #easymealprep #feedmekate #foodandbeverageonly #homecookcollective #healthiermeals
HEALTHY ZUCCHINI FRITTERS Recipe! This was lunch HEALTHY ZUCCHINI FRITTERS Recipe! 

This was lunch yesterday! Couple of my zucchini fritters with a poached egg, green leafy salad and a side of cherry tomatoes, red onion and some @stickybalsamic pearls. 

You could of course do so many things with these fritters. Serve with bacon, avocado, toast, smoked salmon, in a sandwich or wrap…the list is endless. 

Recipe below. I made them in my Thermomix but I have given directions for using a food processor. You could even just mix in a bowl. Just make sure you squeeze as much liquid as possible from the zucchini. You want the mixture to be quite firm so that you can almost shape them in the palm of your hand 🖐️ 

HEALHTY ZUCCHINI FRITTERS

Makes 8 

600g zucchinis
2 teaspoons salt, divided
100g grated mozzarella
50g grated light cheese
2 spring/green onions, roughly chopped
1/2 cup fresh parsley leaves
1/2 cup basil leaves
1 teaspoon dried oregano leaves
1 1/2 teaspoon garlic granules
1/2 teaspoon ground cumin
1/2 teaspoon pepper
1 egg
75g (1/2 cup) wholemeal self-raising flour
125g can corn kernels, drained

1 Grate the zucchini into a bowl. Add the 1 teaspoon of the salt and mix to combine. Transfer onto a clean tea towel, chux or cheesecloth and wring out to remove as much liquid as possible. (Squeeze this really well then squeeze again)

2 Place cheese, spring/green onions, parsley, basil, oregano, garlic granules, cumin, pepper and remaining salt into a food processor. Mix until throughly combined. 

3 Add the zucchini, egg and flour. Process until combined. Add the corn and fold through. The mixture should be quite firm . If it’s too wet, add some more flour. (you almost want to be able to shape them with your hands kinda firm).

4 Heat a drizzle of olive oil in a non-stick pan over medium heat. Add 4 heaped spoonful of the mixture and flatten with the back of a spatula. Cook for 4-5 minutes each side or until golden brown and cooked through. Repeat with remaining mixture and a little more oil. Cool on a wire rack  and serve as desired. 

#zucchinifritters #healthyfood #healthyzucchinifritters #fritters #zucchiniandcornfritters #poachedegg #easylunch #snacktime #feedmekate #foodandbeverageonly
Loaded Vietnamese Chicken & Soba Noodle Salad! I Loaded Vietnamese Chicken & Soba Noodle Salad!

I was craving a noodle salad yesterday so l did a fridge rummage and this baby was made! Was bloody delicious!

No recipe today as I literally just cooked some soba noodles and added whatever veggies, herbs and some poached chicken I had in the fridge, topped with noc cham dressing, sesame seeds, a few peanuts and chilli! Voila

Have a lovely Thursday 💕🌸💕

#vietnamesesalad #healthysalad #asiansalad #feedmekate #salad #foodandbeverageonly #poachedchickensalad #sobanoodles #edamame
WHITE BEAN SOUP WITH SPINACH & BACON - Healthy & L WHITE BEAN SOUP WITH SPINACH & BACON - Healthy & Low Fat! 

I usually make this soup with prosciutto but I didn’t have any so some very lean eye bacon did the trick! 

Perfect for lunches! I serve with a slice of my homemade chai sourdough bread 🥖 

Happy Monday Friends 😊

White Bean Soup with Prosciutto & Spinach

Serves 4
Prep 15 minutes
Cook 25 minutes 

1 tablespoon olive oil
1 red onion, diced
2 each carrots and celery sticks, diced
2 teaspoons each crushed garlic and fresh thyme leaves
100g prosciutto, fat trimmed, torn into bite size pieces OR lean bacon, chopped
400g can diced tomatoes
2 cups prepared vegetable stock
½ cup small pasta shapes
400g can cannellini beans, drained and rinsed (white beans)
2 cups baby spinach leaves
Harissa paste, to taste or chilli flakes

1 Heat olive oil in a large saucepan over medium high heat. Add onion, carrots, celery, garlic, thyme and prosciutto and cook, stirring, for 10 minutes or until well softened.
2 Add the tomatoes, stock and 2 cups water. Bring to the boil. Reduce heat and simmer for 5 minutes. Add the pasta and cook for a further 10 minutes or until pasta is justtender.
3. Remove from heat and stir through the spinach, cannellini beans and harissa paste to taste . Stand for 1 minute. Season to taste. Serve with fresh crunchy bread of choice. 

(I used a Smokey harissa paste which adds a spicy kick with a beautiful depth of flavour)

#whitebeans #cannellinibeans #cannellinibeansoup #healthysoups #lowfatsoup #lowfat #healthyfood #soups #spinach #babyspinach #feedmekate #foodsndbeverageonly #homecookcollective #soupsoupsoup #harissa
Healthy Thai Basil Beef Stir Fry What you’ll n Healthy Thai Basil Beef Stir Fry 

What you’ll need:

Serves 4
Time 20 min

2 tablespoons oyster sauce
1 tablespoon each kecap manis, soy sauce and fish sauce
2 teaspoons brown sugar
400g rump steak, trimmed of all visible fat, thinly sliced
3 cloves garlic, finely diced
1 long red chilli, cut into thick slices, optional
3 spring/green onions, cut into 4cm lengths 
1/2 each red and yellow capsicum , thinly sliced
1 cup each chopped green beans and broccoli florets
1 cup Thai basil leaves

1 Combine oyster sauce, kecap manis, soy, fish sauce, brown sugar and 1 tablespoon water in a small bowl stirring until sugar has dissolved. Set aside. 
2 Heat a wok over high heat and spray lightly with oil. Add half the beef, stir-fry for 1-2 min or until just browned. Transfer to a bowl and repeat with remaining beef. Set aside.
3 Spray wok again with oil, add the garlic, spring/green onions and capsicum, stir-fry for 2 min. Add the beans, broccoli and 2 tablespoons water, stir-fry for 1-2 min. Return beef to wok along with any juices and add the sauce. Stir-fry for a further 1 min. Remove from heat and stir through the Thai basil. Serve with cooked brown  rice. Garnish with extra fresh Thai basil leaves.


Happy Sunday ☀️ 

#thaibasil #thaibasilbeef #thairecipes #healthy #lowfat #healthyrecipe #beef #stirfry #stirfryrecipe #healthyeating #feedmekate #foodandbeverageonly
Spiced Salmon with Couscous, Vegetables and Balsam Spiced Salmon with Couscous, Vegetables and Balsamic Pearls. 

This was such a healthy and delicious dinner!

I pretty much had a fridge raid on my vegetable drawer! I roasted some cauliflower, zucchini, red onion and capsicum and also did some steamed greens 🥦 

For the salmon , I made a dry rub with smoked paprika, garlic powder, onion powder, chilli flakes, brown sugar, dried oregano and S & P.  I lightly oiled the fish then sprinkled the rub over to coat. Baked in a 180C air fryer for 6 minutes! 

I served all this with @ainsleyfoodscompany Moroccan medley couscous, a light sprinkle of crumbled feta and topped it off with the lovely  @stickybalsamic balsamic pearls for a burst of flavour in every bite!! (See Link in bio)

It was a cracker of a dish my friends 💚🍣

Have. fabulous Friday 🥂 😁

#affiliate #stickybalsamicpearls #healthyeating #salmondinner #couscous #roastedveggies #airfryerrecipes #spices #feedmekate #homecookcollective #bowlfood #lowfatdinner #salmon #atlanticsalmon #balsamic #stickybalsamic
Follow Me!
  • About
  • Contact
  • Image Policy
  • Privacy Policy

Copyright © 2025 Feed Me Kate · Theme by 17th Avenue