
This Is Not Your Average Carrot Soup
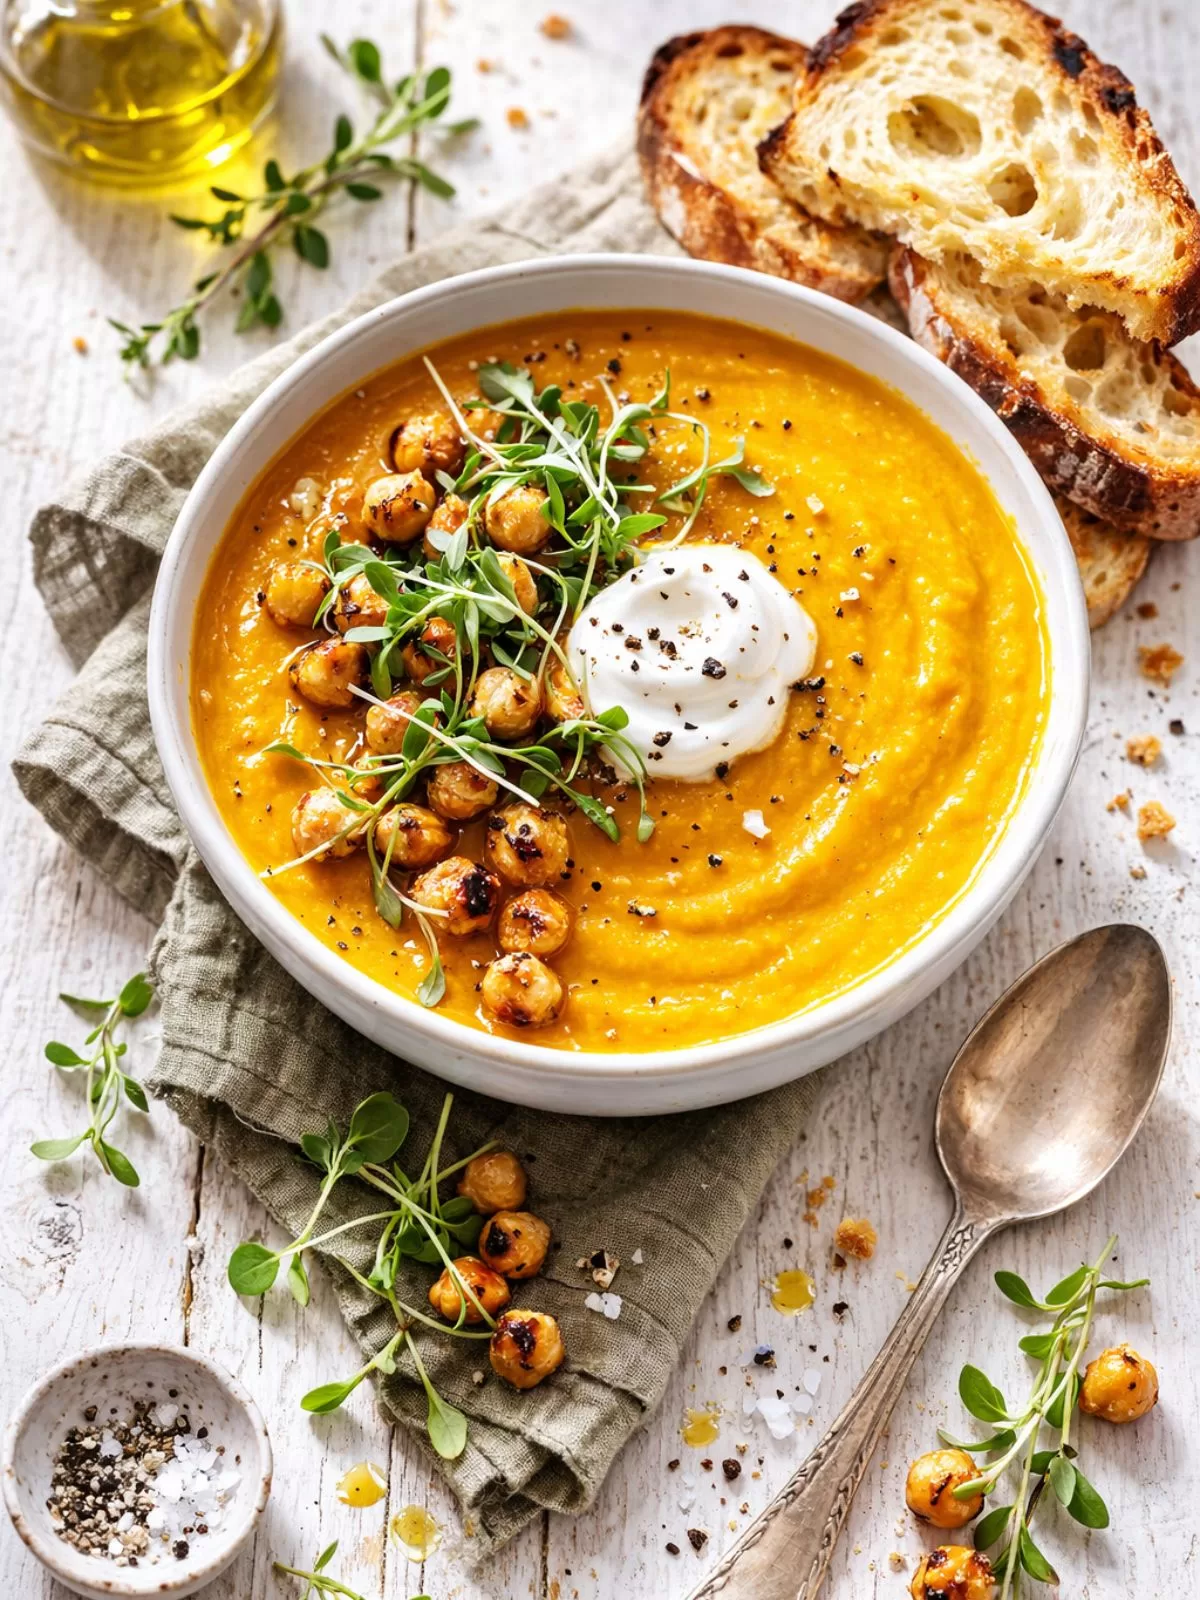
If you think carrot soup is bland, this Creamy Roasted Carrot Soup with Crispy Chickpeas is about to change your mind. Roasting the carrots brings out their natural sweetness and creates a depth of flavour you simply don’t get from boiling, while warm spices add comfort and richness to every spoonful. Finished with golden, crispy chickpeas for the perfect crunch, this is the kind of nourishing, budget friendly bowl that feels cosy enough for winter but light enough to enjoy any time of year.
There is something magical about what roasting does to vegetables, and this roasted carrot soup is proof. As the carrots caramelise in the oven, their natural sweetness deepens and the flavour becomes richer and more complex. It is a simple step that completely transforms what could be an ordinary carrot soup into something far more satisfying.
Then come the crispy chickpeas. That little bit of crunch on top adds texture and turns this into a bowl that feels hearty and interesting, not just smooth and one note. It is easy, nourishing and made from everyday ingredients, but it tastes like so much more.
Why You’ll Love This Creamy Carrot Soup
- Big flavour from simple ingredients – Roasting the carrots brings out their natural sweetness and creates a depth of flavour that makes this roasted carrot soup taste far more complex than it actually is.
- Creamy without cream – The blended carrots and chickpeas create a silky texture, so you get a rich, comforting soup without needing any actual cream.
- Budget friendly and pantry based – Made with everyday vegetables, warm spices and a tin of chickpeas, this is an affordable meal that still feels special.
- Perfect for meal prep – This carrot soup reheats beautifully, making it ideal for work lunches or easy weeknight dinners.
- Texture that keeps it interesting – Those crispy chickpeas on top add the perfect crunch, turning a simple bowl of soup into something that feels hearty and satisfying.
- Naturally vegetarian with easy vegan options – Just skip the yoghurt or use a dairy free alternative and you have a completely plant based meal.
Ingredients You’ll Need
This Creamy Roasted Carrot Soup with Crispy Chickpeas is made with simple, everyday ingredients you probably already have on hand. Sweet carrots are the star, supported by warm spices, aromatics and a good vegetable stock to build depth. The chickpeas do double duty, adding body to the soup and crunch on top, while a spoonful of yoghurt and fresh herbs at the end brings everything together beautifully.
Tips for the Best Roasted Carrot Soup
- Cut the carrots evenly
Similar sized pieces help them roast at the same rate so you get caramelised edges, not burnt bits. - Take your time with the aromatics
Cooking the onion, garlic, ginger and spices properly builds the base flavour of the soup. Do not rush this step. - Use good quality vegetable stock
Stock is the backbone of any soup. A flavourful stock makes a noticeable difference. - Blend until completely smooth
For that silky texture, blend thoroughly. A stick blender works beautifully, but a high speed blender will make it extra smooth. - Dry the chickpeas well before frying
Pat them dry so they crisp up properly in the pan instead of steaming. - Season at the end
Taste and adjust salt and pepper after blending. The flavours concentrate as the soup cooks. - Let it rest briefly before serving
Giving the soup a few minutes to sit allows the flavours to settle and deepen.

Serving Suggestions
This Creamy Roasted Carrot Soup with Crispy Chickpeas is beautiful served simply with a swirl of Greek style yoghurt or sour cream, a drizzle of good olive oil and a sprinkle of fresh herbs. For extra brightness, add a little lemon zest or a squeeze of lemon juice just before serving. It is perfect with thick slices of toasted sourdough for dipping, or you can make it more substantial with a handful of toasted seeds, crunchy croutons or even a spoonful of diced avocado on top.
Storage
Fridge:
Allow the roasted carrot soup to cool completely before transferring to an airtight container. It will keep well in the fridge for up to 4 days and actually tastes even better the next day as the flavours continue to develop.
Freezer:
This soup freezes beautifully. Once cooled, portion into freezer safe containers or zip lock bags, label and freeze for up to 3 months. Thaw overnight in the fridge before reheating gently on the stovetop or in the microwave.
If you make this Creamy Roasted Carrot Soup with Crispy Chickpeas, I would love to hear what you think. Leave a comment below and let me know how it turned out, or if you added your own twist. Your feedback genuinely helps other readers and I always love seeing your creations.
More Soup Recipes:
- Creamy Thai Panang Pumpkin Soup
- Hearty Chicken & Vegetable Quinoa Soup (One-Pot)
- Hearty Chicken Soup with Ancient Grains, Barley and Freekeh
- Easy Homemade Wonton Noodle Soup

Creamy Roasted Carrot Soup with Crispy Chickpeas
Ingredients
- 1kg carrots, peeled, havled lengthways and cut into 5cm pieces
- 2 ½ tablespoons olive oil
- 1 onion, diced
- 2 cloves garlic, chopped
- 2cm piece ginger, grated
- 1 teaspoon each of ground cumin and ground coriander
- ½ teaspoon ground turmeric
- pinch of ground cinnamon
- 6 cups liquid vegetable stock
- 400g can chickpeas, drained
TO SERVE
- Greek style natural yoghurt or sour cream
- Chopped coriander, parsley or micro-greens
- Sourdough toast or other toast
Instructions
- Preheat oven to 200℃ (180℃ fan forced). Line a baking tray with baking paper. Toss carrots with 1 tablespoon of the olive oil and season with salt and pepper. Transfer to the baking tray and bake in the oven for 40-45 minutes or until tender and lightly golden around the edges.
- Heat a further 1 tablespoon of the olive oil in a large saucepan over medium heat. Add the onion and cook, stirring often for 5 minutes. Add the garlic, ginger, cumin, coriander, turmeric and cinnamon, cook, stirring for 1 minute.
- Add the roasted carrots to the pan, vegetable stock and half the chickpeas. Bring to the boil then reduce heat to medium-low and simmer for 15 minutes. Remove from heat.
- Using a hand held blender, blend soup until smooth. Alternately, let cool slightly then blend in a food processor or blender. Season to taste with cracked black pepper. Set aside.
- Pat the remaining chickpeas dry with paper towel. Heat remaining 2 teaspoons olive oil in a small frying pan over high heat. Add the chickpeas and cook until lightly golden. Season to taste. Ladle soup into bowls and garnish with toasted chickpeas, a dollop of yoghurt or sour cream and a drizzle olive oil. Garnish with herbs and serve with toasted sourdough.
Notes
- Oven Temps: Oven temperatures are for conventional ovens. If using fan forced (convection), reduce the temperature by 20°C.
- Measurements: We use Australian tablespoons and cups: 1 teaspoon = 5 ml, 1 tablespoon = 20 ml and 1 cup = 250 ml.
- Herbs: All herbs are fresh unless specified and cups are lightly packed.
- Vegetables: All vegetables are medium size and peeled unless specified.
- Eggs: We use extra large eggs (55 to 60 g each) unless specified.
- Lemon: A squeeze of fresh lemon juice stirred through before serving adds brightness.
- Butter: Stirring through 1 to 2 tablespoons of butter after blending gives the soup an extra silky finish.
- Fridge: Store cooled soup in an airtight container for up to 4 to 5 days.
- Freezer: Freeze for up to 3 months. Thaw overnight in the fridge before reheating gently.
- Reheating: Warm slowly on the stovetop or in the microwave, stirring occasionally until heated through.


Leave a Reply