person drinking wine
Hello! I'm Kate.
  • About
  • Contact
  • Image Policy
  • Privacy Policy
  • HOME
  • ABOUT
  • ALL RECIPES
  • Categories
    • Breakfast & Brunch
    • Appetisers & Dips
    • Condiments & Sauces
    • Meat & Poultry
    • Seafood
    • Pasta
    • Salads & Sides
    • Chinese
    • Curries
    • Soups
    • Sweets
    • Vegetables
  • CONTACT

Feed Me Kate

A collection of delicious recipes from my table to yours

Home » Categories » Salads & Sides » Red Cabbage Salad with Honey Lime Dressing

Salads & Sides · July 5, 2023

Red Cabbage Salad with Honey Lime Dressing

Jump to Recipe Print Recipe

Elevate your next Mexican or BBQ Night with the vibrant and flavourful slaw featured in this Red Cabbage Salad with Honey Lime Dressing recipe. Ideal for pairing with tacos, wraps, quesadillas, burrito bowls, burgers, and grilled fish or meats, this dish is not only quick and easy to prepare but also offers a healthy and nutritious option that stays fresh in the fridge for days!

Red Cabbage Salad with Honey Lime Dressing in a bowl with spoon on a tea towel

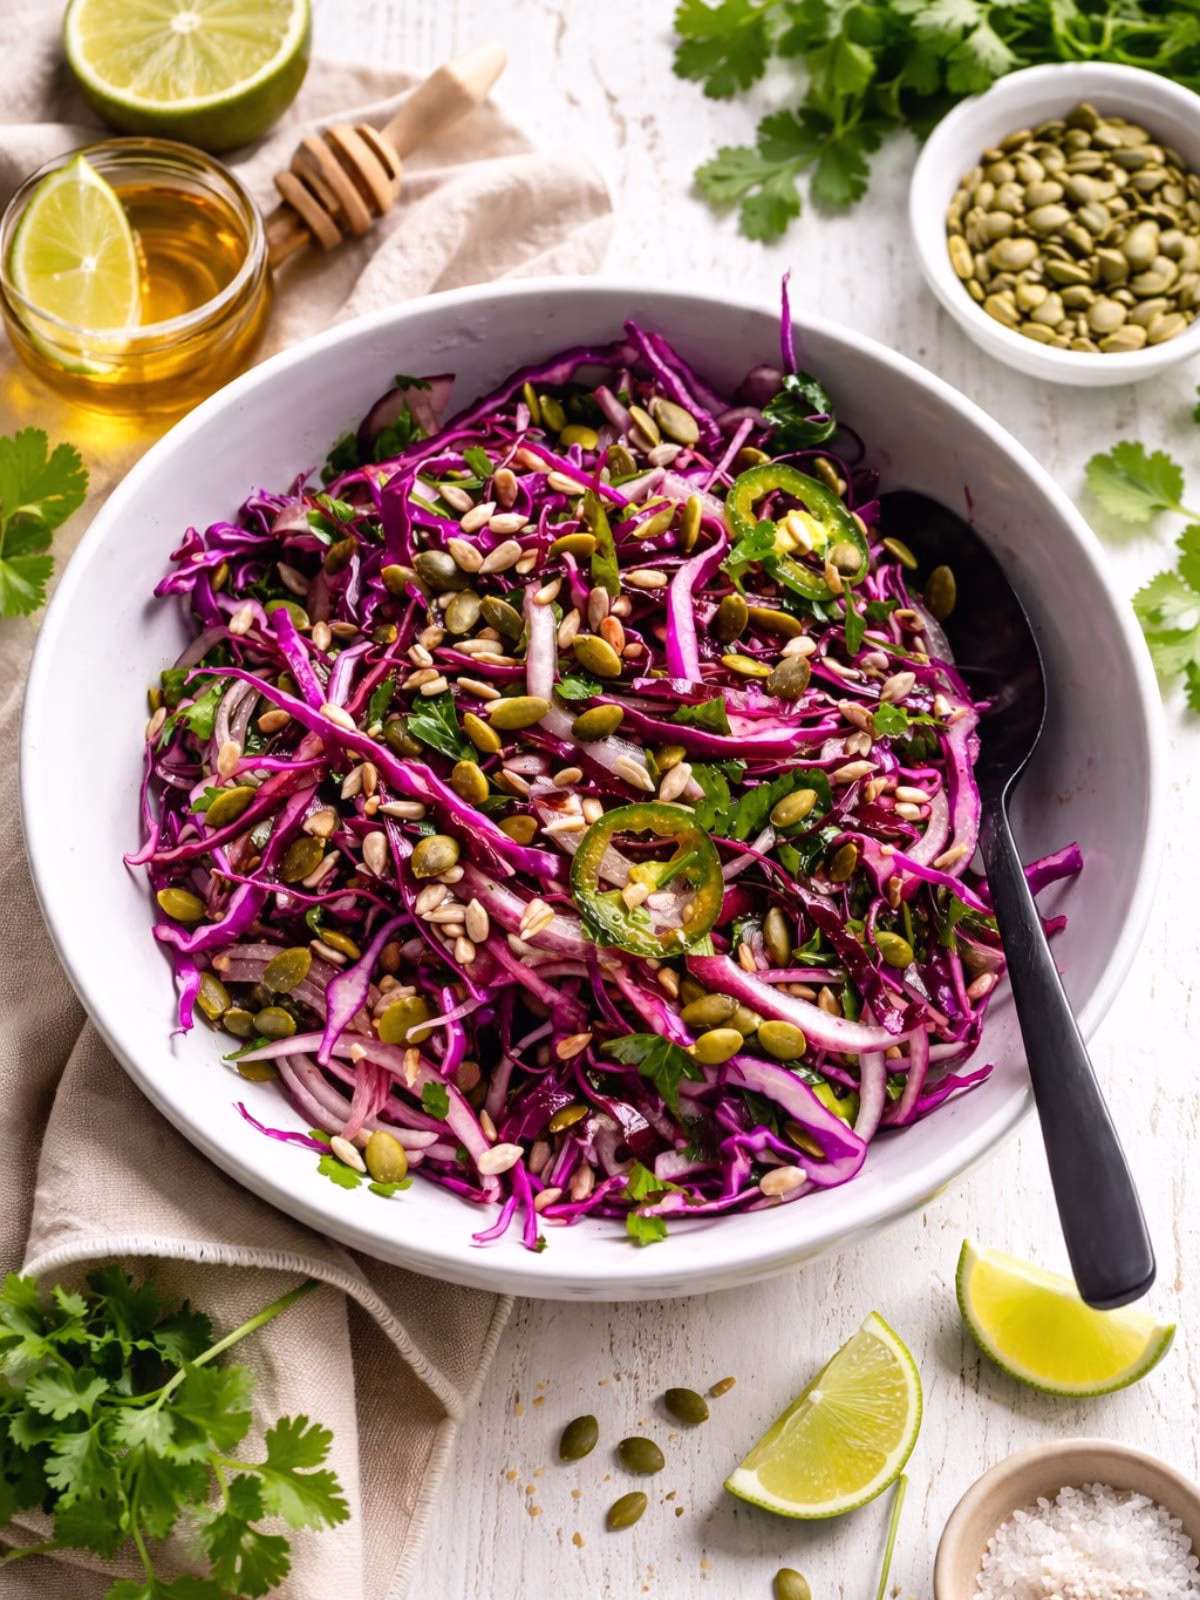
Prepare to make a statement at your next meal with this quick and easy Red Cabbage Salad with Honey Lime Dressing. Ready in under 10 minutes, it’s a versatile side dish that adds a burst of flavour and crunch to your mid-week meals.

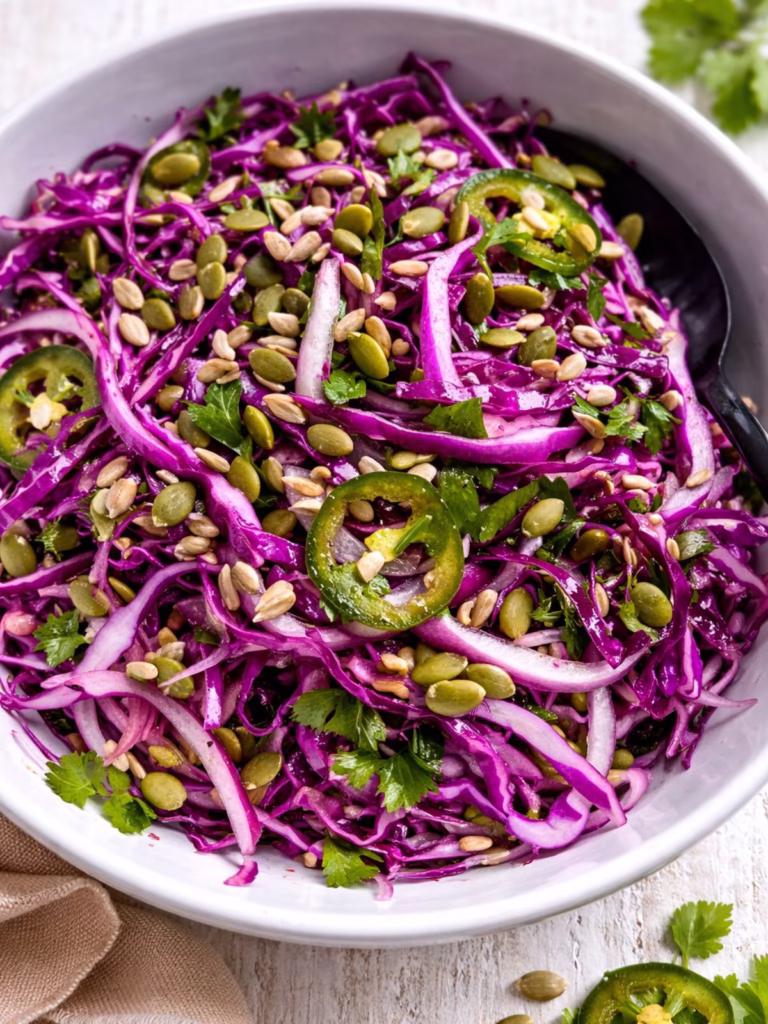
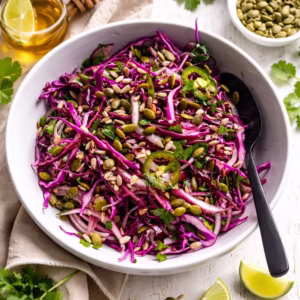
This non-creamy slaw showcases the vibrancy and distinct taste of its ingredients, offering a delightful combination of crunch, texture, freshness, and zinginess in every bite.

How to make

You can have this salad on the table within 10 minutes flat! I always make extra and pop into a zip-lock bag (without dressing) and it keeps in the fridge for about 1 week.

slaw ingredients in a bowl ready to be tossed
Slaw ingredients in a bowl tossed together
ingredients in a bowl tossed together
Honey lime dressing in a small glass jar with a whisk in it

Serving suggestions

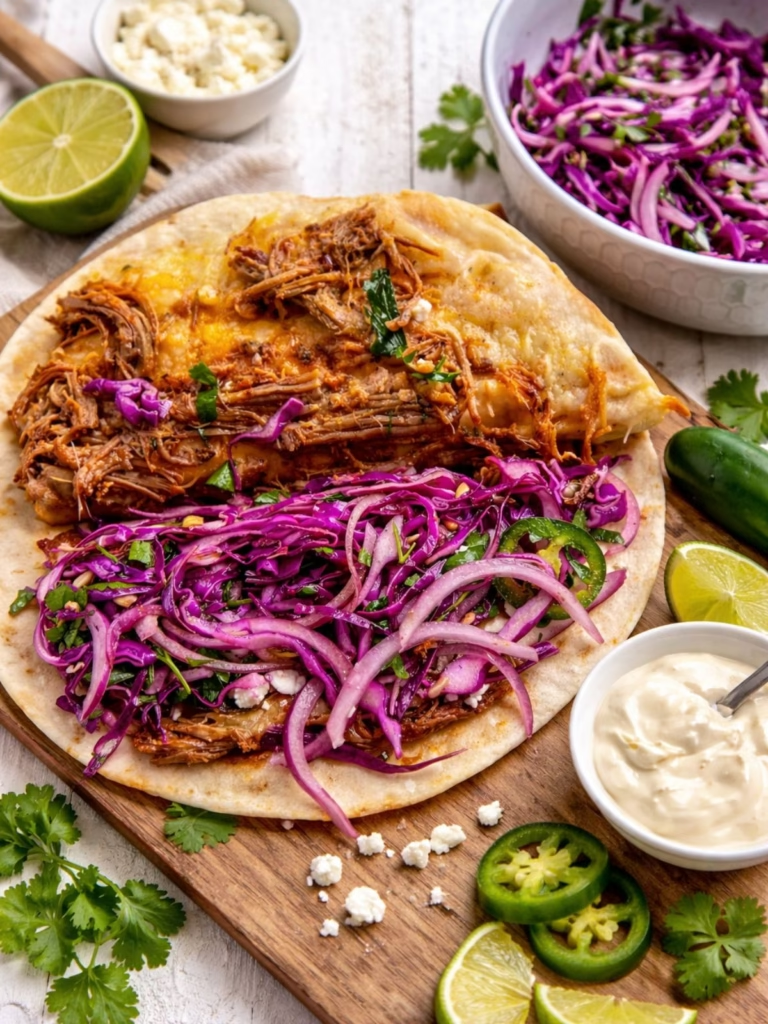
The salad goes particularly well with Mexican food like tacos, burritos or quesadillas but is equally good with grilled meats, poultry and fish as a side. I used this salad with whole baked fish for dinner and it was amazing!

  • Tacos: Whether you prefer hard or soft tacos, this salad is a fantastic topping for an extra burst of flavour and texture.
  • Burritos: Add this slaw to your rolled burritos or enjoy it as part of a burrito bowl.
  • Quesadillas: Elevate your quesadillas by placing this cabbage salad inside for a delightful textural crunch.
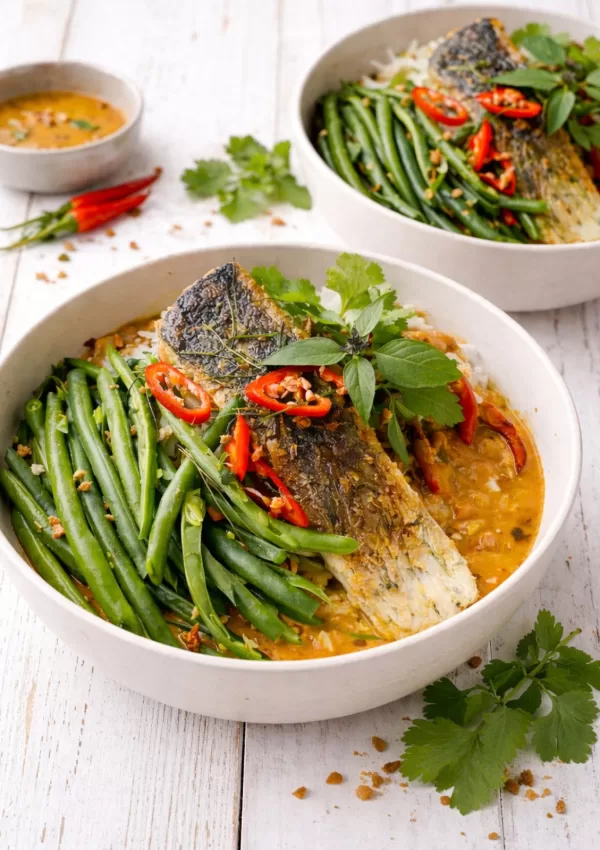
  • Side Salad: Serve as a refreshing side salad with grilled meats, poultry, or fish.
  • Burgers: Use it as a filling for your pulled pork or brisket burgers instead of traditional creamy coleslaw.
  • Chilli: Pair with chilli and beans for a satisfying crunch and zingy flavour.
  • Enjoy on its own: The perfect quick bite for lunch!
Pulled pork quesadilla with on a wooden board
Red Cabbage Salad served inside Pulled Pork Quesadillas

Storage

The salad will keep for up to 1 week in the fridge without the dressing or seeds. Once dressed its best served within 30 minutes for the ultimate crunch. It’s still ok to eat after this time but it just won’t be quite as crunchy.

The best way I find is to store the salad in a zip-lock bag. Squeeze as much air out of the bag as possible before sealing as it will keep it fresher for longer when not exposed to air. Store in the refrigerator for up to 1 week. When ready to serve, pop into a bowl, add dressing and seeds and toss to coat.

The dressing will keep for 1 week or longer in the fridge. Store in a screw-top jar or air tight container. Bring to room temperature before using.

red cabbage salad in bowl with a serving spoon
red cabbage salad in a white bowl with black spoon on a beige napkin

Red Cabbage Salad with Honey Lime Dressing

This quick and easy Red Cabbage Salad with Honey Lime Dressing will be the star of your next meal. It's takes less than 10 minutes to prepare an its handy to have ready in the fridge to serve as a side dish for your mid-week meals. The salad is light, refreshing, crunchy, colourful and a little bit spicy not to mention pretty healthy too!
Print Recipe Pin Recipe
Prep Time:10 minutes mins
Cook Time:0 minutes mins
Total Time:10 minutes mins
Course: Salad, Side Dish
Cuisine: Mexican, Western
Keyword: Cabbage Salad, Mexican Slaw
Servings: 6
Calories: 193kcal
Author: Kate Brodhurst

Ingredients

  • ½ red cabbage, finely shredded (about 6 cups)
  • 1 red onion, finely sliced
  • 1 cup parsley leaves, roughly chopped
  • 1 jalapeno, finely sliced (deseeded if desired)
  • 2 tablespoons pepitas
  • 2 tablespoons sunflower seeds

HONEY LIME DRESSING

  • ¼ cup olive oil
  • 2 tablespoons fresh lime juice
  • 1 tablespoon honey
  • ½ teaspoon ground cumin
  • Salt and pepper, to taste

Instructions

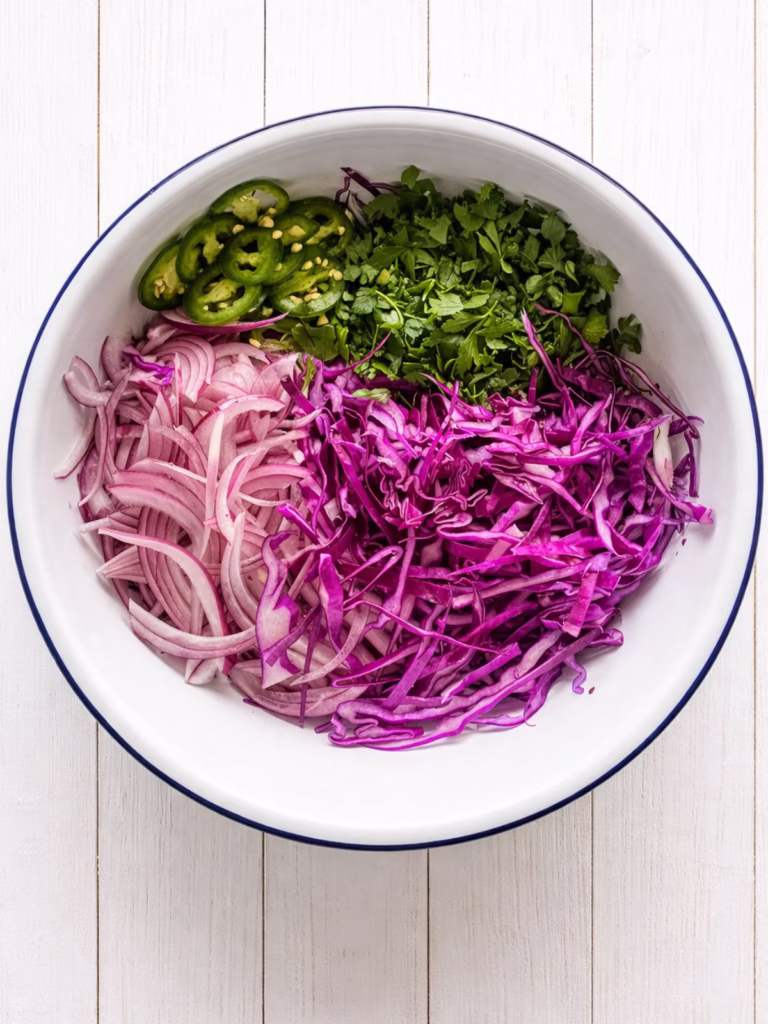
  • Combine the red cabbage, red onion, parsley and jalapenos in a large bowl. Toss to combine.
  • Add the Honey & Lime Dressing and toss to coat. Transfer to a serving bowl or plate and sprinkle with the pepitas and sunflower seeds. Serve immediately.
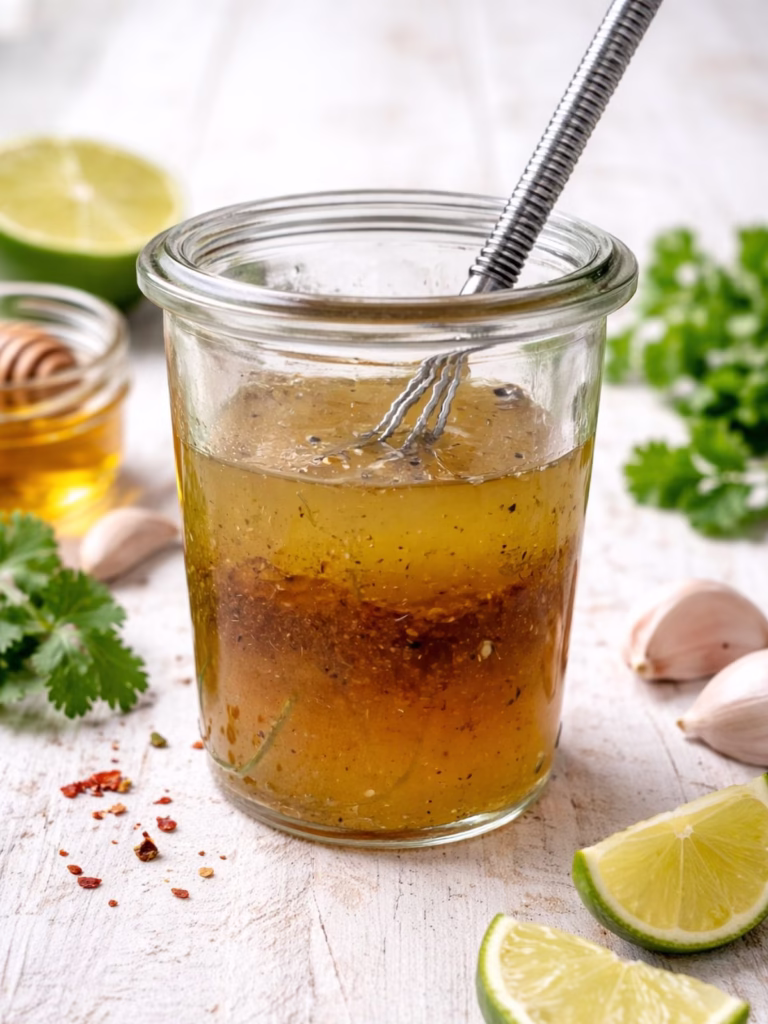
HONEY LIME DRESSING

  • Place all ingredients into a screw-top jar or bowl and shake or whisk until well combined.

Notes

  • COOKS NOTES:
    Oven Temps: 
    Oven temperatures are for conventional, if using fan-forced (convection), reduce the temperature by 20˚C.
    Measurements: We use Australian tablespoons and cups: 1 teaspoon = 5 ml, 1 tablespoon = 20 ml & 1 cup =  250 ml.
    Herbs: All herbs are fresh (unless specified) and cups are lightly packed.
    Vegetables: All vegetables are medium size and peeled, unless specified.
    Eggs: We use extra-large size and eggs are 55-60 g each, unless specified.
  • CABBAGE
    Opt for green cabbage if that’s your preference. Select a sturdy green cabbage, but avoid using Wombok cabbage, as its texture is too soft for this recipe.
  • JALAPENOS
    Remove the seeds from the jalapeños for the salad if you prefer. Assess their heat level by tasting them first; jalapeños can vary in spiciness. Adjust the quantity based on your personal preference for heat.

You may also enjoy

  • Mexican Chilli Beef
  • Easy 5 Ingredient Guacamole
  • Pice De Gallo

Loading

Posted In: Salads & Sides

Get on the List

You’ll Also Love

naan bread on tea towelThe Easiest Garlic Naan Bread Ever
chipotle chicken in bowlChipotle Chicken & Grain Bowls (with Mexican slaw)
Creamy Potato & Pumpkin Bake a dish with spoonCreamy Potato & Pumpkin Bake

Leave a Reply Cancel reply

Your email address will not be published. Required fields are marked *

Recipe Rating


Next Post >

The Best Scrambled Eggs

About Photo
Hi there! I'm Kate, an avid food lover and cooking enthusiast. Join me on a global culinary adventure as I whip up a storm with my favourite dishes from around the world. From my kitchen to yours, discover easy, delicious, and sometimes unique recipes that might just become your new favourites!

Stay Updated

Search

EXPLORE CATEGORIES

  • Appetisers & Dips
  • Breakfast & Brunch
  • Chinese
  • Condiments & Sauces
  • Curries
  • Meat & Poultry
  • Pasta
  • Salads & Sides
  • Seafood
  • Soups
  • Sweets
  • Vegetables

Trending Now

hey there!

I'm eager to hear about your culinary creations! If you've tried a recipe from Feed Me Kate, please share your thoughts and suggestions in the comments section below each recipe. Your feedback is greatly appreciated. Thanks for visiting! Cheers, Kate x

BROWSE BY COURSE

  • Breakfast & Brunch
  • Appetisers & Dips
  • Condiments & Sauces
  • Meat & Poultry
  • Seafood
  • Salads & Sides
  • Vegetables
  • Pasta
  • Soups
  • Sweets

Latest on Instagram

Penang Chicken Curry!! Been a bit cold and windy Penang Chicken Curry!!

Been a bit cold and windy here the last 2 days so a curry was definitely on the table!! 

So easy and delicious to whip up. I love all Thai curries but Penang is my partners absolute fave so this was for him!! I of course add heaps of chilli to mine as I like a good kick 🌶️ 

Have a fab Friday and an awesome weekend!! 😎💜😊

#penang #chickenpenang #chickencurry #thaicurry #thaipenang #kaffirlimeleaves #chilli #chickendinner #easycurry #currypaste #coconutcream #feedmekate
Asian Pork & Broccolini Bowls ✨RECIPE✨ These Asian Pork & Broccolini Bowls ✨RECIPE✨

These pork bowls are SOOOO quick and easy to make and everyone, including the kids will enjoy it!

Not a fan of pork? Simply swap the pork mince out for extra lean beef, chicken or turkey!  You could also swap the broccolini out for snow peas, more green beans, Asian greens, zucchini or regular broccoli. 🥦 Simply use what’s you have or what your family enjoys! It’s very versatile - leave the chilli 🌶️ out or add more depending on your heat tolerance. 😎

Have a Happy day 🌺🌈

RECIPE ⬇️

Asian Pork & Broccolini Bowls
 
INGREDIENTS: - Serves 4

1 tablespoon oil
3 cloves garlic, finely chopped 
1/2 long red chilli, deseeded and finely chopped (Optional)
500g Extra Lean pork mince (or your choice of mince)
2 bunches broccolini, cut into 3cm lengths
1 cup chopped green beans
2 spring onions, cut into 3cm lengths

STIR-FRY SAUCE:
1/4 cup oyster sauce
1/4 cup water
1 tablespoon kecap manis
1 tablespoon soy sauce
2 teaspoons sesame oil
2 teaspoons brown sugar or honey
2 teaspoons cornflour

TO SERVE:
Cooked rice of choice 
Finely shredded carrot
Spring onions, sliced, extra to garnish
Herb to garnish if desired (I used some Thai basil as that’s what I had)

1 Combine Stir-Fry Sauce ingredients in a jug or bowl until throughly combined. Set aside.
2 Heat oil in a large frying pan over medium high heat. Add the garlic and chilli (if using) and cook for 30 seconds. Crumble in the pork mince then cook, breaking up with a spoon for 5 minutes or until cooked through. 
3 Add the broccolini and green beans. Cook, stirring for 2 minutes or until just starting to soften. Add the prepared Stir-Fry Sauce and the spring onions and cook for a further 1-2 minutes or until vegetables are just soft (but still a little crunchy) and the sauce has thickened.
4 Serve with rice and garnish with shredded carrot, extra spring onions, sliced red chilli (if using) and a sprig of herbs. Enjoy 😊 

#asianbowl #healthypork #highprotein #quickdinner #mincerecipe #oystersauce #porkstirfry #easymealprep #feedmekate #foodandbeverageonly #homecookcollective #healthiermeals
HEALTHY ZUCCHINI FRITTERS Recipe! This was lunch HEALTHY ZUCCHINI FRITTERS Recipe! 

This was lunch yesterday! Couple of my zucchini fritters with a poached egg, green leafy salad and a side of cherry tomatoes, red onion and some @stickybalsamic pearls. 

You could of course do so many things with these fritters. Serve with bacon, avocado, toast, smoked salmon, in a sandwich or wrap…the list is endless. 

Recipe below. I made them in my Thermomix but I have given directions for using a food processor. You could even just mix in a bowl. Just make sure you squeeze as much liquid as possible from the zucchini. You want the mixture to be quite firm so that you can almost shape them in the palm of your hand 🖐️ 

HEALHTY ZUCCHINI FRITTERS

Makes 8 

600g zucchinis
2 teaspoons salt, divided
100g grated mozzarella
50g grated light cheese
2 spring/green onions, roughly chopped
1/2 cup fresh parsley leaves
1/2 cup basil leaves
1 teaspoon dried oregano leaves
1 1/2 teaspoon garlic granules
1/2 teaspoon ground cumin
1/2 teaspoon pepper
1 egg
75g (1/2 cup) wholemeal self-raising flour
125g can corn kernels, drained

1 Grate the zucchini into a bowl. Add the 1 teaspoon of the salt and mix to combine. Transfer onto a clean tea towel, chux or cheesecloth and wring out to remove as much liquid as possible. (Squeeze this really well then squeeze again)

2 Place cheese, spring/green onions, parsley, basil, oregano, garlic granules, cumin, pepper and remaining salt into a food processor. Mix until throughly combined. 

3 Add the zucchini, egg and flour. Process until combined. Add the corn and fold through. The mixture should be quite firm . If it’s too wet, add some more flour. (you almost want to be able to shape them with your hands kinda firm).

4 Heat a drizzle of olive oil in a non-stick pan over medium heat. Add 4 heaped spoonful of the mixture and flatten with the back of a spatula. Cook for 4-5 minutes each side or until golden brown and cooked through. Repeat with remaining mixture and a little more oil. Cool on a wire rack  and serve as desired. 

#zucchinifritters #healthyfood #healthyzucchinifritters #fritters #zucchiniandcornfritters #poachedegg #easylunch #snacktime #feedmekate #foodandbeverageonly
Loaded Vietnamese Chicken & Soba Noodle Salad! I Loaded Vietnamese Chicken & Soba Noodle Salad!

I was craving a noodle salad yesterday so l did a fridge rummage and this baby was made! Was bloody delicious!

No recipe today as I literally just cooked some soba noodles and added whatever veggies, herbs and some poached chicken I had in the fridge, topped with noc cham dressing, sesame seeds, a few peanuts and chilli! Voila

Have a lovely Thursday 💕🌸💕

#vietnamesesalad #healthysalad #asiansalad #feedmekate #salad #foodandbeverageonly #poachedchickensalad #sobanoodles #edamame
WHITE BEAN SOUP WITH SPINACH & BACON - Healthy & L WHITE BEAN SOUP WITH SPINACH & BACON - Healthy & Low Fat! 

I usually make this soup with prosciutto but I didn’t have any so some very lean eye bacon did the trick! 

Perfect for lunches! I serve with a slice of my homemade chai sourdough bread 🥖 

Happy Monday Friends 😊

White Bean Soup with Prosciutto & Spinach

Serves 4
Prep 15 minutes
Cook 25 minutes 

1 tablespoon olive oil
1 red onion, diced
2 each carrots and celery sticks, diced
2 teaspoons each crushed garlic and fresh thyme leaves
100g prosciutto, fat trimmed, torn into bite size pieces OR lean bacon, chopped
400g can diced tomatoes
2 cups prepared vegetable stock
½ cup small pasta shapes
400g can cannellini beans, drained and rinsed (white beans)
2 cups baby spinach leaves
Harissa paste, to taste or chilli flakes

1 Heat olive oil in a large saucepan over medium high heat. Add onion, carrots, celery, garlic, thyme and prosciutto and cook, stirring, for 10 minutes or until well softened.
2 Add the tomatoes, stock and 2 cups water. Bring to the boil. Reduce heat and simmer for 5 minutes. Add the pasta and cook for a further 10 minutes or until pasta is justtender.
3. Remove from heat and stir through the spinach, cannellini beans and harissa paste to taste . Stand for 1 minute. Season to taste. Serve with fresh crunchy bread of choice. 

(I used a Smokey harissa paste which adds a spicy kick with a beautiful depth of flavour)

#whitebeans #cannellinibeans #cannellinibeansoup #healthysoups #lowfatsoup #lowfat #healthyfood #soups #spinach #babyspinach #feedmekate #foodsndbeverageonly #homecookcollective #soupsoupsoup #harissa
Healthy Thai Basil Beef Stir Fry What you’ll n Healthy Thai Basil Beef Stir Fry 

What you’ll need:

Serves 4
Time 20 min

2 tablespoons oyster sauce
1 tablespoon each kecap manis, soy sauce and fish sauce
2 teaspoons brown sugar
400g rump steak, trimmed of all visible fat, thinly sliced
3 cloves garlic, finely diced
1 long red chilli, cut into thick slices, optional
3 spring/green onions, cut into 4cm lengths 
1/2 each red and yellow capsicum , thinly sliced
1 cup each chopped green beans and broccoli florets
1 cup Thai basil leaves

1 Combine oyster sauce, kecap manis, soy, fish sauce, brown sugar and 1 tablespoon water in a small bowl stirring until sugar has dissolved. Set aside. 
2 Heat a wok over high heat and spray lightly with oil. Add half the beef, stir-fry for 1-2 min or until just browned. Transfer to a bowl and repeat with remaining beef. Set aside.
3 Spray wok again with oil, add the garlic, spring/green onions and capsicum, stir-fry for 2 min. Add the beans, broccoli and 2 tablespoons water, stir-fry for 1-2 min. Return beef to wok along with any juices and add the sauce. Stir-fry for a further 1 min. Remove from heat and stir through the Thai basil. Serve with cooked brown  rice. Garnish with extra fresh Thai basil leaves.


Happy Sunday ☀️ 

#thaibasil #thaibasilbeef #thairecipes #healthy #lowfat #healthyrecipe #beef #stirfry #stirfryrecipe #healthyeating #feedmekate #foodandbeverageonly
Spiced Salmon with Couscous, Vegetables and Balsam Spiced Salmon with Couscous, Vegetables and Balsamic Pearls. 

This was such a healthy and delicious dinner!

I pretty much had a fridge raid on my vegetable drawer! I roasted some cauliflower, zucchini, red onion and capsicum and also did some steamed greens 🥦 

For the salmon , I made a dry rub with smoked paprika, garlic powder, onion powder, chilli flakes, brown sugar, dried oregano and S & P.  I lightly oiled the fish then sprinkled the rub over to coat. Baked in a 180C air fryer for 6 minutes! 

I served all this with @ainsleyfoodscompany Moroccan medley couscous, a light sprinkle of crumbled feta and topped it off with the lovely  @stickybalsamic balsamic pearls for a burst of flavour in every bite!! (See Link in bio)

It was a cracker of a dish my friends 💚🍣

Have. fabulous Friday 🥂 😁

#affiliate #stickybalsamicpearls #healthyeating #salmondinner #couscous #roastedveggies #airfryerrecipes #spices #feedmekate #homecookcollective #bowlfood #lowfatdinner #salmon #atlanticsalmon #balsamic #stickybalsamic
Follow Me!
  • About
  • Contact
  • Image Policy
  • Privacy Policy

Copyright © 2025 Feed Me Kate · Theme by 17th Avenue