
Easy Macadamia Shortbread Made in a Food Processor
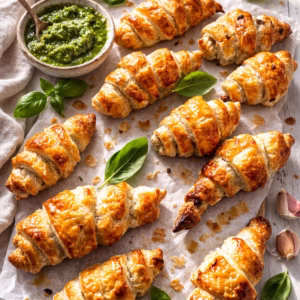
Chocolate Drizzled Macadamia Shortbread Fingers deliver rich, buttery shortbread with crisp edges and a delicate crumb. Ground macadamias add a subtle nutty flavour while a drizzle of chocolate finishes each piece. The dough comes together quickly in a food processor with simple pantry ingredients. No creaming, no rolling, and no complicated steps. A simple shortbread recipe perfect for afternoon tea or gifting.
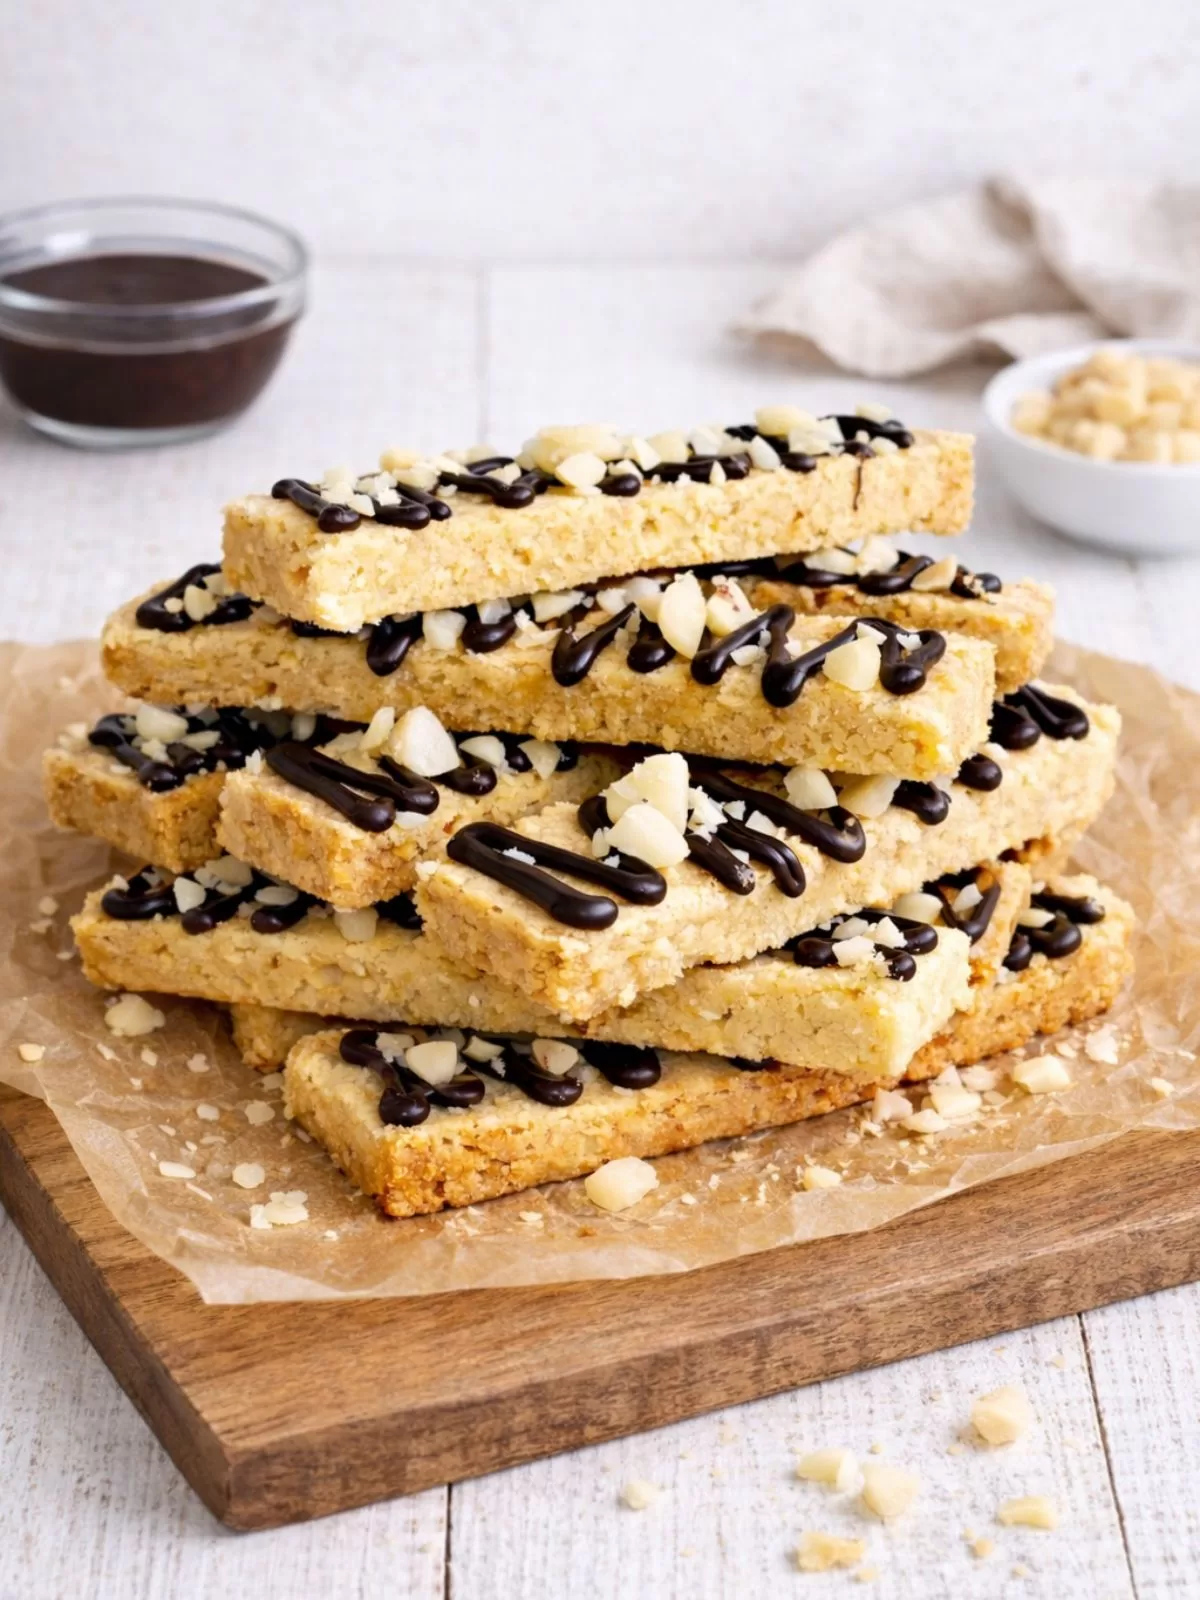
Macadamia shortbread brings a rich, buttery biscuit with a delicate crumb. The macadamia nuts add natural creaminess and a subtle nutty flavour that works beautifully with the shortbread base. A drizzle of dark chocolate finishes the biscuits with a touch of sweetness. These macadamia shortbread fingers work well for afternoon tea, holiday baking, or sharing with friends.
What is Shortbread?
Shortbread is a traditional buttery biscuit that originated in Scotland. It uses a simple ratio of butter, sugar, and flour to create a rich dough that bakes into a crisp, tender biscuit. Unlike many cookies, shortbread contains no eggs or raising agents, which gives it its classic dense, melt in your mouth texture. In this version, ground macadamias add a subtle nutty flavour while a drizzle of chocolate finishes the shortbread fingers.
Why You’ll Love This Recipe
- Made in a food processor: No creaming, no rolling, and minimal washing up.
- Classic buttery shortbread texture: Crisp edges with a delicate melt in your mouth crumb.
- Packed with macadamias: Adds a creamy crunch and subtle nutty flavour.
- Chocolate drizzle: Dark chocolate adds a rich finish to each shortbread finger.
- Great for sharing: Makes a generous batch for gatherings or gifting.
- Perfect with tea or coffee: A simple biscuit for afternoon tea.
- Keeps and freezes well: Ideal for make ahead baking.
Tips for the Perfect Macadamia Shortbread
- Use room temperature butter: It blends evenly and helps form a smooth dough.
- Do not over process: Pulse until the dough looks crumbly and holds when pressed.
- Press the dough firmly into the tin: This helps the shortbread hold together after baking.
- Prick the surface with a fork: Stops the dough puffing and keeps the surface even.
- Cut while warm: Slicing before it cools prevents cracking.
- Cool completely before serving: The shortbread firms as it cools.
- Drizzle the chocolate slowly: Use a spoon or a small zip lock bag for thin lines.
Serving Suggestions
Macadamia shortbread fingers pair well with a hot cup of tea or coffee for afternoon tea. Add them to a biscuit platter when entertaining or package them in a jar or box for a simple homemade gift. For dessert, crumble a few pieces over vanilla ice cream for a quick treat.
How to Store Shortbread
Room temperature: Store in an airtight container for up to one week. Keep in a cool spot so the chocolate stays firm.
Fridge: If the kitchen runs warm, store in the fridge for up to two weeks. Bring to room temperature before serving.
Freezer: Freeze in an airtight container with baking paper between layers for up to three months. Thaw at room temperature before serving.
Frequently Asked Questions
Can I use a different chocolate?
Yes. Milk, dark, or white chocolate all work well. You can also mix chocolates for a decorative drizzle.
Can I skip the chocolate?
Yes. The biscuits work well without the drizzle if you prefer a more traditional macadamia shortbread.
Do they need to be refrigerated?
No. Store the shortbread in an airtight container at room temperature. If the weather is hot and the chocolate softens, store them in the fridge and bring to room temperature before serving.
Can I use other nuts?
Yes. Pecans, hazelnuts, almonds, or walnuts work well in place of macadamias.
Can I freeze shortbread?
Yes. Store baked shortbread in an airtight container and freeze for up to three months. Thaw at room temperature before serving.
MACADAMIA SHORTBREAD FINGERS
Buttery, crumbly and just a little bit indulgent – these shortbread fingers are hard to stop at one. If you give them a go, pop a comment below and tell me what you think!
Macadamia shortbread fingers
More Biscuit Recipes:
Macadamia Shortbread Fingers
Ingredients
- 175g butter, chopped, at room temperature
- 1 ½ cups plain flour
- ½ cup caster sugar
- ⅓ cup cornflour
- 1 teaspoon vanilla extract
- ¾ cup raw macadamia nuts
- 90g dark chocolate
Instructions
- Preheat oven to 150°C, 130°C fan forced. Line the base and sides of a 20 x 30 cm baking tin with baking paper.
- Place the butter, flour, sugar, cornflour, vanilla, and ½ cup macadamia nuts into a food processor. Process for 20 to 30 seconds until a crumbly dough forms. To test, squeeze a small handful of dough. It should hold its shape.
- Transfer the dough to the prepared tin and press it out evenly. Smooth the surface with the back of a spoon. Prick all over with a fork. Bake for about 1 hour or until lightly golden.
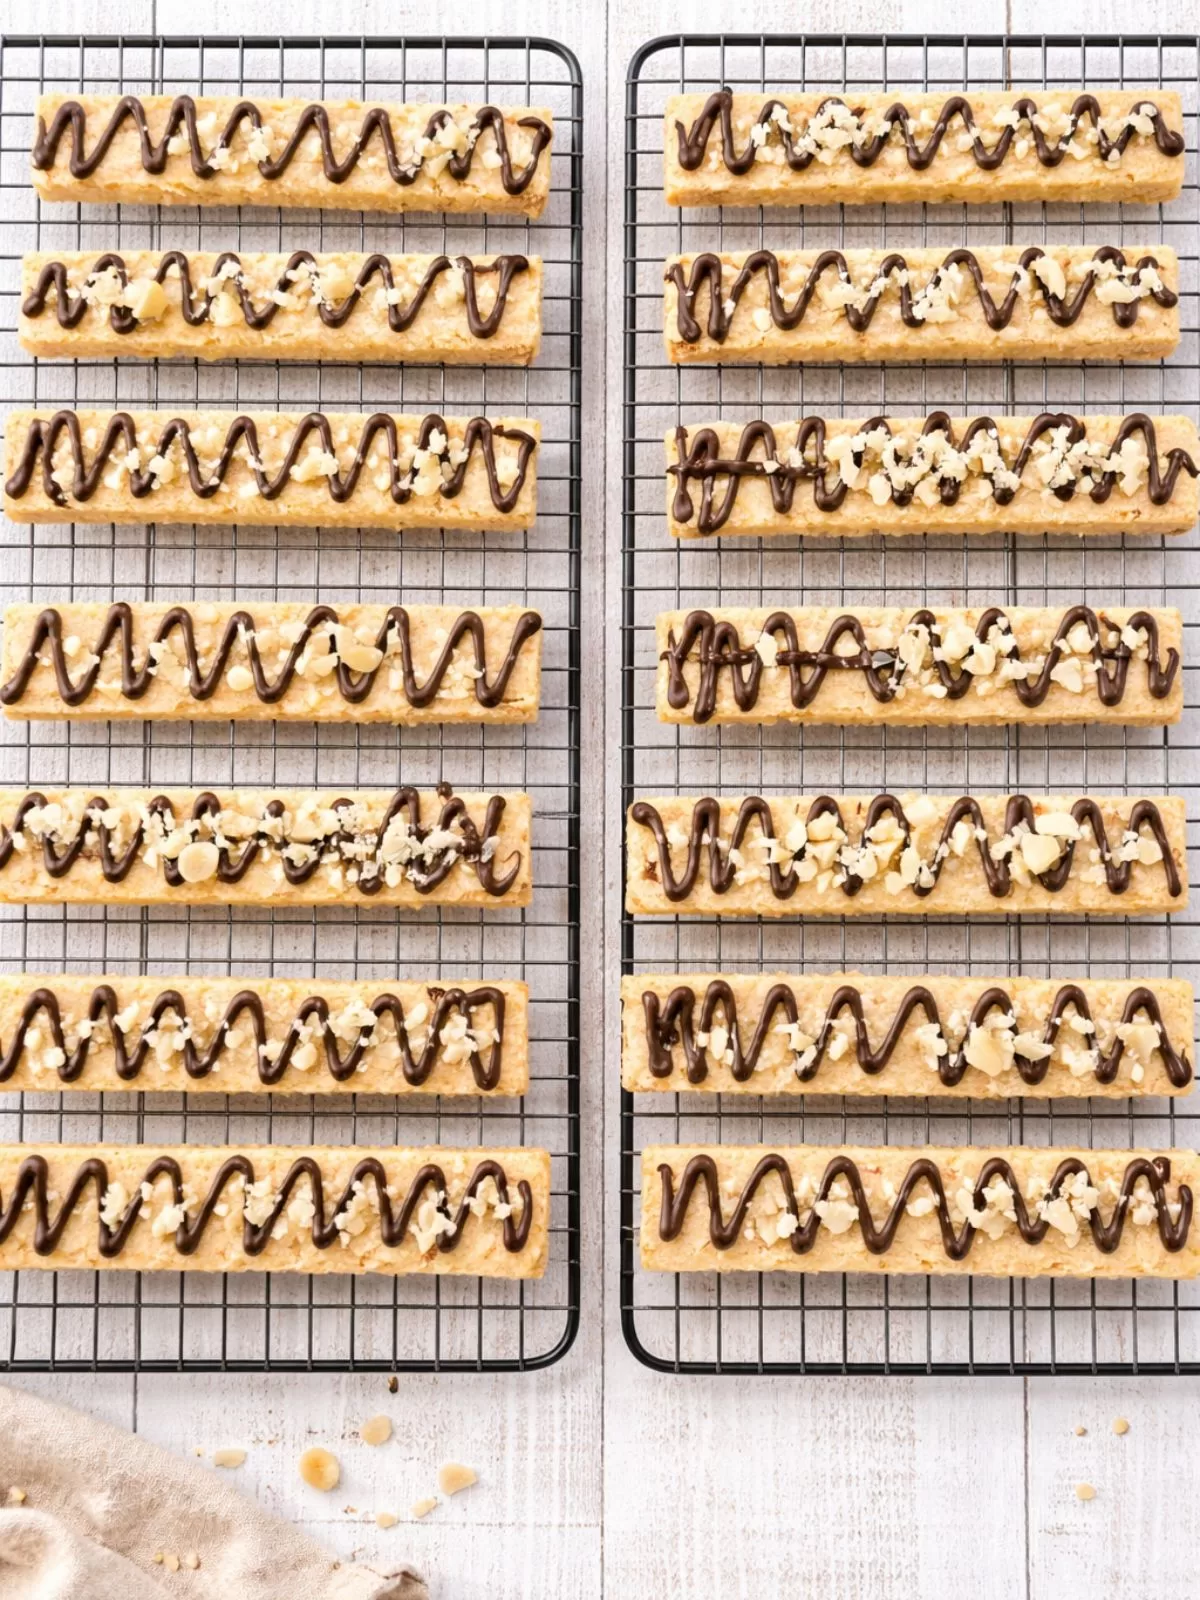
- Remove from the oven and, while still warm in the tin, cut into 24 shortbread fingers using a sharp knife. Leave in the tin to cool completely.
- Place the chocolate in a microwave safe bowl. Melt in 30 second bursts, stirring between each burst, until smooth. Finely chop the remaining macadamia nuts.
- Line a tray with baking paper and place a wire rack over the top. Arrange the shortbread fingers on the rack. Drizzle with melted chocolate and sprinkle with macadamia nuts. Allow the chocolate to set before serving.
Notes
- COOKS NOTES
- BUTTER
- DOUGH TEXTURE
- CUTTING THE SHORTBREAD
- COOLING
- MACADAMIA FLAVOUR

Leave a Reply