
Once You Try Hummus Made from Dried Chickpeas, There’s No Going Back
If you’ve only ever made hummus with canned chickpeas, I completely understand. I do it too when I’m short on time. But this Best Hummus Recipe from Dried Chickpeas is something special. When you plan ahead and start from scratch, the texture becomes unbelievably smooth, the flavour deepens, and suddenly that humble bowl of hummus feels worthy of a gathering. It’s still simple, still wholesome, just better in every way.

If you’ve ever wondered why some hummus tastes light and silky while others feel a little thick or pasty, this is usually the reason. Dried chickpeas simply behave differently. Once soaked and cooked until very tender, they blend into a texture that’s smoother and creamier than most canned versions can achieve.
Yes, it takes a bit of planning. You need to soak them overnight and simmer them properly. But the result is worth it, especially if you’re making hummus for a gathering or putting together a Middle Eastern feast. The flavour is cleaner, the texture is softer, and it holds that beautiful swirl when you spoon it into a bowl and drizzle it with olive oil.
I still use canned chickpeas when I’m in a rush. There’s no shame in that. But when I want truly creamy hummus that feels a little extra special, dried chickpeas are always my first choice.
Why You’ll Love This Recipe
• Extra smooth and creamy thanks to dried chickpeas
• Better flavour than most canned versions
• Made with simple pantry ingredients
• Perfect for gatherings and entertaining
• Naturally wholesome and satisfying
Ingredients You’ll Need
- Dried chickpeas; The star of the show. Soaking and cooking them yourself is what gives this hummus its ultra smooth texture.
- Bi-carb soda: Helps soften the chickpeas while soaking and cooking so they blend beautifully.
- Tahini: Use a good quality tahini that’s runny and fresh. It makes a huge difference to flavour.
- Fresh lemon juice: Brightens everything up. Always fresh if you can.
- Garlic: Start with 2 cloves and adjust to your taste.
- Ground cumin: Adds warmth and depth without overpowering.
- Ice cubes: This is the little trick that helps create that light, whipped texture.
- Salt: Essential for bringing everything together.
Tips for Ultra Smooth Hummus
- Cook the chickpeas until very soft: They should almost fall apart when pressed between your fingers. Undercooked chickpeas are the main cause of grainy hummus.
- Remove loose skins: After simmering, skim off any floating skins. It only takes a minute and helps improve texture.
- Blend while the chickpeas are warm: Warm chickpeas break down more easily and give you that silky finish.
- Use ice cubes: It sounds odd, but blending with ice helps lighten the texture and makes the hummus beautifully creamy.
- Taste and adjust: More lemon for brightness. More salt to enhance flavour. Make it yours.
Serving Suggestions
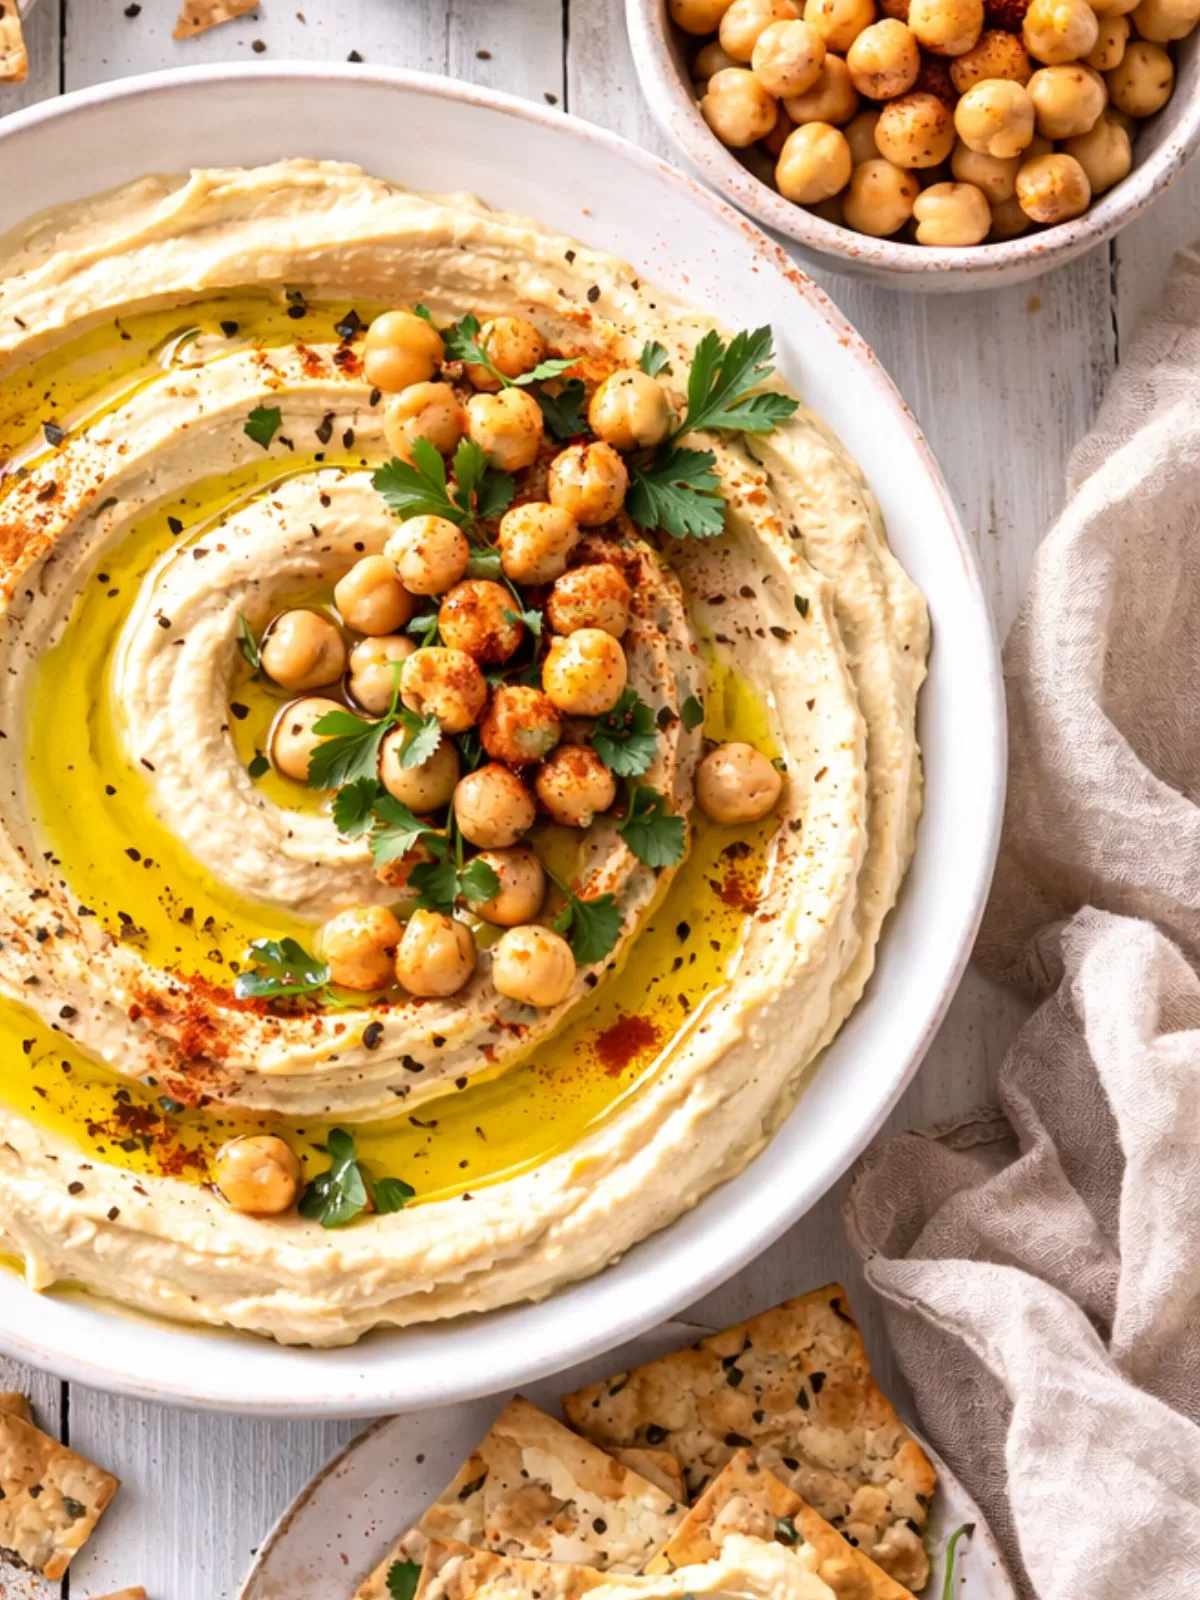
Spoon the hummus into a wide, shallow bowl and use the back of your spoon to create generous swirls. Drizzle with good olive oil so it settles into the ridges, then scatter over a few reserved chickpeas, a sprinkle of paprika and some fresh parsley for colour. Serve with warm Lebanese bread, pita or your favourite crackers. It’s also perfect alongside falafel, grilled meats or roasted vegetables, and makes a beautiful addition to a Middle Eastern style spread. I love using leftovers as a spread in wraps, sandwiches or even burgers for an easy lunch the next day.
Storage
Fridge: Store in an airtight container for up to 5 to 7 days. Use clean utensils each time to keep it fresh.
Freezer: Hummus can be frozen, but the texture may change slightly once thawed. If freezing, stir well before serving to bring it back together.
If you try this hummus made from dried chickpeas, I would genuinely love to hear what you think. Leave a comment below and tell me if you’re officially converted.
More Dip Recipes:

Best Hummus Recipe from Dried Chickpeas
Equipment
- Food processor or high speed blender
Ingredients
- 1 cup dried chickpeas
- 1 teaspoon bi-carb soda, divided (baking soda)
- ⅓ cup hulled tahini
- 1 large lemon, juiced
- 2-3 cloves garlic, roughly chopped
- ¾ teaspoon ground cumin
- 3-4 ice cubes
- Salt, to taste
Instructions
- Place chickpeas and 1/2 teaspoon of the bi-carb soda into a large bowl. Cover with cold water by at least 5cm. Cover and set aside for a minimum of 12 hours and up to 24 hours.
- Drain the chickpeas and transfer them to a large saucepan. Add the remaining 1/2 teaspoon bi-carb soda and a good pinch of salt and cover with cold water by at least 5cm. Bring to the boil over high heat and skim the surface of any scum. Reduce heat to medium low, cover, and simmer for 30 minutes or until they are very tender.
- Give the chickpeas a good stir, then using a slotted spoon, remove any skins floating on the surface and discard them. Drain the chickpeas, reserving 1/4 cup of the liquid and 10-12 of the chickpeas to garnish with later.
- Place the warm chickpeas into the bowl of a food processor or high speed blender. Process for 30 seconds. Add all the remaining ingredients along with 2 tablespoons of the reserved cooking liquid. Process for 3-5 minutes or until the mixture is super smooth. Taste and adjust consistency with more reserved chickpea water if required and taste with more lemon juice and/or salt if need be.
- Spoon and swirl the hommus into a wide shallow serving bowl or transfer to an airtight container and chill if not serving within 30 minutes. The hommus will thicken slightly once cooled. Garnish hommus with a good drizzle of olive oil, the reserved chickpeas, a sprinkle of paprika and pepper, and some fresh herbs if desired. Serve with pita, Lebanese bread, crackers and/or vegetable sticks.
Notes
- COOKS NOTES:
Oven Temps: Oven temperatures are for conventional, if using fan-forced (convection), reduce the temperature by 20˚C.
Measurements: We use Australian tablespoons and cups: 1 teaspoon = 5 ml, 1 tablespoon = 20 ml & 1 cup = 250 ml.
Herbs: All herbs are fresh (unless specified) and cups are lightly packed.
Vegetables: All vegetables are medium size and peeled, unless specified.
Eggs: We use extra-large size and eggs are 55-60 g each, unless specified. - Make sure the chickpeas are very tender before blending. They should almost fall apart when pressed. This is key to smooth hummus.
- Blending while the chickpeas are still warm helps create a silkier texture.
- If your tahini is thick or slightly bitter, stir it well before measuring and adjust lemon and salt to balance the flavour.
- The hummus will thicken slightly once chilled. Stir in a spoonful of reserved chickpea liquid if you’d like to loosen it before serving.
- Canned chickpeas can be used in a pinch, but the texture will not be quite as light and creamy.

WOW Was so good so much better them the brought hummus. Gave some to a friend and said was the best he had every tasted. Served it with naan bread.