
The Banh Mi You’ll Think About Long After It’s Gone
If you’re craving a sandwich that really delivers, this Crispy Pork Belly Banh Mi is it. Golden, crackly pork belly meets tangy pickles, creamy mayo and loads of fresh herbs all stuffed into a warm, shattery roll for the ultimate crunch. Big flavour, serious texture, and absolutely worth it.

If you’ve ever gone on a Banh Mi hunt around Sydney, Cabramatta, Marrickville or Mascot, you’ll know this isn’t just a sandwich, it’s a whole experience. That light, crusty roll that crackles when you bite in, the hit of fresh herbs, creamy mayo and tangy pickles… it’s the kind of food you think about later.
This Crispy Pork Belly Banh Mi isn’t strictly traditional, but it’s inspired by our old weekend Banh Mi runs when the kids were still at home, all trying to claim the crispiest pork. Here I lean right into the crackling, with golden, blistered pork belly stuffed into warm rolls with herbs, cucumber and quick pickled carrots. It’s a bit messy, a lot of fun, and ridiculously good homemade.
Why You’ll Love This Banh Mi
- Ultra-crispy crackling pork belly (with oven or air fryer method)
- Fresh herbs + crunchy pickles = perfect balance
- Easy to scale for a crowd
- Not strictly traditional, but insanely tasty
- Great way to use leftover roast meat
- Every texture you want in one bite
What Is A Banh Mi?
A classic Vietnamese Banh Mi is all about contrast – crisp baguette, pâté, cold cuts, pickled veg, herbs and seasoning sauce. This version skips the pâté and deli meats and focuses on one star: crispy roasted pork belly. It’s not textbook-authentic, but it hits every craving: salty, crunchy, fresh, creamy and herb-loaded.
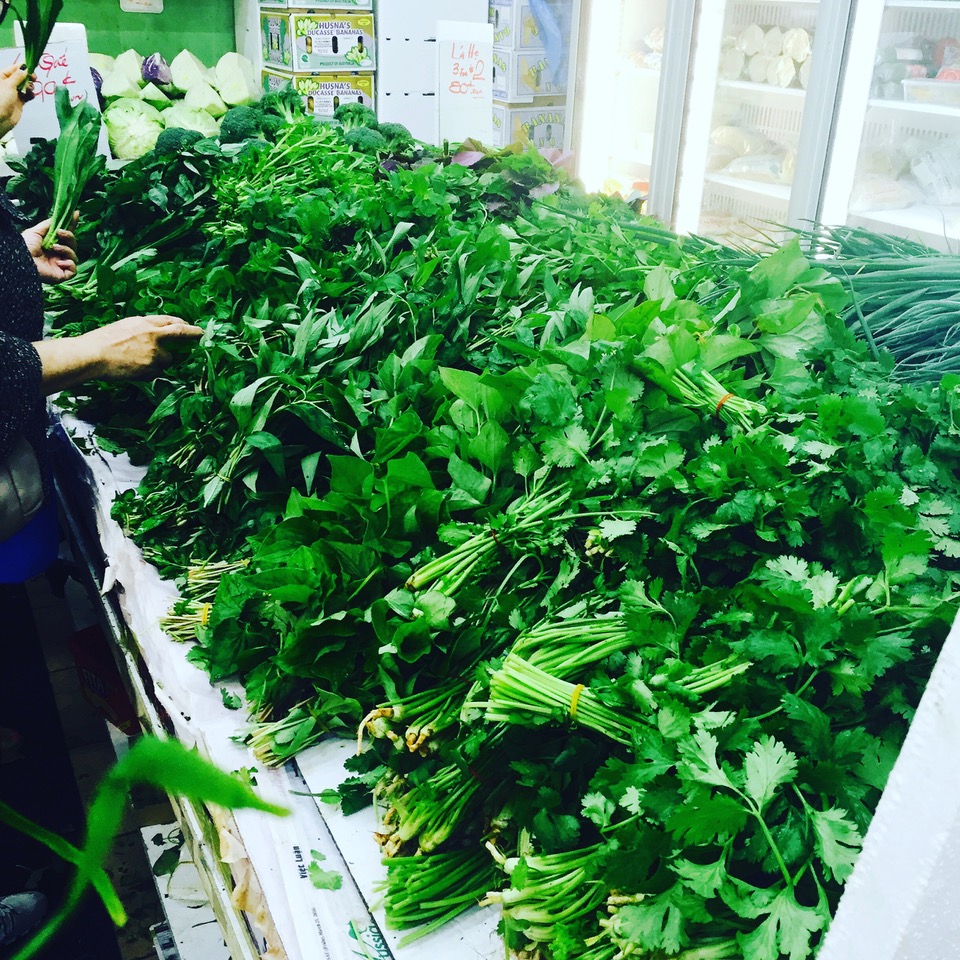
Amazing array of fresh herbs available at Cabramatta any day of the week
Variations
Think of the roll as your flavour vehicle. Swap the pork for poached chicken, grilled beef, meatballs, prawns or tofu. Add sriracha, chilli oil, hoisin, soy sauce, pickled daikon or radish – build it mild or fiery. There are no rules here; just make it taste good.
Tips for the BEST Crackling
Getting crisp crackling comes down to one thing – dry skin. Leave the pork uncovered in the fridge overnight (or up to 48 hours), score deeply (be careful not to cut through to the meat though), salt well and start cooking at high heat before finishing low and slow. This gives you blistered golden crackle and tender, juicy meat underneath.
Whether you use the oven or air fryer, the method stays the same: dry, salt, blast, then finish gently.
Storage
Cooked pork belly keeps in the fridge for 3–4 days and can be reheated in the air fryer or oven (never the microwave, it softens the crackling). Sliced pork freezes well for up to 2 months. Pickled carrots keep for a week in the fridge. Assembled Banh Mi are best eaten immediately because the bread softens once filled.
FAQ’s
What is traditionally in a Vietnamese Banh Mi?
A classic Banh Mi includes pâté, cured meats, pickled carrot and daikon, cucumber, herbs, chilli, mayo and a savoury seasoning sauce inside a crisp Vietnamese baguette.
How do I get super crispy pork crackling?
Dry the pork skin uncovered in the fridge for 24–48 hours, score deeply, salt well, and cook at high heat first before finishing low and slow. Dry skin = the best crackle.
Can I make Banh Mi with a different protein?
Yes! Chicken, pork meatballs, grilled beef, tofu, prawns or leftover roast meat all work beautifully.
Can I make the pickled carrots in advance?
Definitely. They keep in the fridge for up to one week and actually taste better the next day.
What rolls are best for Banh Mi?
Look for Vietnamese long rolls or Vietnamese-style “crusty” baguettes. They should be crisp on the outside and soft and fluffy inside.
How do I reheat pork belly so it stays crispy?
Air fryer: 180°C for 3–5 minutes.
Oven: 200°C for 10 minutes.
Avoid the microwave as it softens the crackling.

More Recipes You May Love:
- Crunchy Vietnamese Fried Spring Rolls (Cha Gio)
- Vietnamese Chicken Salad
- Chilli Garlic Crisp Oil
- Lemon Thyme Roast Chicken – don’t like pork? make this amazing roast chicken instead and use the meat to fill your rolls with!
- Sticky Asian Chicken Wings with Hoisin
- Quick Pickled Asian Cucumber Salad
- 15-Minute Soy Sauce Noodles (Cantonese Style)

Crispy Pork Belly Bahn Mi
Ingredients
CRIPSY PORK BELLY
- 1kg pork belly
- ½ teaspoon cracked black pepper
- ½ teaspoon Chinese five spice powder
- 4 cloves garlic, finely grated
- 2 teaspoons fish sauce
- 2 teaspoons salt
QUICK PICKLED CARROTS
- ¼ cup white vinegar
- ¼ cup hot water
- 2 tablespoons caster sugar
- ½ teaspoon salt
- 2 carrots, julienned or cut into thin matchsticks
SPRING ONION OIL (OPTIONAL)
- 1 cup finely sliced spring/green onions (I used 3 large spring onions)
- 1-2cm ginger, finely diced (optional)
- ½ teaspoon caster sugar
- ½ teaspoon salt
- ½ teaspoon ground white pepper
- ¼ cup neutral flavoured oil, such as vegetable, rice bran, canola etc (do not use olive oil)
TO SERVE
- 6 Vietnamese long rolls
- Butter to spread
- Kewpie mayonnaise – about 1 tablespoon per person
- Maggi seasoning, to sprinkle over
- 2 Lebanese cucumbers, thinly sliced lengthways
- 2 Spring/green onions, cut into 15cm lengths and then halved lengthways
- 1-2 long red chillies, thinly sliced
- ½ coriander, picked into long sprigs
- ½ fresh mint leaves, leaves picked (or try Vietnamese mint)
Instructions
PORK BELLY
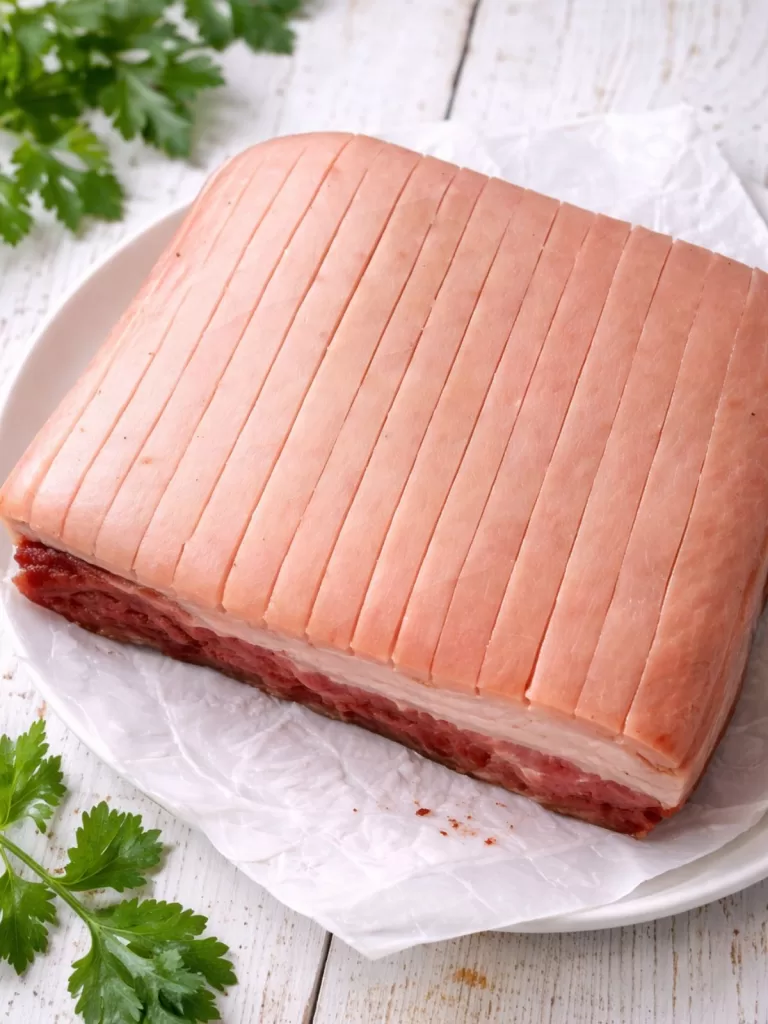
- Place the pork belly on a clean board and pat the skin completely dry with paper towel. Using a sharp knife or Stanley knife, score the skin at 1 cm intervals, cutting through the rind but not into the meat. This hasselback-style scoring helps the crackling blister and makes slicing easier later.
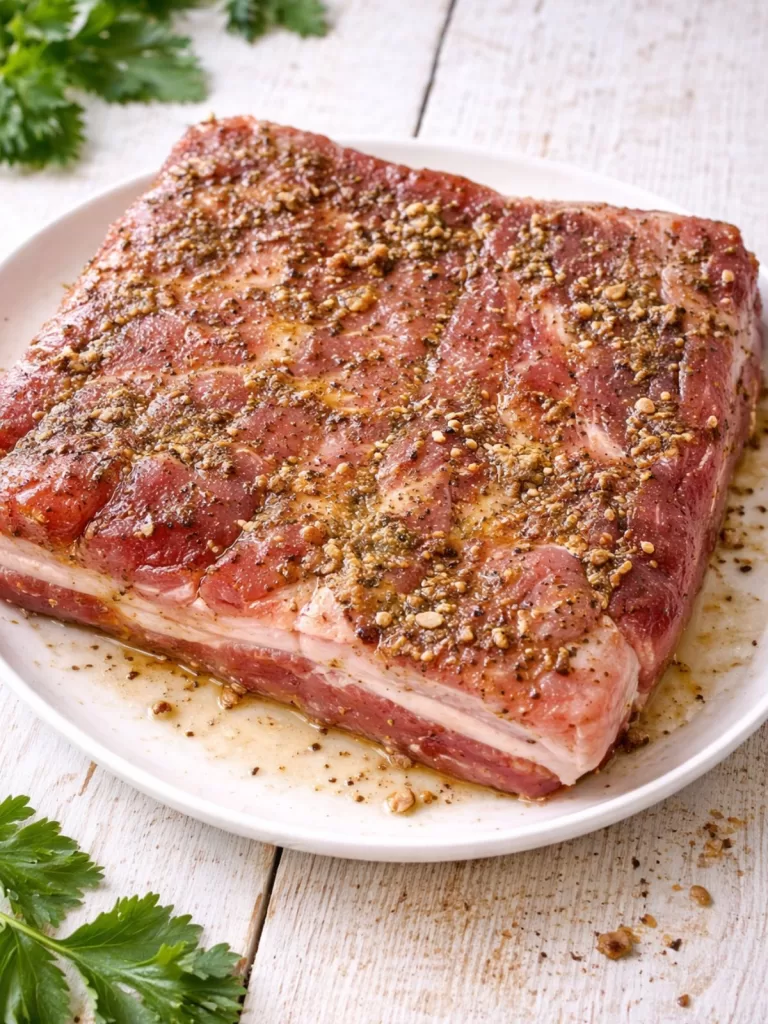
- Flip the pork so the flesh is facing up. Make shallow slits about 2 cm apart and roughly 2 mm deep. Sprinkle over the pepper and Chinese five spice, then add the garlic and rub everything into the meat, making sure it gets into the slits to form a flavourful paste. Drizzle with fish sauce and pat in gently.
- Turn the pork back over, skin side up, and place it on a clean plate. Refrigerate uncovered for at least 6 hours (or up to 24 hours). The longer the skin dries, the better your crackling will be.
TO AIR FRY PORK BELLY
- Preheat the air fryer to 200°C for 5 minutes. Rub a little oil over the pork skin, then sprinkle with 2 teaspoons of salt, massaging it into the scored cuts.
- Place the pork in the air fryer, skin side up, and cook for 40 minutes.
- Check the crackling. If blistered, reduce the heat to 160°C and cook for a further 20–30 minutes until the pork is cooked through (internal temp 71°C). If the skin hasn’t fully crackled, keep cooking at 200°C until it does, then reduce to 160°C and finish cooking to temp.
- Rest the pork loosely covered with foil for 10 minutes. It should reach 75°C before slicing.
TO OVEN BAKE PORK BELLY
- Preheat the oven to 240°C. Place the pork, skin side up, on a wire rack set over a baking tray.
- Roast for 40 minutes or until the skin crackles and turns golden (it may happen sooner).
- Reduce oven temperature to 180°C and bake for a further 20 minutes, or until the internal temperature reaches 71°C.
- Rest loosely covered for 10 minutes before slicing (it will finish at around 75°C)
QUICK PICKLED CARROTS
- Combine the vinegar, hot water, sugar and salt in a bowl until the sugar dissolves.
- Combine the vinegar, hot water, sugar and salt in a bowl until the sugar dissolves. Stand for at least 15 minutes, or refrigerate until needed.
SPRING ONION OIL
- Place the sliced spring onions, ginger (if using), sugar, salt and pepper in a heatproof bowl.
- Heat the oil in a small pan until just smoking. Carefully pour the hot oil over the spring onion mixture and stir to combine — it will bubble and spit, so take care. Let cool completely. Serve at room temperature.
TO SERVE
- Preheat oven to 150°C and warm the rolls directly on the rack for 5–8 minutes (optional, but recommended).
- Slice each roll open without cutting all the way through.
- Spread with butter and drizzle with Kewpie mayo. Sprinkle 1–2 teaspoons of Maggi Seasoning over the cut sides.
- Layer in cucumber, spring onions, pickled carrots and slices of crispy pork belly.
- Finish with spring onion oil (if using), coriander, mint and fresh chilli. Serve immediately while the crackling is at its best.
Notes
- COOKS NOTES:
Oven Temps: Oven temperatures are for conventional, if using fan-forced (convection), reduce the temperature by 20˚C.
Measurements: We use Australian tablespoons and cups: 1 teaspoon = 5 ml, 1 tablespoon = 20 ml & 1 cup = 250 ml.
Herbs: All herbs are fresh (unless specified) and cups are lightly packed.
Vegetables: All vegetables are medium size and peeled, unless specified.
Eggs: We use extra-large size and eggs are 55-60 g each, unless specified.

Leave a Reply