
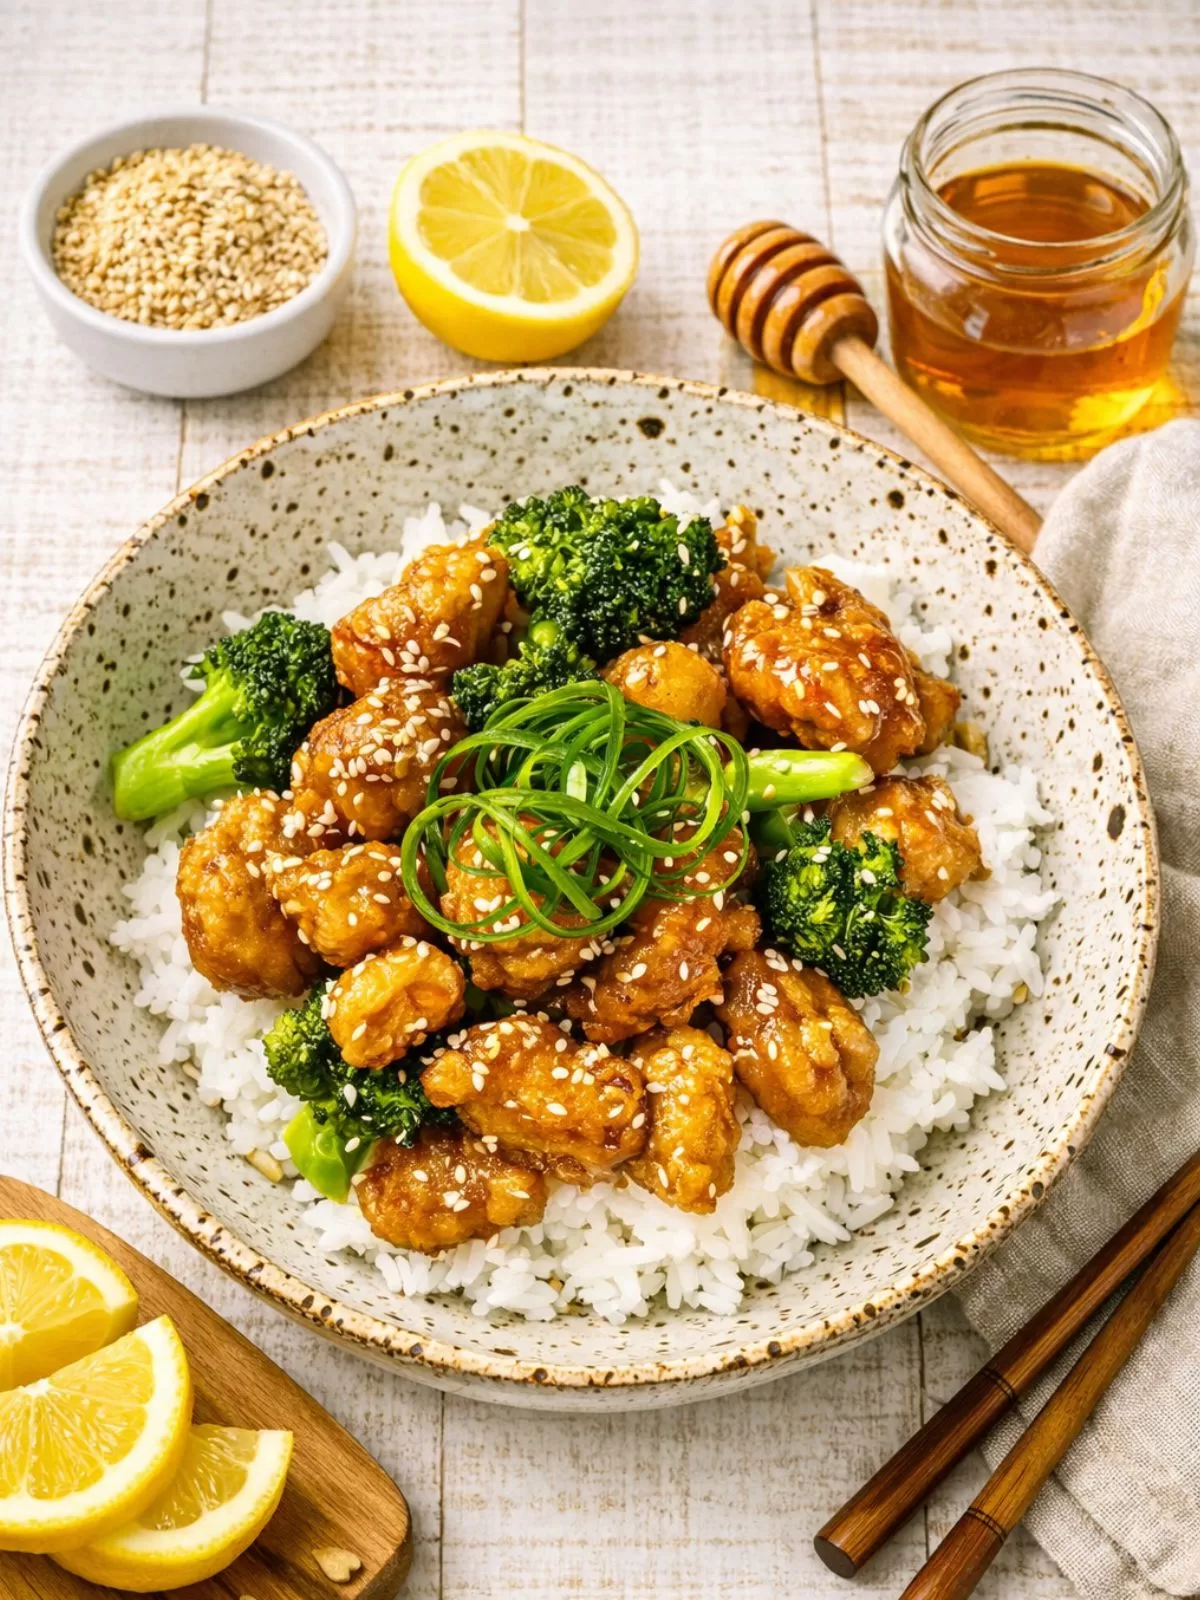
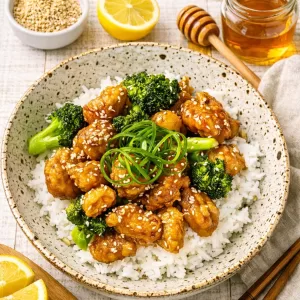
This Crispy Lemon Honey Chicken is crunchy, golden and coated in a sweet, tangy lemon honey sauce. It’s inspired by classic Chinese takeaway flavours and is always a hit for family dinners or fakeaway nights.
This Crispy Lemon Honey Chicken is inspired by those classic Chinese restaurant dishes everyone loves – sweet, tangy, crunchy and completely comforting. It’s the kind of meal that feels a bit special, but doesn’t require fancy ingredients or complicated techniques. If you’ve got a little time to fry in batches, the rest is surprisingly straightforward.
The double-fried chicken gives you that light, crunchy coating, while the lemon honey sauce brings the perfect balance of sweetness and zing. It’s not an everyday dinner, but for a family fakeaway night or when you’re craving something nostalgic and indulgent, this dish always hits the spot. Everything in moderation, right?
Why You’ll Love This Crispy Lemon Honey Chicken
- Ultra-crispy, light coating thanks to cold batter and double frying
- Sweet and tangy lemon honey sauce inspired by Chinese takeaway favourites
- Simple pantry ingredients you likely already have
- A guaranteed crowd-pleaser for both kids and adults
- Perfect for fakeaway nights when you’re craving something indulgent
- Freezer-friendly option if you want to prep ahead
What Makes This Chicken So Crispy
The secret to really crispy, non-greasy chicken is cold batter and double frying. The chilled soda water creates a light coating, while the first fry cooks the chicken through and the second fry crisps everything up beautifully.
Keeping the batter cold and frying in batches ensures the chicken stays crunchy, golden and never soggy.
How to Make Crispy Lemon Honey Chicken
You’ll find the full ingredient list and step-by-step instructions in the recipe card below, but here’s a quick overview:
- Marinate the chicken briefly for tenderness and flavour
- Prepare the lemon honey sauce and set aside
- Make a light, cold batter just before frying
- Deep-fry the chicken twice for maximum crunch
- Heat the sauce until thick and glossy, then drizzle over the chicken
Best Tips
- Keep the batter cold for a light, crisp coating
- Fry in small batches to maintain oil temperature
- Always allow the oil to return to temperature between batches
- Double fry for the best texture – don’t skip it
- Serve immediately for maximum crunch
Serving Suggestions
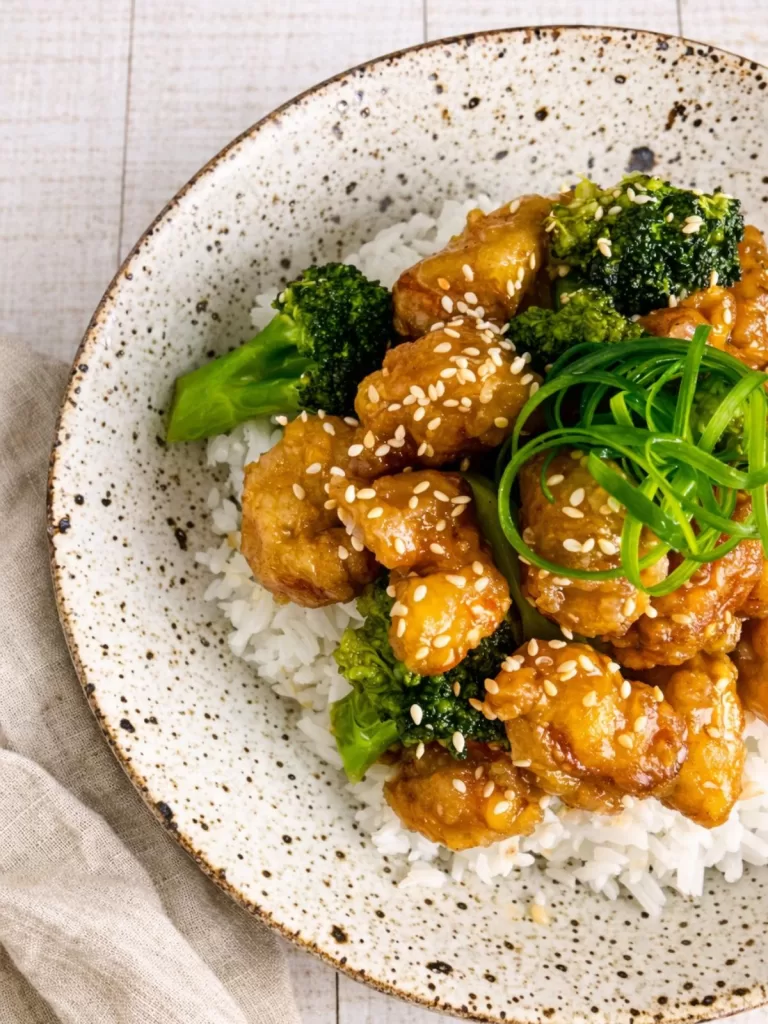
Serve this Crispy Lemon Honey Chicken piled over steamed rice or Garlic Butter Rice with a side of steamed broccoli for freshness and balance. Finish with toasted sesame seeds and spring onion curls for extra flavour and crunch. It’s best enjoyed straight away while the chicken is at its crispiest.
Storage & Reheating
FRIDGE: Store leftovers in an airtight container in the fridge for 2–3 days. For best results, keep the chicken and sauce separate to prevent the coating from going soggy.
REHEAT: Reheat the chicken in the air fryer at 180°C until hot and crisp. Reheat the sauce gently on the stovetop, then drizzle over the chicken before serving.
FREEZER: You can freeze the chicken after the first fry. Allow it to cool completely, then freeze pieces on a lined tray until solid. Transfer to a freezer-safe bag and freeze for up to 2 months. Thaw overnight in the fridge, then complete the second fry as per the recipe.
Frequently Asked Questions
Is this the same as Chinese takeaway lemon chicken?
It’s very similar in flavour and texture, with a sweet and tangy sauce and ultra-crispy chicken.
Can I skip the double fry?
You can, but the chicken won’t be quite as crisp or stay as crisp for long. The double fry really makes a difference.
Can I make the sauce thicker?
Yes. Add a small cornflour slurry and bring it to the boil until thickened.
This Crispy Lemon Honey Chicken is everything you want from a fakeaway classic – crunchy, glossy, sweet, tangy and completely irresistible. It’s perfect for a special family dinner or when you’re craving something better than takeaway. If you give it a go, don’t forget to leave a rating or comment – I’d love to hear what you think!
More Chinese Style Recipes
- Chinese Chicken with Roasted Almonds (Easy and Delicious)
- Restaurant-Style Sweet and Sour Pork (Extra Crispy!)
- 4-Ingredient Chinese Sweet and Sour Sauce
- 15-Minute Soy Sauce Noodles (Cantonese Style)
- Creamy Satay Chicken Curry (with Jimmy’s Sate Sauce)
- Easy Air-Fryer Chinese BBQ Pork (Char Siu)
- Chinese Ham and Chicken Rolls (Cheats Version)
Crispy Lemon Honey Chicken
Ingredients
CHICKEN MARINADE
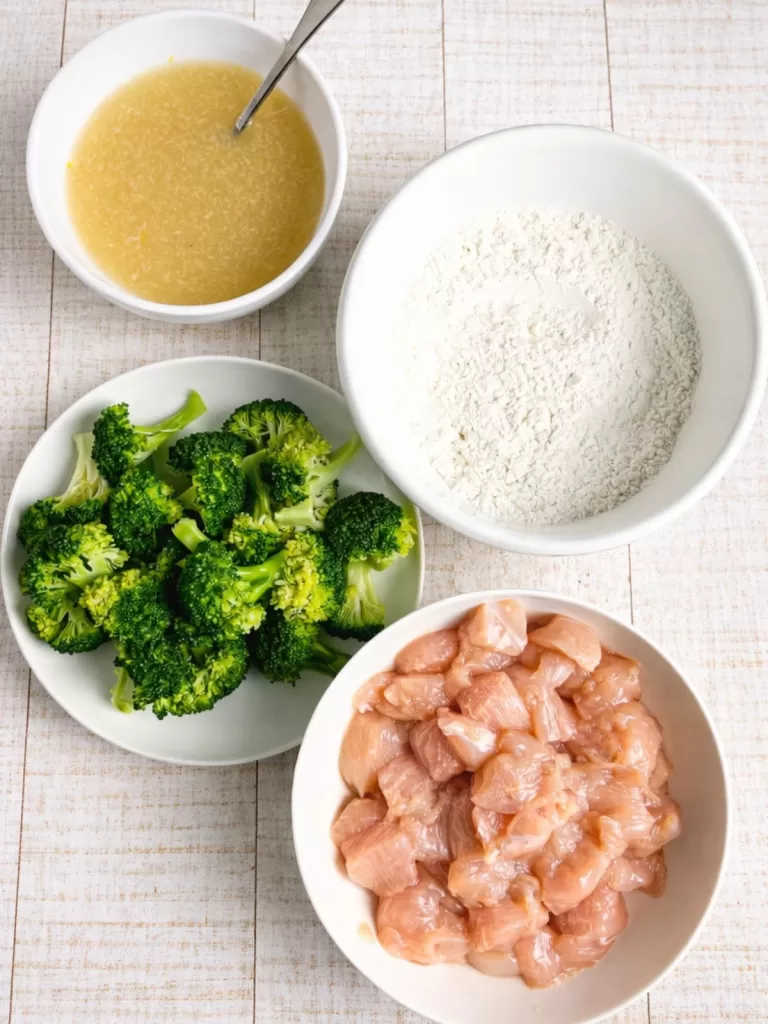
- 600g chicken breast fillets, cut into bite size cubes
- 2 teaspoons Chinese cooking wine
- 1 teaspoon chicken stock powder
- ¾ teapsoon bicarbonate soda (baking soda)
- Pinch of ground white pepper
LEMON SAUCE
- 1 tablespoon cornflour
- ¾ cup chicken stock
- ¼ cup fresh lemon juice
- ⅓ cup caster sugar
- 2 tablespoons honey
- 1 tablespoon Chinese cooking wine
- 1 clove garlic, finely grated
- ½ teapsoon salt
BATTER
- 1 cup self-raising flour
- ½ cup cornflour
- 1 ⅓ cups chilled soda water (or chilled water)
FOR FRYING
- Vegetable or other neutral oil, for deep frying
TO SERVE
- Steamed white or brown rice
- Steamed broccoli (optional)
- Spring/green onion curls
- Toasted white sesame seeds
Instructions
MARINATE the CHICKEN
- Place the chicken into a bowl. Add the Chinese cooking wine, chicken stock powder, bicarbonate of soda and white pepper. Mix well to coat evenly. Cover and refrigerate for at least 10 minutes (or longer if time allows).
Prepare the Lemon Honey Sauce
- Add the cornflour to a small saucepan. Pour in a small splash of the chicken stock and stir until smooth. Add the remaining stock along with the lemon juice, sugar, honey, Shaoxing wine, garlic and salt. Stir well and set aside.e.
make the BATTER
- In a bowl, whisk together the self-raising flour and cornflour. Add the chilled soda water and gently mix until just combined. Do not overmix — a few small lumps are fine.(This step is best done just before frying.)
first fry
- Heat oil in a wok or deep saucepan to 160°C, filling the pan about one-third full.
- Add the chicken pieces to the batter, then carefully drop them into the hot oil in batches, allowing excess batter to drip off first. Fry for 4–5 minutes or until lightly golden.
- Remove with a slotted spoon or spider and drain on a wire rack. Allow the oil to return to temperature before frying the next batch.
second fry
- Increase the oil temperature to 180°C. Fry the chicken again in batches for 1–2 minutes, or until deeply golden and extra crispy. Drain on a wire rack and set aside.
finish and serve
- Place the lemon honey sauce over medium-high heat, stirring constantly until it comes to the boil and thickens. Remove from heat.
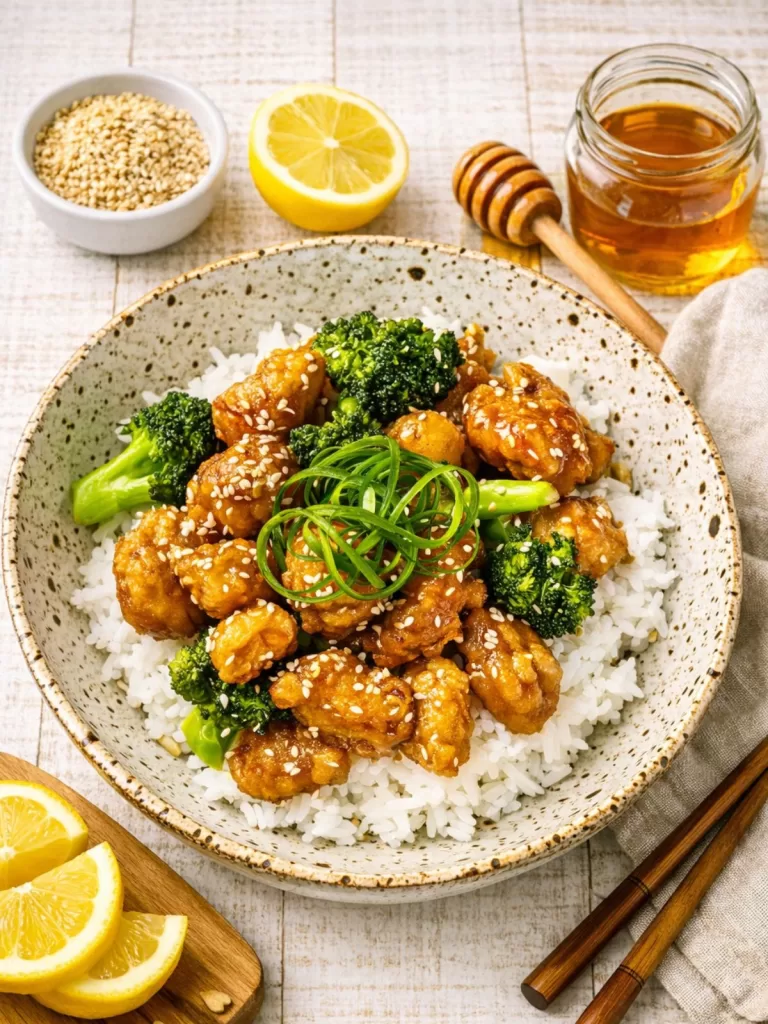
- Serve the crispy chicken over steamed rice with broccoli. Drizzle generously with the lemon honey sauce and garnish with sesame seeds and spring onion curls. Serve immediately.
Notes
- COOKS NOTES:
Oven Temps: Oven temperatures are for conventional, if using fan-forced (convection), reduce the temperature by 20˚C.
Measurements: We use Australian tablespoons and cups: 1 teaspoon = 5 ml, 1 tablespoon = 20 ml & 1 cup = 250 ml.
Herbs: All herbs are fresh (unless specified) and cups are lightly packed.
Vegetables: All vegetables are medium size and peeled, unless specified.
Eggs: We use extra-large size and eggs are 55-60 g each, unless specified. -
COLD BATTER & DOUBLE FRY
For ultra-crispy, non-greasy chicken, keep the batter cold and use the double-fry method. To keep the batter cold:- Chill the dry batter ingredients before mixing
- Chill the soda water (do not freeze)
- Sit the batter bowl over a bowl of ice while frying
- SAUCE CONSISTENCY
If the sauce is too thin, mix 1–2 teaspoons cornflour with a little water to make a slurry. Add to the sauce and bring back to the boil until thickened. - CHINESE COOKING WINE SUBSTITUTE
If unavailable, dry sherry can be used. If omitting alcohol entirely, replace with chicken stock. - STORAGE TIP
For leftovers, store the chicken and sauce separately. Reheat the chicken in the air fryer at 180°C and warm the sauce gently on the stovetop.


Makes this last night and it was so yummy. My husband and kids loved it. The kids are still talking about how good it was this morning!
Thank you Emily! Im so glad to hear the hubby and kids loved it and for the kids to be talking about it the next morning – well that’s a win win!! It’s definitely a family favourite… Thank you
K xx