
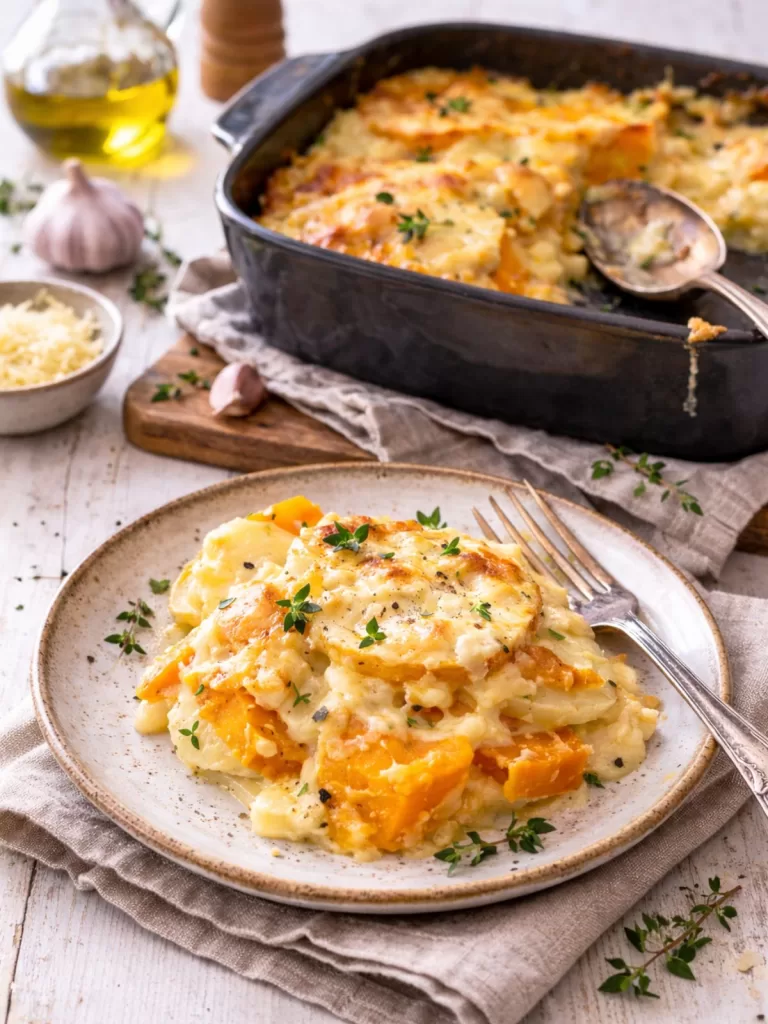
Looking for a side dish that quietly steals the whole show? This Creamy Potato & Pumpkin Bake is exactly that. Think layers of tender potato, sweet pumpkin and a silky, savoury cream sauce, all baked until bubbly, golden and irresistible. Whether you’re hosting a big family dinner or just making a cosy weeknight meal, this bake always gets empty plates and “Can you make that again?” comments.
Why This Potato & Pumpkin Bake Works
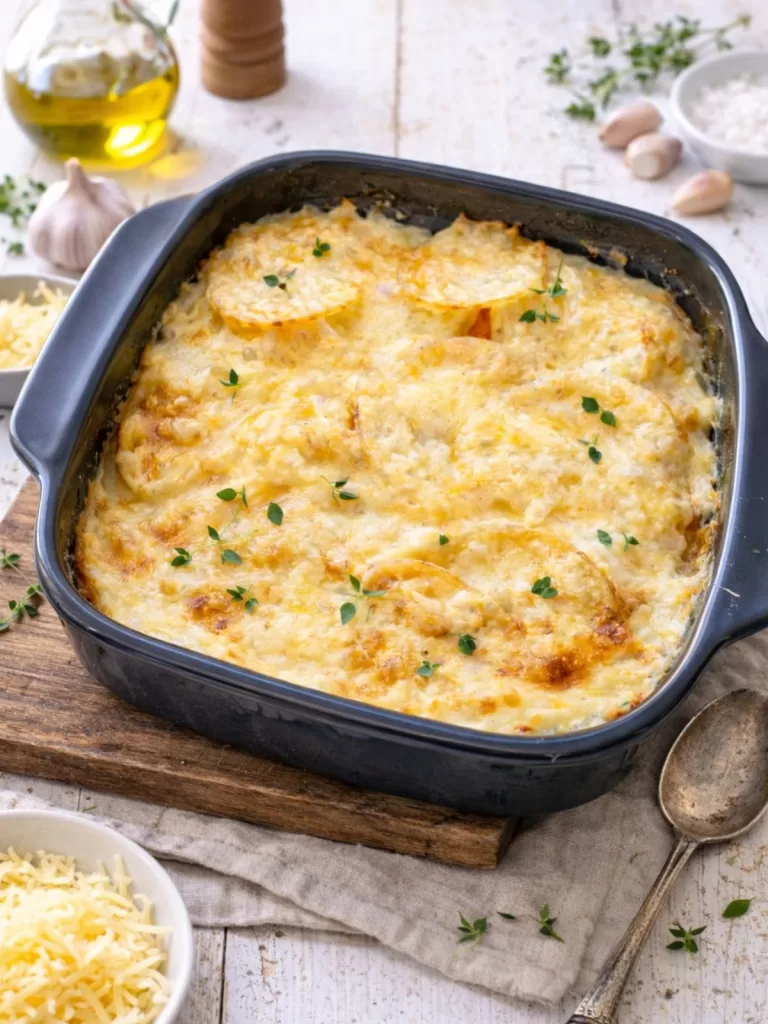
This Potato and Pumpkin Bake is the kind of easy comfort food that delivers big flavour with barely any effort. The magic comes from the combination of creamy potato and sweet pumpkin, which melt together into the most delicious layers. Sprinkling a little stock powder between those layers adds a boost of savoury depth, while thickened cream keeps everything rich, silky and perfectly luscious. And of course, that golden, cheesy crust on top is what makes it truly irresistible. It’s the perfect side dish for roasted meats, grilled chicken, BBQ dinners or weeknight meals, and it’s flexible enough to stand on its own as a cosy vegetarian main — just switch the stock to a veggie version.
What to Expect From This Dish
You’ll get soft layers that hold together when sliced, a warm garlic-thyme aroma, and a top that bakes into a cheesy, golden, bubbling blanket. Give it a 10-minute rest before serving, it helps everything settle and scoop beautifully.
Tips for the Best Potato & Pumpkin Bake
- Use a mandolin for even slicing (but a knife works too).
- Start with a potato layer so the bake holds together better.
- Grease the dish well for easy scooping and cleaning.
- Sprinkle garlic, thyme, stock powder and pepper from high above for even coverage.
- Use a foil + baking-paper lid to trap steam and prevent early browning.
- Portions: serves 6 as a side, but can stretch to 8 with extra sides.
Storage
Fridge:
Store leftovers in an airtight container for up to 3 days. Reheat in the oven or microwave until warmed through.
Freezing:
Best avoided as the cream sauce tends to split and the texture can become watery once thawed.
More Side Recipes:
- Creamy Curried Potato & Bacon Bake
- Aussie Potato Bake
- Easy Rocket and Parmesan Salad
- Vietnamese Chicken Salad
- Red Cabbage Salad with Honey Lime Dressing
Creamy Potato & Pumpkin Bake
Equipment
- 2 Litre (8 cup capacity) oven proof baking dish
Ingredients
- 600g potatoes, thinly sliced (See Note 2)
- 600g Kent or butternut pumpkin, thinly sliced
- 2 cloves garlic, finely chopped
- 2 teaspoons fresh thyme leaves (or 1 teaspoon dried)
- 2 teaspoons chicken stock powder
- 300ml thickened cream
- 1 cup grated tasty cheese (See Note 3)
- Salt and pepper, to taste
Instructions
- Preheat oven to 180℃. Spray an 2-litre capacity (8 cup) baking dish with non-stick cooking spray.
- Layer one third of the potatoes of the base of the prepared dish then layer over a half of the pumpkin. Sprinkle over half each of the chopped garlic, thyme leaves and chicken stock powder. Season well with salt and pepper.
- Drizzle over ¼ cup of the thickened cream then repeat layering process finishing off with a potato layer. Pour remaining cream evenly over the top.
- Take a sheet of foil that is larger than the dish your using. Spray with the middle section with non-stick cooking spray. Top with a smaller piece of baking paper that will just cover with top of the dish. Turn foil upside down so baking paper is facing the bench. Place over the top of the dish and seal, pushing the foil around the edges of your dish. Bake in the oven for 1 hour or until vegetables are tender (use a fork or tip of knife inserted in to check).
- Remove from oven and discard foil and baking paper. Sprinkle the grated cheese evenly over the top. Return to the oven and bake, uncovered, for a further 20-25 minutes or until cheese is bubbling and golden brown. Remove and set aside to cool for 10 minutes before serving.
Notes
- COOKS NOTES:
Oven Temps: Oven temperatures are for conventional, if using fan-forced (convection), reduce the temperature by 20˚C.
Measurements: We use Australian tablespoons and cups: 1 teaspoon = 5 ml, 1 tablespoon = 20 ml and 1 cup = 250 ml.
Herbs: All herbs are fresh (unless specified) and cups are lightly packed.
Vegetables: All vegetables are medium size and peeled, unless specified.
Eggs: We use extra-large size and eggs are 55-60 g each, unless specified. - POTATOES
You will need to use a starchy potato here, NOT waxy. It just doesn’t work well. I mainly use a “dirty” potato such as Sebago or Dutch cream but you can also use an all-rounder white washed potato. If using a washed potato you can peel or leave the skin on. - CHEESE
Pre-packaged cheese you purchase from the supermarket has a powder coating on it to stop it clumping together in the bag. Due to this, the cheese does not melt as well either. I like to freshly grate my cheese here to get an even good coverage.
- MAKE AHEAD
You can make this recipe up to 1 day ahead. Bake as directed up to Step 4 then allow to cool. Cover and refrigerate until required. To reheat, preheat oven to 180 (160C fan forced). Cover with foil and bake for 20 minutes or until heated through. Remove, top with cheese and bake for a further 20-25 mins or until cheese is bubbling and golden brown. Stand for 10 minutes before serving.

Leave a Reply